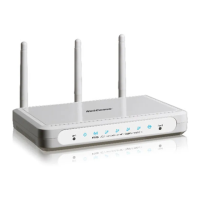
3. Click on the "Wireless Networks" tab, as shown below.
(If you do not see this tab, you will need to enable and start the “Wireless Zero Configuration” service. Please refer to the steps at the end of the
guide to enable this)
Make sure "Use Windows to configure my wireless network settings" is TICKED.
This window will list any wireless networks you have previously connected to. If you see an entry matching the SSID you obtained at
the start of this guide, you will need to select it and then click "Remove".
(Typically, a number of networks will be listed here. This is nothing to worry about. You can delete the other entries too. These are just
stored settings and passwords for connecting to the listed networks.)
If your SSID is not listed, or you have just removed it, click “OK”.
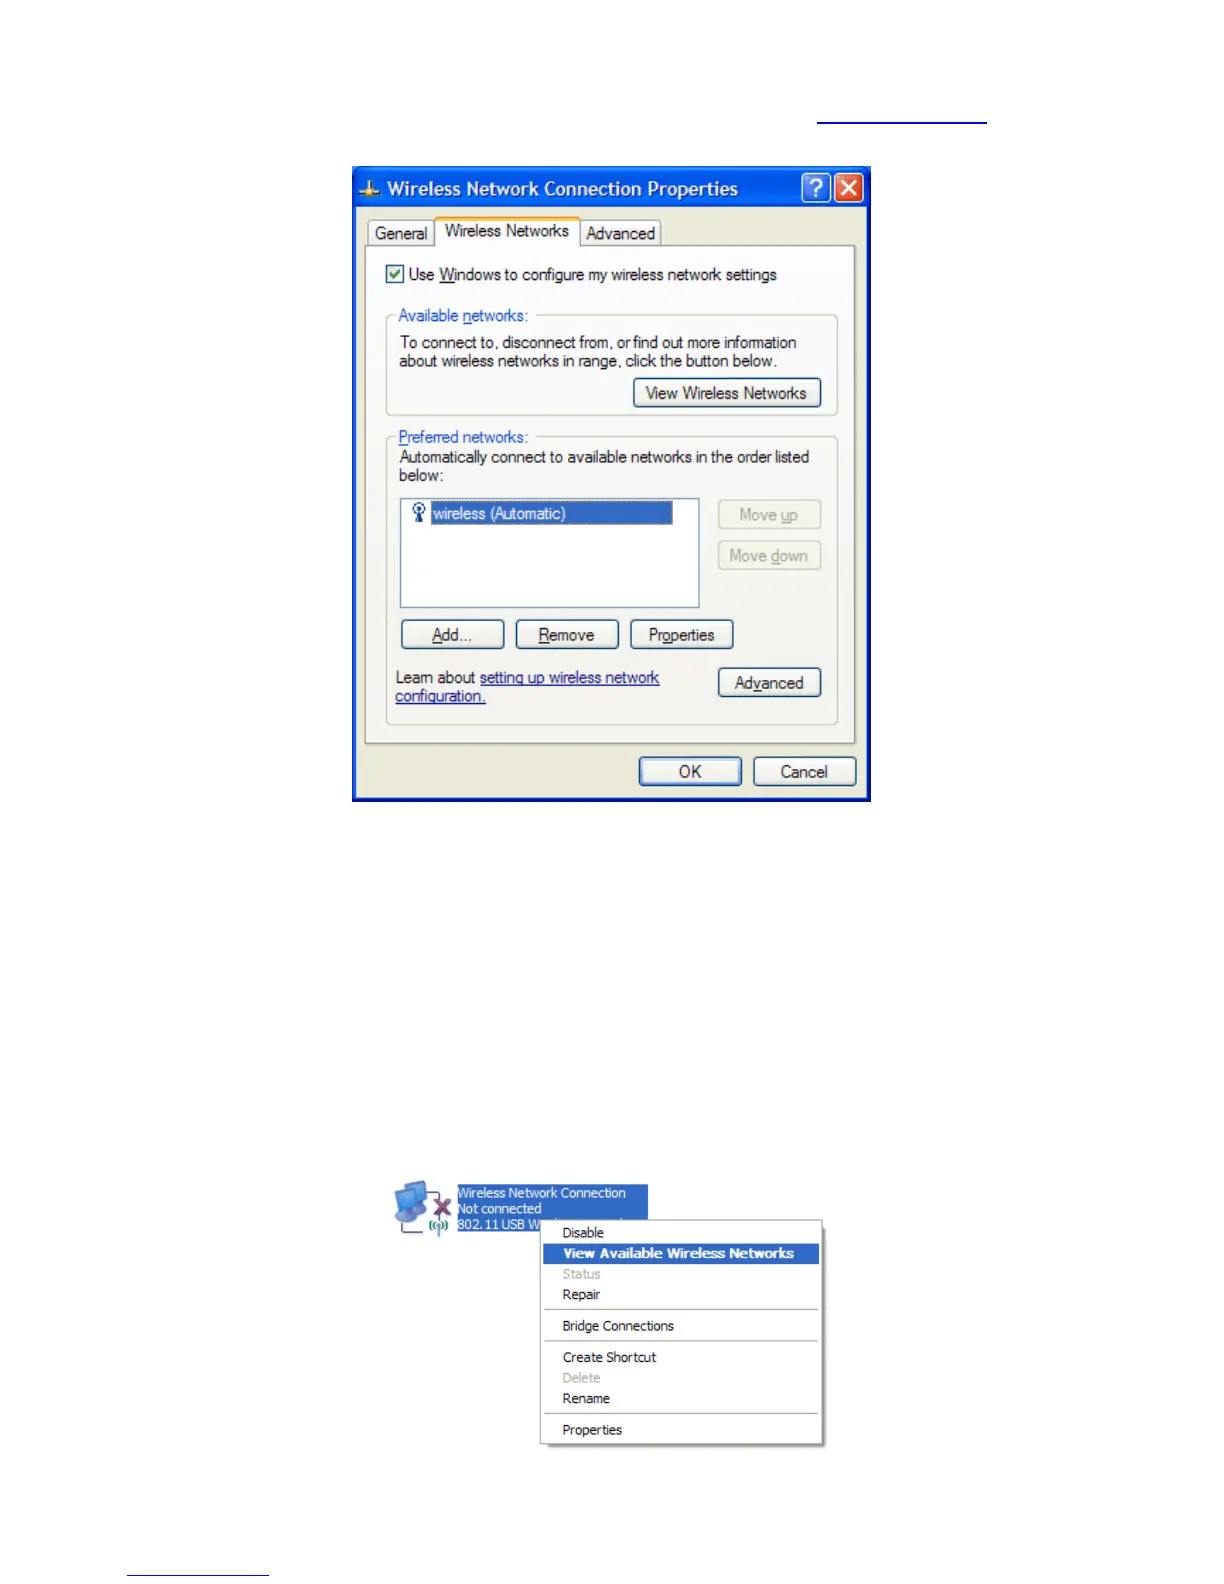
The window will close and you should now be returned to the “Network Connections” control panel window.
4. Right click on “Wireless Network Connection” and select "View Available Wireless Networks".

 Loading...