Disks
35
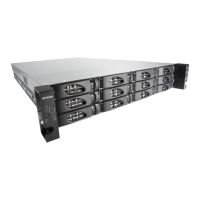
NETGEAR ReadyNAS OS 6 Rack-Mount Storage Systems
To replace a 3.5-inch hard disk drive (HDD):
1. Press the disk tray release latch.
The disk tray handle pops out.
2. Pull out the disk tray
.
3. Remove the screws and the old 3.5-inch HDD from the tray
.
4. Place the new 3.5-inch HDD in the disk tray
.
5. Secure the HDD in the tray using the screws.
Make sure that the hard disk connectors face the interior of the disk tray when you
assemble the disk.
 Loading...