)NSTALLATION'UIDE
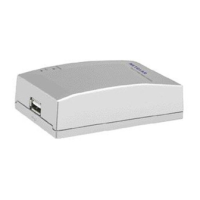
54 Mbps Wireless USB Print Server with 4-Port Switch WGPS606
These setup instructions assume that you will connect to an access point or
wireless router.
Note: See the installation instructions for your operating system before attaching
the USB cable to the USB Adapter and your computer.
Estimated Completion Time: 20 minutes for each printer; 10 minutes for each
computer.
Overview
When you finish the installation, your network will resemble this illustration.
7IRELESS2OUTER7'2
#ABLEOR$3,MODEM
7'03
-BPS7IRELESS53"0RINT3ERVER
WITHPORT3WITCH
0RINTER!
0RINTER"
53"#ABLE
53"#ABLE
$ESKTOP0#
Remove the NETGEAR CD.
What’s on the CD?
• A setup wizard
• Software utilities you use for customizing your
print server
• The installation and reference guides
Note: Do not connect the Wireless USB Print Server until you are prompted to do
so by the wizard on the CD.
FAMILIARIZE YOURSELF WITH THE WIRELESS USB
PRINT SERVER.:
• Notice that the bottom label has information such as:
• Port and connector descriptions and locations
• Login defaults
• Status lights
• To stand the unit up, attach its feet.
• Set the antenna vertically for best side-to-side coverage or horizontally for best
top-to-bottom coverage.
Set Up the Print Server First
1. INSERT THE NETGEAR CD.
If the wizard screen does not appear, double click
autorun.exe on the CD.
2. USE THE SMART WIZARD TO SET UP A PRINTER.
a. Click Set up a printer.
The Smart Wizard installation assistant opens the print server manager wizard.
b. Follow the on-screen instructions, and click Next when you are ready to proceed.
c. Follow the step-by-step instructions to complete setting up the printer with the
wireless USB print server.
Now, Set Up a PC
1. USE THE SMART WIZARD TO SET UP A PC.
a. Click Set up this PC.