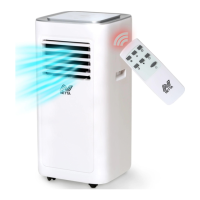
This document describes the NETTA Portable Air Conditioner, model JHS-A019-08KR2/E1 (SKU: 103440), providing detailed information on its function, technical specifications, usage, and maintenance.
Function Description:
The NETTA Portable Air Conditioner is designed for domestic and indoor use, primarily for cooling, dehumidifying, and fan operation. It is a self-contained unit that can be easily moved around a room to provide localized cooling. The device extracts warm air from the room and expels it outside through an exhaust pipe assembly, while simultaneously cooling and dehumidifying the indoor air. It features a control panel on the unit itself and a remote control for convenient operation. The air conditioner is equipped with a water full indicator to alert users when the internal water tank needs draining, ensuring continuous operation.
Important Technical Specifications:
- BTU: 8000
- Weight: 23KG
- Timer: 24 Hours (adjustable in 1-hour increments)
- Hose Length: 1.5M (exhaust hose length shall be 280mm-1500mm)
- Operating Temperature Range: 7-35 °C (for cooling mode)
- Dehumidification Mode Temperature: Above 17 °C
- Power: Operates via a power plug, requiring connection to a socket with a Residual Current Device (RCD) fitted with home circuits.
- Display: LED display for settings and indicators.
Usage Features:
The portable air conditioner offers multiple operating modes and control options:
Control Panel Operation:
- Power Key (①): Turns the machine on and off. Upon initial power-on, a buzzer sounds, and the machine enters standby.
- Cooling Key (②): Activates the cooling function.
- Dehumidify Key (③): Turns on the dehumidify mode.
- Fan Key (④): Operates the fan mode.
- Low Wind Key (⑤): Adjusts to low fan speed in cooling/fan mode.
- High Wind Key (⑥): Adjusts to high fan speed in cooling/fan mode (inapplicable in sleep mode).
- Display Window (⑦): LED display showing current settings.
- Sleep Mode (⑧): Turns sleep function on or off when in cooling mode.
- Down Key (⑨): Shortens set time in timer function or lowers set temperature in cooling mode.
- Up Key (⑩): Lengthens set time in timer function or raises set temperature in cooling mode.
- Timer Key (⑪): Sets the timer for 1-24 hours, adjustable by one hour up or down.
- Water Full Indicator (⑫): Flashes when the water tank is full, stopping the machine until drained.
Remote Control Operation:
The remote control provides similar functionalities for convenience:
- Power Button: Turns the unit on/off.
- Timer Button: Sets the timing.
- Down Button: Reduces temperature and timing set value.
- Mode Button: Switches between cooling, fan, and dehumidifying modes.
- Up Button: Increases temperature and timing set value.
- Fan Button: Selects high or low wind speed.
- Sleep Mode Button: Activates sleep mode.
- Important Note: Pressing the 'UP' and 'DOWN' keys simultaneously on the remote controls the temperature.
Installation and Adjustment:
- Upright Positioning: Before use, the unit must be kept upright for at least two hours.
- Placement: The air conditioner should be placed on a flat surface, maintaining a distance of at least 50cm from walls or other objects to ensure proper ventilation. It should not be used in bathrooms or other humid areas.
- Heat Pipe Assembly: The exhaust pipe assembly is inserted into the back-panel vent slot by pushing it to the left.
- Window Sealing Plate Components: The window sealing plate assembly is mounted to the window (horizontally or vertically) and adjusted to fit the window frame. The flat end of the exhaust pipe joint must be snapped into place, ensuring the pipe is not distorted or turned more than 45° to maintain unblocked ventilation.
- Exhaust Hose: The exhaust hose length is critical (280mm-1500mm); using extension tubes or different hoses may cause malfunction and overheating.
Drainage Instructions:
The unit supports two drainage modes:
- Manual Drainage:
- When the water tank is full (indicated by the flashing Water Full Indicator), turn off and unplug the machine.
- Place a water container below the side water outlet behind the body.
- Unscrew the drainage cover and unplug the water plug to allow water to flow into the container.
- Carefully move the machine to avoid spilling water. Keep the drainage cover and water plug together.
- If the container is insufficient, re-plug the drainage hole temporarily.
- After draining, re-plug the hole and tighten the drainage cover.
- Continuous Drainage (Optional):
- Applicable only in dehumidifying mode.
- Unscrew the drainage cover and unplug the water plug.
- Insert a drainage pipe into the water outlet and connect it to a bucket for continuous water collection.
Maintenance Features:
Regular cleaning and maintenance are essential for optimal performance and longevity. Always turn off and unplug the machine before maintenance.
- Cleaning the Surface: Wipe the machine's surface with a damp cloth. Avoid using chemicals, as they can damage the unit.
- Cleaning the Filter Screen: To prevent dust clogging and reduced effectiveness, clean the filter screen at least once every two weeks.
- Cleaning the Upper Filter Screen Frame:
- Use a screwdriver to remove the screws on the filter.
- Grip the edge of the evaporator filter screen with both hands and pull it out.
- Wash the filter screen in warm water (around 40°C) with natural detergent.
- Rinse it clean and dry it in the shade.
Storage:
For long-term storage:
- Drain all water from the water pan by unscrewing the drainage cover and unplugging the water plug. Tilting the machine can assist drainage.
- Turn on the machine in low-wind mode for 12-24 hours to ensure the drainage pipe is completely dry, preventing mildew.
- Turn off and unplug the machine. Wrap the power cord around the wrapping post, then reinstall the water plug and drainage cover.
- Remove the exhaust pipe and store it safely.
- Cover the air conditioner with a plastic bag and store it in a dry place, out of reach of children, ensuring no dust can enter.
- Remove batteries from the remote control and store them safely.
The unit is then ready for storage.
Troubleshooting:
The manual provides a troubleshooting guide for common issues:
- No electricity: Check power connection.
- Overflow indicator 'FL' shows: Discharge internal water.
- Ambient temperature too high/low: Operate within 7-35 °C.
- Room temperature lower than set temperature: Change set temperature.
- Dehumidification mode, ambient temperature low: Unit requires temp above 17 °C.
- Direct sunlight: Pull curtains.
- Doors/Windows open: Close them.
- Dirty filter screen: Clean or replace filter.
- Air inlet/outlet blocked: Clear obstructions.
- Unit not on flat surface: Place on a flat surface to reduce noise.
- Remote control not working: Reduce distance, align with receiver, or change batteries.
- Displays 'E1' (pipe temp sensor abnormal): Check pipe temp sensor and related circuitry.
- Displays 'E2' (room temp sensor abnormal): Check room temp sensor and related circuitry.
Warranty and Disposal:
- Warranty: A 1-year warranty is automatically enrolled for purchases from NETTADIRECT or authorized resellers. Consumable parts are not covered.
- Disposal: The product must be disposed of responsibly, not with general waste, in accordance with EC Directive 2002/96/EC. Contact local council authorities for proper disposal methods to prevent hazardous substances from entering the environment.