4
FIRING YOUR TOOL
I. To fire your tool, place down on your work piece depressing the contact safety on the front of the tool.
Once the contact safety, is depressed, push the trigger to fire your staple. You must pick up the front of
the tool and reactivate the contact safety for each shot. The tool will operate in low temperatures down
to 32°F(0℃)and in higher temperatures up to 104°F(40℃).
HOW TO DETERMINE PROPER STAPLE LEG SIZE
In choosing the proper staple leg length for a job, there are two basic things to consider:
1.Thickness of material to be stapled.
2.Hardness of the wood.
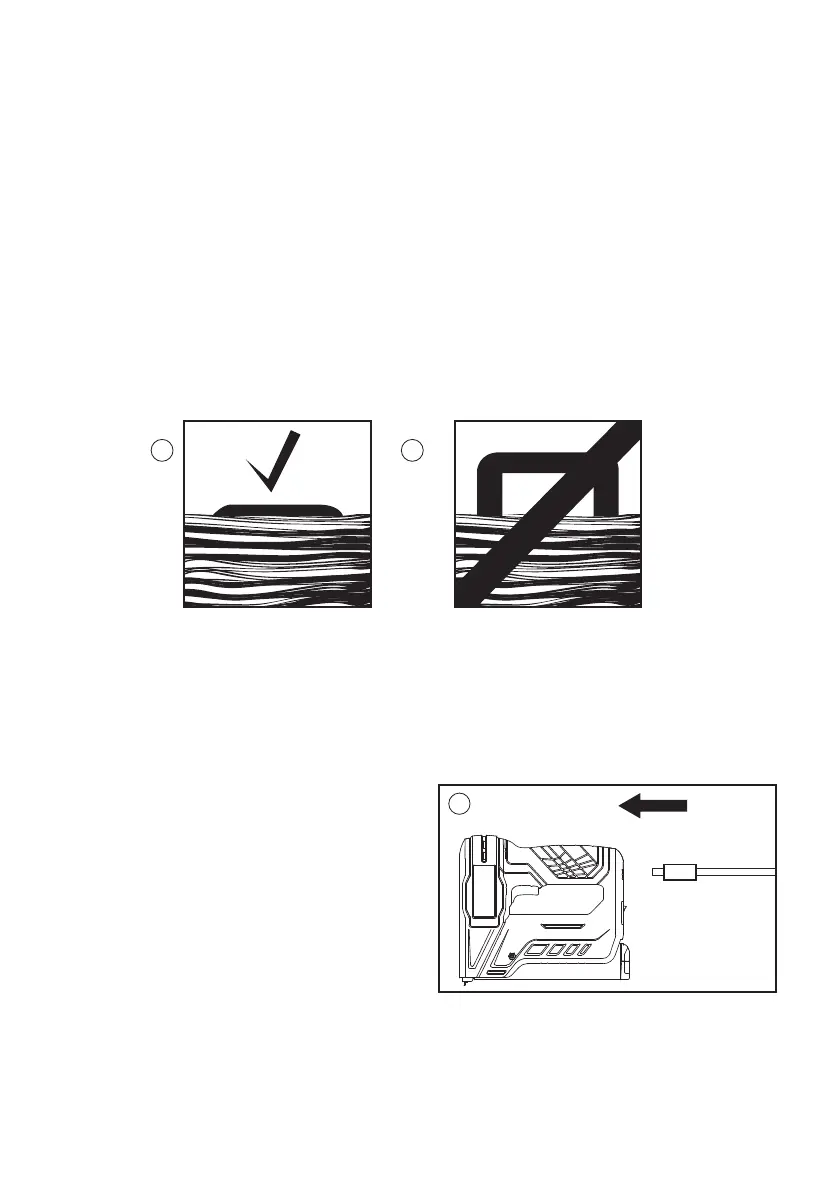
As a general rule, in hardwood, approximately 3/16"to 1/4"penetration into the wood is sufficient...and for
softwood, up to approximately 3/8"shouldbe sufficient. The staple should be flush with the underlying
surface, as shown in Fig 4a. However,if the staple used is not flush with the underlying surface, as
shown in Fig 4b -this means that too long a leg length has been used. In that case,we recommend the
next shorter leg length for desired results.
ABOUT YOUR BATTERY AND CHARGING THE TOOL NOTE
Make sure your battery is fully charged. The tool comes equipped with charger and built-in battery so
there is no need to ever remove or replace the battery. The 3.6V Lithium-ion battery is equipped to
provide up to 500 shots on a single charge.
CHARGING PROCEDURE: Red flash Need to recharge
1.Make sure tool is powered off.
2. Insert the charger into the back of the tool (Fig.5).
3.Plug the charger into a wall outlet.
4. Charging time up to 1.5 hours.
Notes:
1. Just use the charger provided.
2. Status of charging indicator
A) green = plenty of power
Flashing red = low power
B) when charging
Red light = charge
Green = full of
After charging, disconnect the charger from the tool
5
4a 4b


 To Next Page