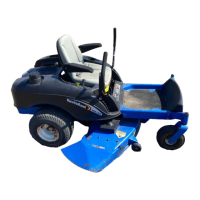
This document is an operator's manual for a New Holland 52" Side Discharge Mower, designed for use with LS Yard Tractors. The specific model number covered is 716736006 – T1T0001 & Up. The manual provides comprehensive instructions for assembly, operation, and maintenance of the mower, emphasizing safety throughout.
Function Description
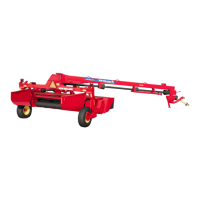
The New Holland 52" Side Discharge Mower is an attachment designed to be used with LS Yard Tractors for cutting grass. Its primary function is to efficiently cut and discharge grass clippings to the side, away from the cutting path. The mower is equipped with rotating blades that operate beneath a deck, and a hinged grass deflector ensures that clippings are dispersed towards the turf. The mower's height-of-cut can be adjusted to suit different grass lengths and desired lawn appearances. It is designed for both general mowing and mulching applications, with specific tips provided for optimal performance in various conditions. The mower utilizes a Power Take Off (PTO) system from the tractor to engage and disengage the electric clutch, which drives the blades.
Usage Features
The manual details several key usage features to ensure effective and safe operation:
- Attachment Lift Lever/Power Lift: The mower can be raised and lowered using either an attachment lift lever (on some models) or an attachment power lift (on other models). The lift lever allows the operator to pull it rearward to latch the attachment in the up position, or push a button and move it forward to lower the attachment. The power lift, controlled by a switch, raises or lowers the attachment when the key is in the "ON" or "RUN" position.
- Dial-A-Height Control: This control limits the downward travel of the attachment, allowing the operator to adjust the height-of-cut. The Dial-A-Height knob is rotated clockwise to raise the height and counterclockwise to lower it. An indicator shows the current height setting.
- Gage Wheels: For certain height-of-cut positions, the gage wheels must be adjusted. They should be positioned so they are approximately 3/8" (9.5 mm) off the ground for the selected cutting height. This adjustment involves removing a hairpin cotter and pin, selecting the appropriate hole, and re-securing.
- Side Discharge Operation: The mower is designed for side discharge, with a hinged grass deflector that routes clippings down toward the turf. Operators are explicitly warned against removing this deflector due to safety risks from thrown objects and blade contact.
- PTO Engagement/Disengagement: To operate the mower, the PTO must be engaged. This is done by depressing the brake and/or clutch pedal(s) and pulling the PTO control to "ON." Disengagement involves the same pedal action and pushing the PTO control to "OFF." A PTO light on the indicator module reminds the operator when the PTO is engaged, preventing engine cranking.
- Mowing Tips: The manual provides guidance on optimal mowing practices, including using a "FAST" throttle setting for maximum air circulation and cutting efficiency. It recommends cutting only about 1/3 of the grass blade and alternating mowing directions to promote even grass growth and clipping dispersion. For long grass, it suggests an initial higher cut followed by a lower, normal setting.
- Ground Speed: To achieve better cut quality, the manual advises using a slower ground speed.
- Stopping Procedure: To avoid clumps of grass clippings when stopping, operators are advised to move onto a previously cut area with the blades engaged, and then raise the mower one or two height-of-cut settings while driving forward to disperse clippings evenly.
Maintenance Features
Regular maintenance is crucial for the mower's longevity and performance, and the manual outlines a detailed schedule and procedures:
- Recommended Maintenance Schedule: This schedule specifies maintenance tasks at different intervals:
- Each Use: Clean mower housing.
- 5 Hours: Clean mower housing, check cutter blade.
- 25 Hours: Check cutter blade.
- 50 Hours: Grease mower spindles and wheels, check cutter blade.
- Storage Service: Grease mower spindles and wheels, check belts for wear/cracks, clean mower housing, and paint chipped surfaces.
- Safety Precautions: Before any maintenance, the operator must remove the ignition key and disconnect the spark plug wire(s) to prevent accidental engine start-up and serious injury.
- Cutting Blade Maintenance:
- Inspection: Blades should be inspected periodically for wear, damage, or slot formation, especially in the curved area. Damaged blades must be replaced immediately.
- Sharpening: Blades should be kept sharp to ensure a clean cut. Sharpening involves using a file to maintain the original angle at both ends of the blade, removing equal amounts of material to preserve balance.
- Balancing: After sharpening, blades must be checked for balance using a blade balancer. If unbalanced, metal should be filed off the back side until balance is achieved.
- Replacement: When installing a new blade, the curved part must point toward the inside of the mower. The bolt securing the blade should be tightened to 80-100 ft-lb (109-136 Nm).
- Greasing and Lubrication: The mower should be greased every 50 operating hours or once a year, or more frequently in dusty/sandy conditions, using general-purpose grease. Specific points for lubrication include blade spindles, idler pulley arm, and gage wheel bearings.
- Belt Maintenance (Blade Drive Belt & PTO Belt):
- Removal: Both belts require removing the mower from the tractor, and for the blade drive belt, pulley covers must also be removed. The idler spring is loosened to remove the blade drive belt.
- Installation: New belts are installed around the respective pulleys. For the blade drive belt, the idler spring tension needs to be adjusted so the length between hooks is 5-1/2" (140 mm). For the PTO belt, the belt guide distance should be 1/8" (4 mm) from the belt.
- Mower Leveling:
- Side-to-Side: The mower blades must be level side-to-side. This is checked by measuring from the outside cutting edges to a flat surface. Adjustments involve loosening a bolt on a hanger bracket and rotating it to raise or lower the mower.
- Front-to-Rear Blade Slope: The front blade tip should be 0-3/8" (0-9.5 mm) lower than the rear blade tip. Adjustment is made by rotating a bolt on the front adjustable link. Shortening the link raises the front of the mower.
- Transport Height Adjustment: After installation, the transport height nut on the lift mechanism is adjusted to ensure 1/4" (6 mm) clearance between rear brackets and footrest, and between the up-stop and mower.
- Cleaning: The underside of the mower should be cleaned of clippings and dirt after each use to maintain cutting quality. The entire machine, especially the engine and shrouding, should be cleaned of dirt and chaff. Mild detergent and water can be used, but pressure washing is prohibited.
- Storage: For storage, the tractor should be clean, dry, and covered. The ignition key should be removed and stored separately. All bolts, nuts, and screws should be checked and tightened, and any damaged parts repaired or replaced. Scratched metal surfaces should be painted.