1. Check your battery is fully charged before going for a ride!
2. Insert the battery into the rear of the bike. To learn how to insert and remove the
battery please refer to the Battery information on the next page of this manual.
3. Make sure the battery is rmly locked in place!
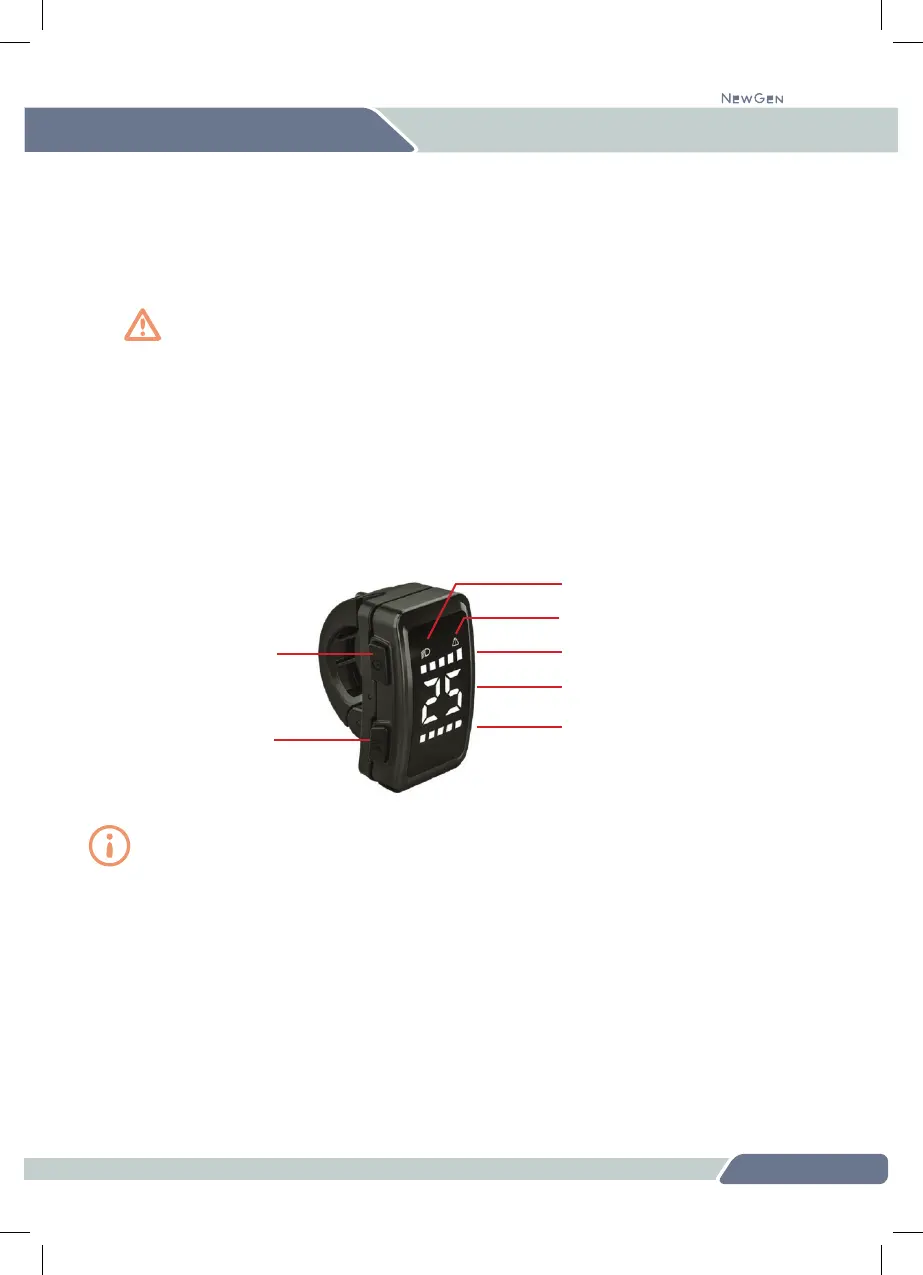
4. To switch the bike on, hold down the power button on the top left-hand side of the
display for three seconds. For detailed information about how to operate the display,
please see the dedicated Display section on p.17
5. Select the pedal assist level by using the front of the display as rocker switch:
press the upper part of the display to increase assist and the lower part to reduce it.
Always set the assist level to the lowest level (level 1) when you set off to make sure you
have full control of the bike. Then when you feel comfortable, increase the assist level.
Squeze the brake levers as you mount the bike to avoid any unintentional movement.
6. To switch your light(s) on, simply press the top of the display rocker switch for three
seconds. A headlight icon will appear on the display indicating the light is on. Switch
the light(s) off in the same way, pressing the top of the display for three seconds.
7. After your ride, always make sure you turn the bike off by pressing the power button
on the top left-hand side of the display for three seconds.
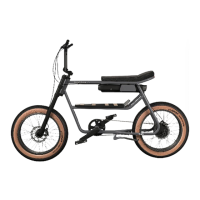
OPERATING YOUR 345
12
345
Power button
Menu button
Pedal assist level
Speedometer
Battery charge level
Light(s) on/off
Error indication