Do you have a question about the NewTek 3Play 4800 and is the answer not in the manual?
Explains how to record video, mark events, and define event points for playback.
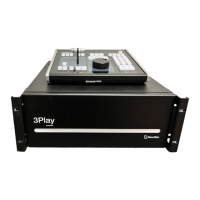
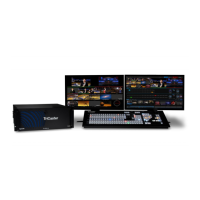
Details the dedicated external control surface for operating the 3Play system.
Introduces the main interface for live production control, clip marking, and playback.
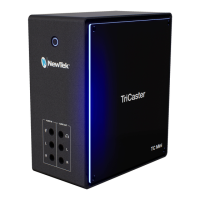
Provides an overview of key physical and functional features of the 3Play system.
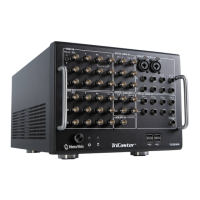
Covers connectivity, connectors, and recording capabilities for video and audio sources.
Explains the output monitors and channel info displays for monitoring video sources.
Discusses the dependency of replay features on recorded data and how recording is enabled.
Details the central interface for managing recorded events, clips, and angles.
Covers creating and controlling sequences like highlight reels with transitions.
Explains how to publish clips and still images to social media and storage locations.
Details connecting the monitor, mouse, keyboard, and powering on the system.
Guides through the process of activating and authorizing the Windows operating system.
Explains how to register the NewTek 3Play system to unlock features and receive updates.
Covers connecting A/V sources like cameras and audio devices to the 3Play backplate.
Details connecting video sources via SDI, Component, Y/C, or Composite.
Discusses various video and audio output options for connecting to external devices.
Details the possibilities for sending independent outputs to external devices.
Covers connecting downstream video devices to output connectors like SDI and Component.
Guides through the initial steps of powering up and starting a new 3Play session.
Describes the primary screen for creating, configuring, and managing sessions.
Introduces the main interface for live production control after session setup.
Covers configuring output settings for Channel A and B, including analog and digital connections.
Details configuring analog output types like Composite, Y/C, and Component for SD sessions.
Explains how to set Genlock reference types and adjust synchronization settings.
Guides through configuring video sources, connection types, and names for inputs.
Covers audio input settings, including type, gain, and mute options for each input.
Walks through the process of creating a new session and configuring basic settings.
Provides a practical overview of the Replay Desktop interface and its main components.
Explains how to set channel delegates and source delegates for controlling outputs.
Details how to enable and manage recording of audio/video inputs for playback.
Explains methods for marking events by setting In and Out points for clips.
Describes the two-button method for marking events with In and Out points.
Explains how to use memo fields and tags for clip annotation and organization.
Details how to use search functions and the Go To command for locating clips.
Guides through adding clips, editing, and setting up playback sequences in the PLAY LIST.
Details methods for adding clips to the PLAY LIST from the CLIP LIST.
Details how to adjust audio levels, transitions, and control playback within the PLAY LIST.
Provides a top-level view of the Replay Desktop interface and its six horizontal bands.
Describes the data displayed in the Dashboard, including menus and status messages.
Discusses the Grab feature for still images and the Record button for capture.
Covers opening the Output Configuration panel and its various tabs for managing outputs.
Details configuration options for primary video outputs Channel A and B.
Explains selecting analog output types like Component or Composite + Y/C for SD sessions.
Explains Genlock feature for video synchronization and failsafe mechanisms.
Guides through configuring input settings for video and audio sources.
Covers selecting connection types, formats, and names for video inputs.
Introduces the concept of two independent audio/video busses and outputs, Channel A and B.
Explains how to set channel delegates to direct operations to Channel A or Channel B.
Explains how to choose the audio/video source for a channel from CLIP LIST, PLAY LIST, or Live.
Details how the REC button activates and toggles recording of audio-visual data.
Covers basic VCR-style playback controls like Previous, Stop, and Play.
Covers the core function of marking events using the SET | IN and SET | OUT buttons.
Explains how the IN button adds a new event and sets the In Point.
Details how the OUT button completes an event, setting the Out Point and Duration.
Introduces functions for tagging, searching, and navigating clips.
Describes live input monitors, also known as ISO or Isolation monitors, for viewing sources.
Explains the output monitors for Channel A and B, showing current output streams.
Details the information provided in the Channel Info area below each output monitor.
Covers the initial decisions for capturing live inputs and storing data on hard drives.
Lists mounted storage volumes available for capture and explains drive assignment.
Details the Record buttons on the Replay Desktop and Control Surface for toggling capture.
Details the columns in the CLIP LIST table, such as Event ID, In Point, and Out Point.
Covers setting and modifying timecode fields for In/Out points and trimming clips.
Details ways to add selected clips to the current PLAY LIST.
Details the columns in the PLAY LIST table, such as Clip ID, Memo, and Audio levels.
Guides through adding clips, re-ordering, and modifying settings for playlist items.
Explains how to pre-configure tabbed lists for clip identifiers using tags.
Details how to use search criteria and the dataview for finding clips.
Discusses the search engine's OR operation and how to interpret search results.
Introduces DSK overlay channels for layering video sources and graphics.
Lists potential sources available for DSKs, including Cameras, Buffers, and Network Inputs.
Covers DSK layer settings accessed in the Network Input Configuration panel.
Explains entering credentials for social media sites or storage targets.
Discusses managing queue entries for batch processing and uploading.
Provides answers on starting, ending, and marking events during recording.
Explains how to start recording using REC button, IN/OUT buttons, or Dashboard.
Details how to stop recording using the Control Surface or Dashboard.
Details two methods for marking events: one-button and two-button marking.
Guides through selecting clips, adding to PLAY LIST, re-ordering, and adjusting settings for reels.
Lists shortcuts for marking events, setting points, and creating bookmarks.
Lists shortcuts for controlling channels, sources, and inputs.
| Recording | Yes |
|---|---|
| Instant Replay | Yes |
| Slow Motion | Yes |
| Multi-angle Playback | Yes |
| Video Outputs | 4 x 3G/HD/SD-SDI |
| Video Output (Display) | 1x HDMI |
| Supported Video Formats | 1080i, 720p, 480i, 576i |
| Recording Resolution | Up to 1080i |
| Connectivity | 1x Ethernet |
| Power Supply | 100-240V AC |
| Weight | 25 lbs (11.3 kg) |