EasyManua.ls Logo

NEXERa 211203 User Manual

NEXERa 211203
15 pages
To Next Page IconTo Next Page
Page #1 background imageLoading...
Page #1 background image
service@nexeradistribution.com
Email / Courriel
Monday to Friday
7 AM - 3 PM - Eastern Time
Lundi au vendredi
7h à 15h - Heure normale de l’Est
www.nexeradistribution.com
Webpage / Page web
1 877 629-9022
CANADA / USA
211203
Assembly instructions
Instructions d’assemblage
product number numéro de produit
nexeradistribution.com
65-211203_R5
L
ot #
Online resources
Ressources disponibles en ligne
How-to videos
Vidéos d’aide
FAQ’s
Questions fréquentes
Order replacement parts
Commande de pièces de remplacement
Were here to help - Do not return this product !
If you need help with assembly
If you received a damaged or defective part
If you are missing hardware
.
.
.
We will process replacement parts in 3-5 business days
or less. Parts are shipped via FedEx Ground or mail.
Nous sommes là pour vous - Ne retournez pas ce produit !
Appelez, écrivez ou trouvez-nous en ligne d’abord !
Si vous avez besoin d’aide avec l’assemblage
Si vous avez une pièce manquante ou endommagée
S’il vous manque de la quincaillerie
.
.
.
Nous vous enverrons les pièces de rechange dans un délai de
3 à 5 jours ouvrables, ou moins. Les pièces sont expédiées
via FedEx Ground ou par la poste.
VIDEO
How-to videos
Vidéos d’aide
VIDEO
25 lb
75 lb
C1
B2
A2
E
XA2
25 lb
XA2
XB2
E
Back panel
Dos arrière
Question and Answer IconNeed help?

Do you have a question about the NEXERa 211203 and is the answer not in the manual?

NEXERa 211203 Specifications

General IconGeneral
BrandNEXERa
Model211203
CategoryIndoor Furnishing
LanguageEnglish

Summary

Nexera Product Information

Customer Support and Contact Details

Provides contact phone, email, and website for assistance with assembly or replacement parts.

Online Assembly Resources

Access to how-to videos and FAQs for assembly guidance.

Assembly Preparation and Safety

Essential Assembly Guidelines

Requires two people for assembly and moving; stresses careful reading of instructions.

Safety and Furniture Care

Includes warnings against children climbing, and advice on avoiding liquids, chemicals, and direct sunlight.

Tools Required for Assembly

Lists the necessary tools for assembling the furniture unit.

Hardware Identification

Main Cabinet Assembly

Install Drawer Slides on Cabinet Panels

Attaches drawer slides (#0909, #0917) to side panels (A2, B2) using screws.

Assemble Cabinet Frame Structure

Installs cam locks, push bolts, dowels, and connects side panels (E) and top panel (C1) to form the cabinet.

Install Cabinet Levellers and Back Panel

Secures insert nuts and adjustable levellers, then fastens the back panel to complete the main unit.

File Drawer Assembly

Prepare File Drawer Components

Inserts file supports into the top grooves of drawer side panels (VA1, WB1).

Assemble File Drawer Box

Installs cam locks, push bolts, and attaches drawer front (XB2) to side panels (VA1, WB1).

Install Drawer Bottom and Hardware

Inserts drawer bottom, attaches panel YB, and installs block K with roller #2141.

Utility Drawer Assembly

Prepare Utility Drawer Sides

Attaches drawer slides to panels and installs cam locks, push bolts, and dowels on utility drawer components.

Assemble Utility Drawer Box

Fastens utility drawer side panels (V, W) to the front (XA2) and inserts the drawer bottom.

Complete Utility Drawer Assembly

Attaches the drawer back panel (Y) and installs the drawer slides (DL, DR) to the utility drawers.

Final Drawer and Unit Integration

Attach Drawer Handles

Fastens handles to the front panels of the main unit drawers.

Insert Drawers into Cabinet

Places the assembled drawers into the main cabinet unit.
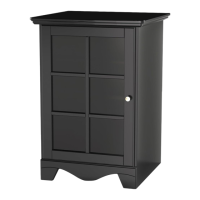
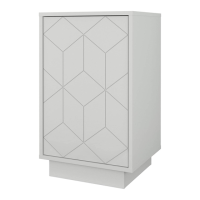
Product Warranty Information

Related product manuals