EasyManua.ls Logo

NEXERa 211303 User Manual

NEXERa 211303
10 pages
To Next Page IconTo Next Page
Page #1 background imageLoading...
Page #1 background image
service@nexeradistribution.com
Email / Courriel
Monday to Friday
7 AM - 3 PM - Eastern Time
Lundi au vendredi
7h à 15h - Heure normale de l’Est
www.nexeradistribution.com
Webpage / Page web
1 877 629-9022
CANADA / USA
211303
Assembly instructions
Instructions d’assemblage
product number numéro de produit
nexeradistribution.com
65-211303_R3
L
ot #
Online resources
Ressources disponibles en ligne
How-to videos
Vidéos d’aide
FAQ’s
Questions fréquentes
Order replacement parts
Commande de pièces de remplacement
Were here to help - Do not return this product !
If you need help with assembly
If you received a damaged or defective part
If you are missing hardware
.
.
.
We will process replacement parts in 3-5 business days
or less. Parts are shipped via FedEx Ground or mail.
Nous sommes là pour vous - Ne retournez pas ce produit !
Appelez, écrivez ou trouvez-nous en ligne d’abord !
Si vous avez besoin d’aide avec l’assemblage
Si vous avez une pièce manquante ou endommagée
S’il vous manque de la quincaillerie
.
.
.
Nous vous enverrons les pièces de rechange dans un délai de
3 à 5 jours ouvrables, ou moins. Les pièces sont expédiées
via FedEx Ground ou par la poste.
VIDEO
How-to videos
Vidéos d’aide
VIDEO
100 lb
Or
Ou
100 lb
A1
C1
B1
E
Question and Answer IconNeed help?

Do you have a question about the NEXERa 211303 and is the answer not in the manual?

NEXERa 211303 Specifications

General IconGeneral
BrandNEXERa
Model211303
CategoryIndoor Furnishing
LanguageEnglish

Summary

Assembly Instructions

Contact and Support

Information on how to get help with assembly or damaged parts.

Online Resources

Access to video guides, FAQs, and replacement part ordering.

Important Information and Safety

General Assembly Precautions

Essential safety guidelines and recommendations for assembling and using the furniture.

Tools Required

List of tools necessary for the assembly process.

Hardware List

Assembly Steps

Step 1: Install Cam Locks

Install 10 cam locks (#0203) into panels A1, B1, and E.

Step 2: Install Push Bolts and Dowels

Install 10 push bolts (#2200) and 2 wood dowels (#0207).

Step 3: Attach Panels to Base

Fasten panels A1 and B1 to panel E and tighten cam locks.

Step 4: Attach Side Panel C1

Fasten panel C1 to the assembled unit and tighten cam locks.

Step 5: Install Insert Nuts and Levelers

Install 2 insert nuts (#2150) and screw in 2 adjustable levelers (#1111).

Step 6: Secure Desk and Add Caps

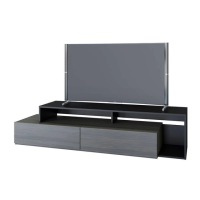
Secure the desk to the drawer unit using mounting plate and screws, add caps.

Limited 1 Year Warranty

Related product manuals