EasyManua.ls Logo

NEXERa 340439 - User Manual

NEXERa 340439
13 pages
Print Icon
To Next Page IconTo Next Page
Loading...
service@nexeradistribution.com
Email / Courriel
Monday to Friday
7:30 AM - 4 PM - Eastern Time
Lundi au vendredi
7:30h à 16h - Heure normale de l’Est
www.nexeradistribution.com
Webpage / Page web
1 877 629-9022
CANADA / USA
340439
Assembly instructions
Instructions d’assemblage
product number numéro de produit
nexeradistribution.com
65-340439_R3
L
ot #
Online resources
Ressources disponibles en ligne
How-to videos
Vidéos d’aide
FAQ’s
Questions fréquentes
Order replacement parts
Commande de pièces de remplacement
Were here to help - Do not return this product !
If you need help with assembly
If you received a damaged or defective part
If you are missing hardware
.
.
.
We will process replacement parts in 3-5 business days
or less. Parts are shipped via FedEx Ground or mail.
Nous sommes là pour vous - Ne retournez pas ce produit !
Appelez, écrivez ou trouvez-nous en ligne d’abord !
Si vous avez besoin d’aide avec l’assemblage
Si vous avez une pièce manquante ou endommagée
S’il vous manque de la quincaillerie
.
.
.
Nous vous enverrons les pièces de rechange dans un délai de
3 à 5 jours ouvrables, ou moins. Les pièces sont expédiées
via FedEx Ground ou par la poste.
VIDEO
How-to videos
Vidéos d’aide
VIDEO
25 lb
C1
B1
A1
D
T
X
T
25 lb
25 lb
25 lb
X
XA
XA
F1
R
R
Question and Answer IconNeed help?

Do you have a question about the NEXERa 340439 and is the answer not in the manual?

Summary

Introduction, Support, and Safety

Contact Information and Online Resources

Provides contact details, website, and links to online assembly resources like videos and FAQs.

Safety and Care Guidelines

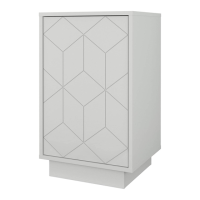
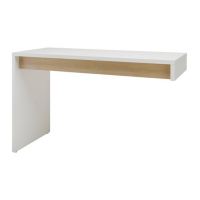
Outlines safety warnings, assembly requirements, and furniture care instructions.

Tools and Hardware Overview

Lists the required tools and provides a comprehensive inventory of all hardware components needed.

Assembly Instructions

Step 1: Install Drawer Slides

Fasten 8 drawer slides (#0910) to panels A1 and B1 using 24 screws (#0110).

Step 2: Install Cam Locks

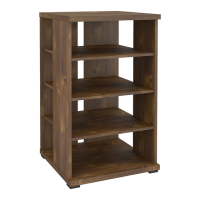
Install 14 cam locks (#0203) into panels A1, B1, F1, and R.

Step 3: Insert Wood Dowels

Insert 6 wood dowels (#0207) into legs T and panel F1.

Step 4: Install Push Bolts

Install 14 push bolts (#2200) into panels A1, B1, and C1.

Step 5: Assemble Main Frame Base

Fasten panels R and F1 to panel B1 using 5 cam locks (#0203).

Step 6: Attach Side Panel A1

Fasten panel A1 to the assembled unit using 5 cam locks (#0203).

Step 7: Attach Top Panel C1

Fasten panel C1 to the assembled unit using 4 cam locks (#0203).

Step 8: Attach Back Panel D1

Fasten panel D1 to the assembled unit using 4 screws (#0111).

Step 9: Attach Legs and Felt Pads

Fasten 2 legs T to panel D1 using 6 screws (#2204) and install felt pads (#1106).

Step 10: Drawer Panel Preparation

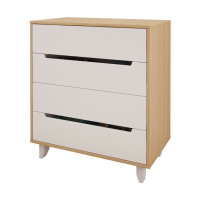
Install cam locks, push bolts, and dowels into drawer panels V, W, Y, X/XA.

Step 11: Assemble Drawer Fronts

Fasten drawer panels V and W to drawer fronts X or XA using cam locks.

Step 12: Insert Drawer Bottom

Insert the drawer bottom into the grooves on panels V, W, and X/XA.

Step 13: Attach Drawer Back Panel Y

Fasten panel Y to panels V and W using dowels and screws (#0111).

Step 14: Attach Drawer Slides

Fasten 2 drawer slides (#0910) (DL and DR) to panels V and W using screws (#0105).

Step 15: Attach Drawer Connector

Fasten connector (#2195) to the drawer back panel Y.

Step 16: Secure Unit to Wall

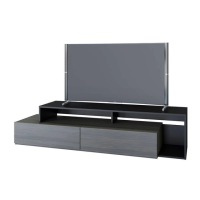
Use safety device #HH510 to secure the unit to the wall.

Step 17: Insert Drawers

Insert the four completed drawer boxes into the main unit.

Product Warranty

Limited 1 Year Warranty Terms

Details the warranty period, coverage, exclusions, and conditions for Nexera products.

NEXERa 340439 Specifications

General IconGeneral
BrandNEXERa
Model340439
CategoryIndoor Furnishing
LanguageEnglish

Related product manuals