EasyManua.ls Logo

Niagara 58145 - User Manual

Default Icon
8 pages
Print Icon
To Next Page IconTo Next Page
Loading...
Visit our website at: http://www.harborfreight.com
Email our technical support at: productsupport@harborfreight.com
Owners Manual & Safety Instructions
Save This Manual Keep this manual for the safety warnings and precautions, assembly,
operating, inspection, maintenance and cleaning procedures. Write the product’s serial number in the
back of the manual near the assembly diagram (or month and year of purchase if product has no number).
Keep this manual and the receipt in a safe and dry place for future reference. 21l
When unpacking, make sure that the product is intact
and undamaged. If any parts are missing or broken,
please call 1-888-866-5797 as soon as possible.
Copyright
©
2007 by Harbor Freight Tools
®
. All rights reserved.
No portion of this manual or any artwork contained herein may be reproduced in
any shape or form without the express written consent of Harbor Freight Tools.
Diagrams within this manual may not be drawn proportionally. Due to continuing
improvements, actual product may differ slightly from the product described herein.
Tools requ ir ed f or a ss em bl y an d se rv ice ma y no t be i nc lu ded.
Read this material before using this product.
Failure to do so can result in serious injury.
SAVE THIS MANUAL.
Question and Answer IconNeed help?

Do you have a question about the Niagara 58145 and is the answer not in the manual?

Summary

Warning Symbols and Definitions

Safety Symbol Definitions

Defines DANGER, WARNING, CAUTION, and NOTICE symbols and their meanings.

General Safety Statement

Emphasizes reading and following all safety warnings for injury prevention.

Important Safety Information

Work Area Safety

Keep work area clean, well-lit, and with adequate drainage.

Personal Safety Measures

Wear protective gear, stay alert, dress properly, maintain balance.

Use Instructions

Approved Liquids and Ventilation

Use only approved liquids in well-ventilated areas; avoid combustible chemicals.

Safe Operation Practices

Do not point sprayer at self/others, allow access to treated areas, or use as a toy.

Pre-Use Inspection and Warnings

Inspect for damage, check pressure release valve, maintain labels, use common sense.

Service and Maintenance

Qualified Service and Parts

Have repairs done by qualified personnel using identical replacement parts.

Storage and Care

Store tools safely out of reach, and maintain the sprayer for easier control.

Specifications

Components and Controls

Assembly Instructions

Spray Wand Assembly

Instructions for assembling the spray wand using the wand nut.

Operating Instructions

Preparation and Filling

Ensure handle is secure, pour liquid through funnel, and do not use undiluted bleach.

Pressurizing and Spraying

Pump handle to pressurize, hold wand away, press trigger to spray, adjust nozzle.

Continuous Spray and Depressurizing

Lock trigger for continuous spray, release to stop, and depressurize tank when done.

Inspection, Maintenance, and Cleaning

Pre-Use Inspection Checklist

Check for loose hardware, binding parts, cracks, or other unsafe conditions.

After-Use Cleaning Procedure

Flush with water, clean nozzle/filter, rinse, and allow to air-dry.

Periodic Lubrication and Storage

Lubricate moving parts and store in a safe, dry, clean location.

Troubleshooting

Unit Does Not Spray

Possible causes include detached tube, low liquid, loose parts, or clogged nozzle/filter.

Undesirable Spray Pattern

Causes include nozzle adjustment, particles in fluid, or clogged nozzle/filter.

Parts List and Diagram

Limited 90 Day Warranty

Overview

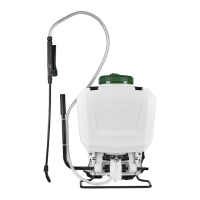
This document serves as an owner's manual and safety instructions for the Niagara 1 Gallon Disinfectant Bleach Sprayer, model number 58145. It provides essential information for safe operation, assembly, maintenance, and troubleshooting of the device.

Function Description:

The Niagara Disinfectant Bleach Sprayer is a manual pump-action sprayer designed for dispensing water-based liquids. Its primary function is to facilitate the application of disinfectants, specifically diluted bleach solutions, for general household cleaning and surface disinfection. It can also be used for water or water-based fertilizers, herbicides, pesticides, and sealers. The sprayer operates by building pressure within its tank through manual pumping, which then allows for a continuous spray when the trigger is activated. The spray pattern can be adjusted by twisting the nozzle.

Important Technical Specifications:

  • Tank Capacity: 1 gallon
  • Hose Length: 41.5 inches
  • Wand Length: 10.8 inches
  • Maximum Output: 75 PSI (Pounds per Square Inch)
  • Bleach Ratio: The manual specifies two dilution ratios for bleach containing 5.25% sodium hypochlorite:
    • 1:99 for general household cleaning (1/3 fl. oz. (10 ml) of bleach with 34 fl. oz. (1 L) of water).
    • 1:49 for disinfecting surfaces contaminated with vomitus, excreta, secretions, or blood (1/3 fl. oz. (10 ml) of bleach with 17 fl. oz. (.5 L) of water).
    • Adjustments to the amount of bleach are required if its concentration of sodium hypochlorite is above or below 5.25%.

Usage Features:

The sprayer is designed for ease of use with several key features:

  • Manual Pump Handle: Allows the user to build pressure in the tank by pumping 20-30 times until sufficient pressure is achieved.
  • Trigger Handle Assembly: Features a trigger for activating the spray. It can be pressed and held for continuous spray or locked into position for extended spraying by pushing it down and forward. To stop continuous spray, the trigger is pressed down and pulled back.
  • Adjustable Nozzle: The spray pattern can be adjusted by twisting the nozzle, allowing for versatility in application.
  • Pressure Release Valve: Before removing parts or storing the tool, pressure in the tank must be released by pulling up on this valve to prevent forceful spurting of contents.
  • Funnel Top: Designed for easy filling of liquids into the tank.
  • Clear Tank Markings: The tank likely includes a "max. fill line" to prevent overfilling, though not explicitly detailed in the provided text.
  • Safety Precautions: Emphasizes the importance of wearing eye protection (ANSI-approved safety goggles), work gloves to avoid skin contact with bleach, and a face mask when necessary to avoid inhaling fumes. It also stresses using the sprayer only in well-ventilated areas and not pointing it at oneself, other people, or animals.
  • Liquid Compatibility: Specifically designed for water or water-based fertilizers, herbicides, pesticides, sealers, disinfectants, or diluted bleach. It explicitly warns against using combustible or undiluted corrosive chemicals.
  • Work Area Considerations: Recommends keeping the work area clean, well-lit, and with adequate drainage to prevent slips.
  • Personal Safety: Advises users to stay alert, avoid operating while tired or under the influence, dress properly (no loose clothing or jewelry), and maintain proper footing and balance.

Maintenance Features:

Proper maintenance is crucial for the longevity and safe operation of the sprayer:

  • Regular Inspection: Users are instructed to inspect the sprayer before each use for damaged, loose, or missing parts, and to not use it if any problems are found. This includes checking for loose hardware, misalignment or binding of moving parts, cracked or broken parts, and any other condition affecting safe operation.
  • Cleaning After Every Use: After spraying, the sprayer should be flushed with water, and the nozzle and filter (part 35, though not explicitly shown in the diagram, it is mentioned in troubleshooting) should be cleaned and rinsed with water, then allowed to air-dry.
  • Periodic Lubrication: All moving parts of the pump assembly should be lubricated periodically with petroleum jelly.
  • Proper Storage: The sprayer should be stored in a safe, dry, clean location, out of reach of children and sunlight.
  • Troubleshooting Guide: The manual includes a troubleshooting section to address common issues such as the unit not spraying or an undesirable spray pattern. Solutions include reattaching the suction tube, adding liquid, tightening various nuts and assemblies, pressurizing the sprayer, and disassembling/cleaning the nozzle and/or filter.
  • Professional Service: For repairs, it is recommended to have the sprayer serviced by a qualified repair person using only identical replacement parts to ensure safety. The manufacturer and/or distributor explicitly states that all repairs and parts replacements should be undertaken by certified and licensed technicians.

Niagara 58145 Specifications

General IconGeneral
BrandNiagara
Model58145
CategoryPaint Sprayer
LanguageEnglish

Related product manuals