Do you have a question about the Nibe SMO 20 UK and is the answer not in the manual?
Describes the function of the Ok button, Back button, and Control knob.
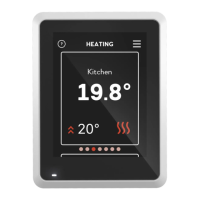
Explains how to set the indoor temperature via the control module's start menu.
Details the procedure to temporarily increase hot water volume using the control knob and OK button.
Provides essential safety guidelines for the installation and use of the appliance.
Details the meaning of warning symbols like NOTE, Caution, and TIP used in the manual.
Explains the significance of CE and IP21 markings on electrical equipment.
Informs the user where to find the product's serial number for servicing and support.
Outlines specific installation requirements for the United Kingdom, including building regulations.
Provides instructions for the proper disposal of packaging and the product itself.
Details the warranty period and conditions for NIBE heat pumps.
Lists checks to be performed during installation inspection before commissioning the heating system.
Presents compatible product combinations recommended for control by the SMO 20.
Lists compatible NIBE air/water heat pumps and their required minimum software versions for control.
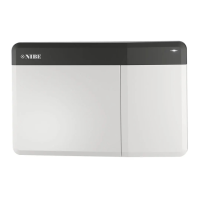
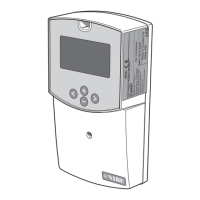
Provides instructions and warnings for wall mounting the SMO 20 control module.
Lists the components supplied with the SMO 20 control module.
Shows the physical location of various components on the control module's boards.
Lists and describes the electrical components of the SMO 20 control module, with designations.
Advises on pipe installation according to regulations and recommends pipe dimensions for heat pumps.
Details minimum system flow rates required for defrosting operation and pipe dimensioning.
Lists compatible heat pumps and their minimum required software versions for control.
Provides a key to understand the symbols used in pipe connection diagrams.
Explains how to correctly install temperature sensors on pipes using thermal paste, cable ties, and tape.
Details menu settings required for controlling a heat pump with fixed condensing.
Describes various ways the SMO 20 can be connected with other NIBE products and system functions.
Provides an explanation of the designations used for various components and systems.
Explains the operation of a specific system configuration involving additional heat and cooling.
Details a complex system setup with additional heat and cooling functions for comfort.
Provides general guidelines and precautions for electrical connections, including safety switch requirements.
Explains the role of the miniature circuit breaker (FA1) in the control module's operating circuit.
Describes how to open the control module cover and move the display for easier electrical connection access.
Explains how to use a tool to release or lock cables in the heat pump terminal blocks.
Provides advice on preventing interference and general connection guidelines for the SMO 20.
Details requirements for the main power connection, including isolator switch and cable sizing.
Explains how to use an AUX input to prevent alarms during voltage loss in the heat pump.
Shows how to connect the circulation pump (charge pump) to the base board terminal blocks.
Illustrates how to connect the heat pump to the SMO 20 using a screened three-core cable.
Provides instructions for installing the outdoor temperature sensor (BT1) in a shaded location.
Details how to install and activate a room sensor (BT50) for indoor climate control and temperature adjustment.
Explains how to connect the temperature sensor (BT6) for hot water charging to the water heater.
Describes connecting the external supply temperature sensor (BT63) for additional heat.
Details connecting the temperature sensor (BT7) to monitor water temperature at the top of the tank.
Explains connecting the external supply temperature sensor (BT25) for additional heat after the reversing valve.
Introduces optional connections, including step-controlled additional heat and relay output for emergency mode.
Explains how step-controlled additional heat can be controlled via relays and its operation.
Describes the function and connection of the relay output for emergency mode operation.
Shows how to connect an external circulation pump (GP10) to the AUX output.
Details available software-controlled AUX inputs and outputs for connecting external functions or sensors.
Explains how to connect an external reversing valve (QN10) for hot water control.
Describes how to connect the NIBE Uplink for communication and control.
Lists various optional inputs for temperature sensors, cooling/heating control, and supply/return monitoring.
Explains how external unit alarms are connected and displayed.
Details how to activate functions like hot water comfort modes or external adjustments using external switches.
Explains the "SG Ready" function for tariff control and its connection requirements.
Describes how to block functions using an external switch and the associated risks.
Lists possible selections for AUX output, including relay functions and external circulation pumps.
Lists optional functions for external connections, including indications, control, and activation.
Refers to other installation instructions for connecting additional accessories.
Lists necessary preparations before commissioning, including software version and system filling.
Outlines the steps for commissioning the SMO 20 with a NIBE air/water heat pump.
Details the procedure for commissioning the system with additional heating only.
Explains how to check the function of the reversing valve (QN10) via menu settings.
Describes how to check functions connected to the AUX socket using menu settings.
Explains how to enable and configure cooling mode if the heat pump supports it.
Provides instructions for the initial start-up and inspection of the system, including the start guide.
Explains how to set basic values for heating curves based on system type and location, using a map.
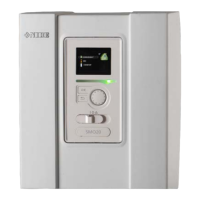
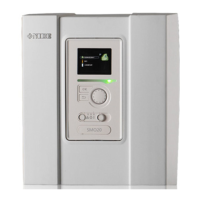
Describes the components of the display unit, including the display, status lamp, and buttons.
Explains the functions of the control knob for navigating menus and adjusting values.
Details the three positions of the SF1 switch: On, Standby, and Emergency mode.
Explains the purpose of the USB port for software updates and saving logged information.
Provides an overview of the SMO 20's menu system, including indoor climate, hot water, info, and service menus.
Explains various symbols that can appear on the display, indicating system status and functions.
Explains how to navigate the menu system and move the cursor.
Guides the user on how to select main menus and sub-menus.
Describes how to select options within a menu, indicated by a green tick.
Details the process of setting or adjusting values within the system's menus.
Explains how to use the virtual keyboard for text input in certain menus.
Describes how to access the help menu for additional information on menu functions.
Explains how to scroll through multiple windows or pages within menus and the start guide.
Outlines the sub-menus related to setting and scheduling the indoor climate.
Details the sub-menus for setting and scheduling hot water production.
Describes the menu for displaying temperature information and accessing the alarm log.
Covers settings related to the system, including internet, smart functions, time, date, language, and advanced options.
Provides an overview of the service menu, its sub-menus, and important notes for advanced users.
Details settings for hot water start and stop temperatures based on comfort modes and periodic increase.
Explains how to set the maximum supply temperature for the climate system.
Details settings for maximum permitted temperature differences for compressor and additional heat.
Describes how the control module alerts the user to alarms and the potential actions.
Explains settings for step-controlled additional heat, including its position relative to the reversing valve.
Describes settings for the heating distribution system type and temperature differences.
Explains the purpose of the heat pump testing menu for diagnostics according to standards.
Details how to set compressor curves for specific operational requirements in heat pumps with inverter control.
Covers general system settings, including activating the heat pump and installed accessories.
Explains how to select inputs and outputs on the terminal block for external functions.
Describes how to reset all settings to default values via the factory setting service.
Explains how to force control of components and connected accessories.
Describes how to manually start the start guide for initial system setup.
Explains how to start the compressor directly for quick start operations.
Details the settings and operation of the floor drying function, including period times and temperatures.
Explains how to read previous changes made to the control system.
Covers settings specific to the installed heat pump and charge pump.
Details operating modes and speed settings for the charge pump.
Explains how to select the installation country for product-specific settings.
Provides an overview of service actions, including general inspection and climate system checks.
Lists essential maintenance checks for the casing, electrical connections, and climate system.
Explains the emergency mode, its activation, and its effects on system operation.
Provides a table of temperature sensor data, including resistance and voltage values.
Explains how to use the USB service outlet for software updates and saving logged information.
Guides the user on how to start the software update process for the SMO 20.
Explains how to select a different software file for updating if the suggested one is not suitable.
Details how to save measurement values from SMO 20 onto a log file on a USB memory.
Explains how to save or retrieve menu settings using a USB memory.
Explains how to use the Info-menu to view measurement values and identify fault sources.
Describes how alarms are indicated and managed, including viewing alarm details and resetting.
Details how to view alarm types, reset them, and potentially use "aid mode" for continued operation.
Lists basic actions to take when operational interference is not displayed, such as checking switches and fuses.
Provides troubleshooting steps for low hot water temperature or lack thereof.
Offers troubleshooting steps for low room temperatures, covering thermostat settings and operating modes.
Provides troubleshooting steps for high room temperatures, focusing on thermostat and heating curve adjustments.
Explains how to address low system pressure by checking water levels and looking for leaks.
Lists reasons why the heat pump compressor might not start and troubleshooting steps.
Explains how to operate the system in "add. heat only" mode while waiting for assistance.
Describes the function and part number of the auxiliary relay HR 10.
Lists charge pump models CPD 11-25/65 and CPD 11-25/75 with part numbers.
Details the EME 20 module for solar cell communication and control.
Describes the connection box K11 for thermostat and overheating protection.
Lists various ELK models for external electric additional heat with power ratings and part numbers.
Lists NIBE VST models for hot water control, specifying pipe sizes and capacities.
Lists immersion heater models with power ratings and part numbers.
Lists NIBE VCC models for cooling reversing valves, specifying pipe sizes.
Describes the ROOM SENSORRTS 40 accessory for even indoor temperature.
Lists various NIBE water heater and accumulator tank models with their specifications and part numbers.
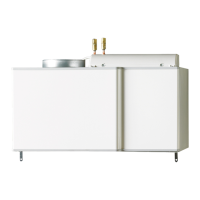
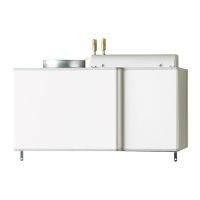
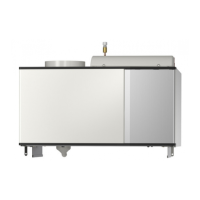
Provides diagrams and measurements for the physical dimensions of the SMO 20 control module.
Lists electrical data, operational parameters, and physical dimensions of the SMO 20.
Details the energy labelling information for the SMO 20 in combination with F2040/F2120 heat pumps.
Presents the main electrical circuit diagram for the SMO 20, showing internal and external connections.
Continues the detailed wiring diagram of the SMO 20, showing PCA base and terminal connections.
Further details the electrical circuit diagram, including power supply and connection blocks.
Continues the detailed electrical circuit diagram, showing various connection points and components.
Shows the wiring diagram for the PCA display unit of the SMO 20.
| Type | Control Unit |
|---|---|
| Compatibility | NIBE heat pumps |
| Display | LCD |
| Weight | 2.5 kg |
| Protection class | IP20 |
| Connectivity | Ethernet |
| Operating temperature | 0 to 40 °C |
| Storage temperature | -20°C to +60°C |
| Relative humidity | max 90%, non-condensing |
| Power supply | 230 V |