20 – English
English
10.4.3 - “Remote” memorisation
You can store a new radio transmitter in the control unit, without pressing
its keys directly. A previously memorised and operational “OLD” trans-
mitter must be available. The “NEW” radio transmitter to be stored will
“inherit” the characteristics of the OLD one; that is, if the OLD radio trans-
mitter is memorised in mode 1, the NEW will be memorised in mode 1;
in this case, during the programming phase, any key can be pressed
on either of the two transmitters. If, on the other hand, the OLD radio
transmitter is memorised in Mode 2, you must press the key with the
command you want on the OLD transmitter, and on the NEW, the key to
which you want to associate that command.
Holding the two transmitters, position yourself within the operating range
of the automation and perform the following operations:
01. Press the key on the NEW radio transmitter and hold it down for at
least 5s, then release it.
02. Press the button on the OLD radio transmitter 3 times slowly.
03. Press the key on the NEW radio transmitter once slowly.
At this point, the NEW radio transmitter will be recognised by the control
unit, and take on the characteristics that the OLD one had.
If there are other transmitters to memorise, repeat all the above steps for
each new transmitter.
10.4.4 - Deleting a radio transmitter
If you have available only one radio transmitter, use this operation to
delete it.
If the transmitter is memorised in Mode 1, one deletion phase is sufficient
and at point 3 you may press any key. If the transmitter is stored in mode
2, a deletion phase is required for each memorised key.
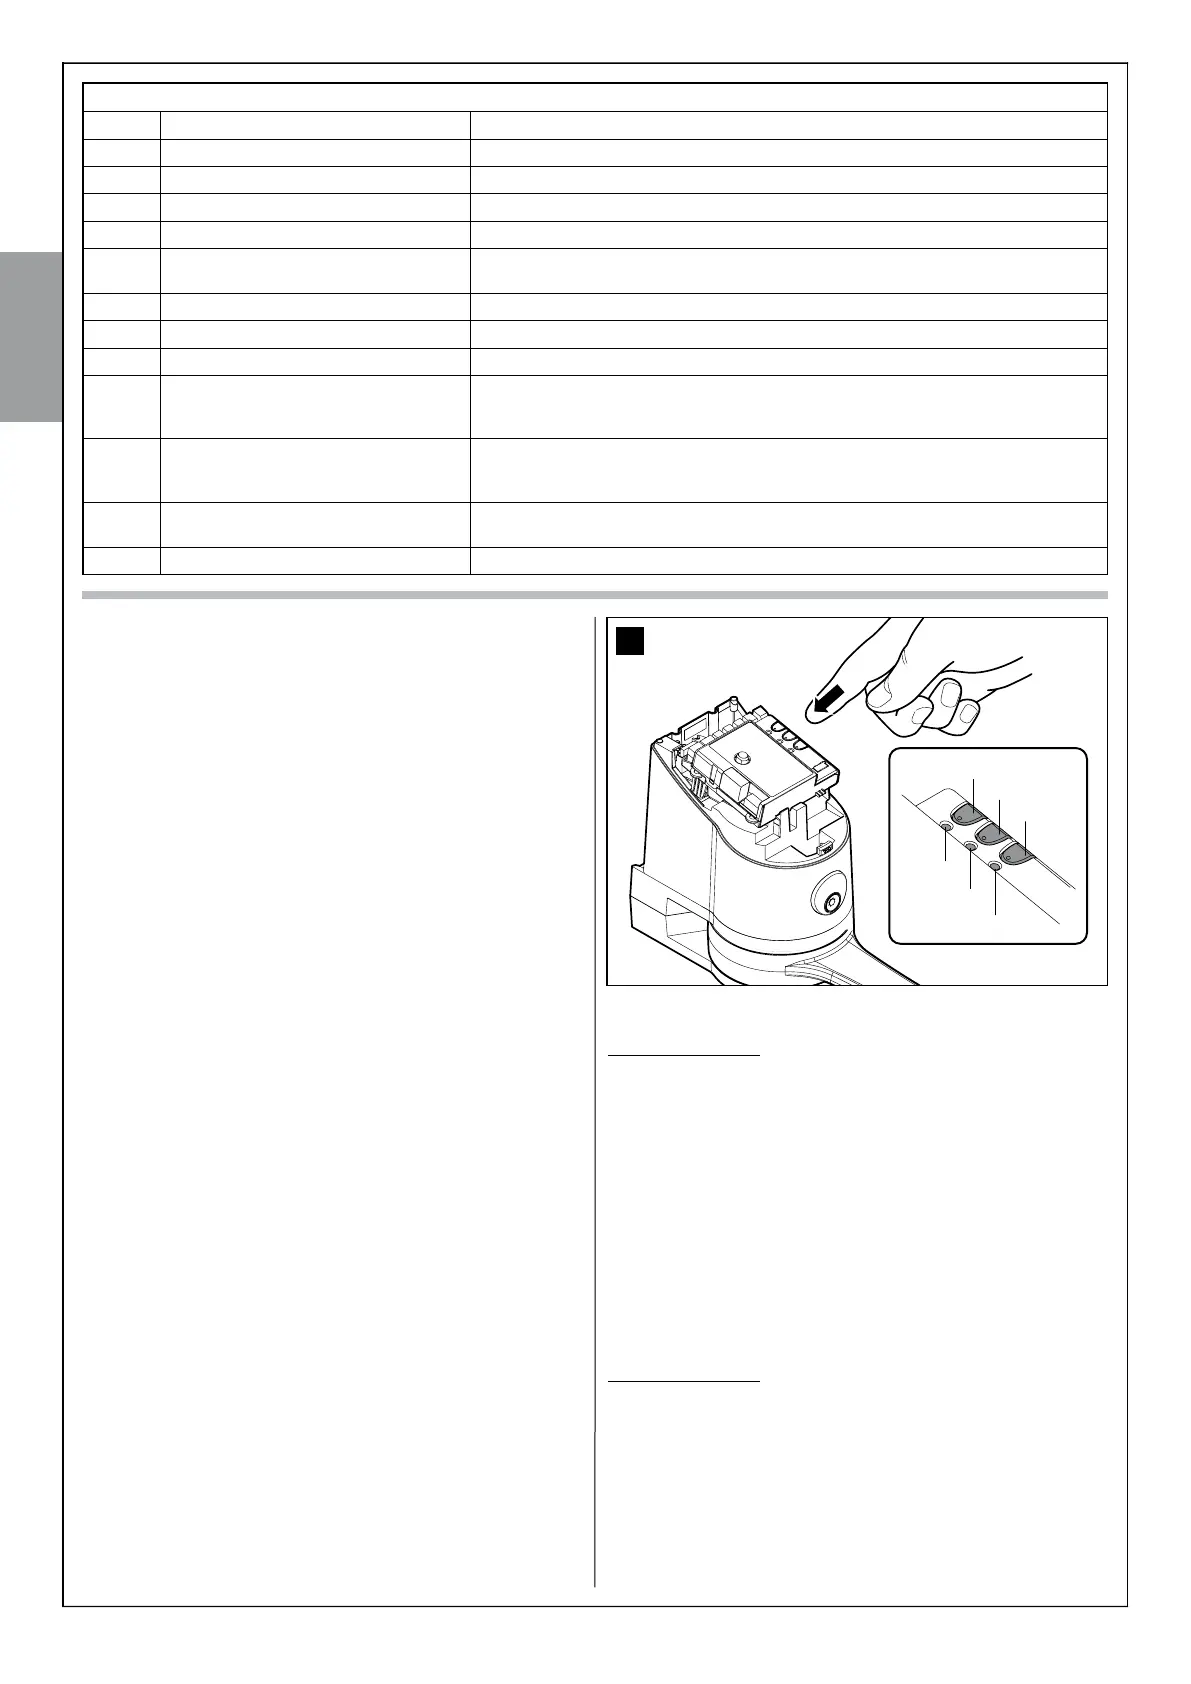
01. Press the P1 key (fig. 36) on the control unit and hold it down.
02. Wait until the led P1 lights up, within three seconds.
03. Press the key of the radio transmitter to be deleted for at least three
seconds. If cancellation was successful the led P1 will flash quick-
ly five times. If led P1 emits 1 slow flash, the deletion phase was
unsuccessful because the transmitter is not memorised.
04. If there are other transmitters to delete, keeping P1 depressed,
repeat step 3 within another 10 seconds; otherwise, the deletion
phase will stop automatically.
10.4.5 - Deleting all memorised radio transmitters
This operation deletes all memorised transmitters.
01. Press the P1 key (fig. 36) on the control unit and hold it down.
02. Wait for the P1 led to light up, then wait for it to switch off and then
wait for it to flash 3 times.
3 Release button P1 exactly during the third flash.
4 Wait for around 4s for the deletion phase to finish; during this time the
P1 led will flash very quickly.
If the procedure is successful, after a few moments the P1 led will flash
slowly 5 times.
10.4.6 - Digital selector switch DS100 programming and deletion
Mode 1 memorisation – with this memorisation, the commands that can
be sent by pressing the A, B or C buttons on the DS100 selector switch
are:
- key A - “Step by Step” command,
- key B - “Pedestrian Opening” command,
- key C - “Open Only”.
To memorise DS100:
01. Press P1 (g. 36) for at least 3 s. When the P1 led lights up, release
the key.
02. Within 10 s, type in the factory combination 11 (or the secret combi-
nation, if the factory combination has been changed), and press any
of the keys A, B or C on the DS100 selector switch for at least 3 s.
If the procedure was memorised correctly, the P1 led will ash 3
times.
03. If there are other selector switches to memorise, repeat step 2 within
another 10 seconds; otherwise, the memorisation will stop automati-
cally.
Mode 2 memorisation – with this memorisation, the commands that can
be sent by pressing the A, B or C buttons on the DS100 selector switch
are those listed in table 9.
In Mode 2 each key requires its own memorisation phase.
To memorise DS100:
01. Press P1 (g. 36) on the control unit, the same number of times as
your desired command, according to Table 14 (e.g. 3 times for the
“Open Only” command).
02.
Check that P1 led emits a number of quick ashes which are equal
to the selected command.
03. Within 10 s, type in the factory combination 11 (or the secret combi-
nation, if the factory combination has been changed), and press the
36
led P1
led P2
led P3
TABLE 9
1 time “Step-by-Step” command Commands the automation as described in table 3 (Step-by-Step function)
2 times “Pedestrian opening” command Causes partial opening of one or two leaves as described in table 3 (Pedestrian Opening)
3 times “Open only” command Causes the leaves to open (open - stop - open etc.)
4 times “Close only” command Causes the leaves to close (close - stop - close etc.)
5 times “Stop” command Halts the manoeuvre
6 times “Apartment block Step-by-Step”
command
The command has no effect on opening, when closing the command causes the move-
ment to reverse, that is, opens the leaves
7 times “High priority Step-by-Step” command Works also when the automation is locked
8 times “Pedestrian opening 2” command Causes partial opening of leaf M2, equal to halfway
9 times “Pedestrian opening 3” command Causes partial opening of both the leaves, equal to halfway
10 times “Open + lock automation” command Causes an opening manoeuvre and when this is complete, the automation is locked;
the control unit will not accept any command other than “High priority Step-by-Step” and
“Release” of the automation
11 times “Close + lock automation” command Causes a closure manoeuvre and when this is complete, the automation is locked; the con-
trol unit will not accept any command other than “High priority Step-by-Step” and “Release”
of the automation
12 times “Lock automation” command Causes a halt of the manoeuvre and locks the automation; the control unit will not accept
any command other than “High priority Step-by-Step” and “Release” of the automation
13 times Release automation” command Causes automation release and reset to normal operation
 Loading...