Do you have a question about the Nikon Coolpix S3600 and is the answer not in the manual?
Instructions on how to securely attach the camera strap to the device.
Guide to correctly inserting the battery and memory card into the camera.
Detailed steps for charging the camera's battery using the AC adapter and USB cable.
How to power on the camera and understand its auto-off function.
Initial camera setup for language selection and setting the camera's clock.
How to check battery status and available shots before shooting.
Guidance on holding the camera steady and composing shots for optimal results.
Steps for achieving focus and capturing an image using the shutter button.
How to view captured images on the camera's monitor.
Instructions for removing unwanted images from the camera.
Instructions for installing the Nikon ViewNX 2 software on your computer.
List of supported operating systems for installing ViewNX 2 software.
Methods for transferring images from the camera to a computer using USB or card readers.
How to view transferred images using the ViewNX 2 software.
Overview of adjusting flash, self-timer, macro, and exposure compensation settings.
How to choose and set various shooting modes for different photographic scenarios.
Instructions on how to record video clips with the camera.
Navigating and using the camera's menu system for settings adjustment.
Critical warnings and precautions for safe camera operation.
Safety instruction regarding the camera strap and children.
Precaution to prevent infants from accessing small parts.
Precautions for safe handling and use of the camera's battery.
Identification and description of the camera's external components and controls.
Step-by-step guide on how to insert the camera battery correctly.
Instructions on how to charge the camera's battery using the AC adapter and USB cable.
Guide to inserting a memory card into the camera, including precautions.
Initial camera setup for language selection and setting the camera's clock.
How to power on the camera and understanding the auto-off function.
How to choose and set different shooting modes for capturing images.
Guidance on holding the camera steady and composing the shot.
Detailed steps on how to focus and capture an image using the shutter button.
How to view captured images on the camera's monitor.
Instructions for removing unwanted images from the camera.
Automatic selection of optimal scene modes for easier photography.
Optimizing camera settings for specific scenes like portrait, landscape, or night.
Automatically captures images when a smile is detected, with skin softening option.
General shooting mode with adjustable settings for various conditions.
How to select and use different flash modes to match shooting conditions.
How to use the self-timer for delayed shooting to avoid camera shake.
Instructions for taking close-up images using the macro mode.
How to adjust overall image brightness for better exposure.
How the camera automatically detects and focuses on human faces.
Softening facial skin tones in images after detection of human faces.
Camera focuses on the main subject or closest subject when shutter is half-pressed.
Situations where the camera may not focus as expected.
Technique to lock focus on a subject for recomposing shots.
How to zoom in and out of captured images for detailed viewing.
Viewing captured images in thumbnail or calendar format.
Menu options available for image editing and management during playback.
Step-by-step guide on how to record video clips using the camera.
Menu options for configuring movie recording settings like resolution and autofocus.
How to play recorded video clips on the camera.
Accessing and configuring general camera settings via the setup menu.
Setting the camera's internal clock and time zone for accurate date/time stamping.
Adjusting display options like photo info, image review, and brightness.
How to imprint the shooting date and time directly onto images.
Setting vibration reduction for still images to minimize blur.
Reducing blur from subject movement or camera shake using motion detection.
Enabling or disabling the AF-assist illuminator for better focus in low light.
Enabling or disabling the digital zoom feature for magnification.
Configuring button sounds and shutter sound for camera operation.
Setting the automatic power-off timer to conserve battery life.
Instructions for formatting internal memory or memory cards to erase all data.
Changing the camera's display language for menus and messages.
Adjusting video output settings for TV connection (NTSC/PAL).
Setting camera to charge battery via USB connection to a computer.
Enabling detection of human eye blinks in captured images.
Configuring settings for uploading images wirelessly using an Eye-Fi card.
Restoring camera settings to their default values.
Overview of methods for connecting the camera to external devices.
Installing and using Nikon's software for image management and editing.
Step-by-step guide on transferring images from the camera to a computer.
How to view transferred images using the ViewNX 2 software.
Guide to creating panoramic images by stitching multiple shots.
Organizing images into albums as favorite pictures for easy playback.
Automatically sorting images into categories like portraits and landscapes.
Viewing captured images organized by date.
Options for editing still images directly on the camera.
Applying various visual effects to images to alter their hue or mood.
Improving image quality by enhancing contrast and saturation.
Adjusting image brightness and contrast, particularly in dark areas.
Removing red-eye effect from images captured with flash.
Applying retouching effects to human faces in images.
Creating a smaller version of an image for easier sharing or storage.
Selecting a portion of an image and creating a new cropped copy.
Steps for viewing images and movies on a television.
How to print images directly from the camera to a PictBridge-compatible printer.
Detailed explanation of shooting menu options available in Auto mode.
Adjusting white balance to ensure accurate color reproduction under different lighting.
How to capture multiple images consecutively using different shooting modes.
Adjusting camera sensitivity to light for better performance in various lighting conditions.
Changing color tones of images for artistic effects or natural color reproduction.
How the camera selects the focus area for autofocus operation.
Selecting autofocus behavior for still images and movies.
Menu options for smart portrait mode, including skin softening and smile timer.
Options for managing images during playback, like print order and slide shows.
Menu options for configuring movie recording settings like resolution and autofocus.
Accessing and configuring general camera settings via the setup menu.
Error message indicating overheating and automatic shutdown.
Error message when the memory card's write-protect switch is locked.
Error indicating an issue with the memory card's compatibility or condition.
Prompt to format the memory card if it's not recognized or formatted correctly.
Error message when the Eye-Fi card's write-protect switch is locked.
Guidelines for maintaining and storing the camera and its accessories.
Solutions for common problems encountered while operating the camera.
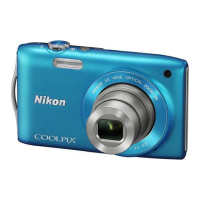
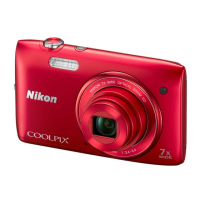
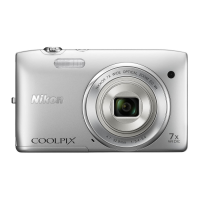
Technical details and specifications of the Nikon COOLPIX S3600 digital camera.
List of memory cards tested and approved for use with the camera.
| Sensor Resolution | 20.1 MP |
|---|---|
| Optical Zoom | 8x |
| Digital Zoom | 4x |
| Type | Compact |
| Image Sensor Size | 1/2.3 inch |
| Aperture | f/3.7-6.6 |
| Video Recording | Yes |
| LCD Screen Size | 2.7 inches |
| Video Resolution | 720p |
| Battery Type | Lithium-ion |
| Focal Length | 4.5-36.0 mm |
| Weight | 125 g (with battery and memory card) |