VBA10501-R.3657.A
- D1 ・ -
Precautions for disassembly/(re)assembly
Notes
: ①
In disassembly/(re)assembly, be sure to use conductive mat (J5033) and wrist strap (J5033-5), in order to
protect electric parts from static electricity.
②
Before disassmbling, be sure to remove batteries, AC power cord, and battery for clock (CR1616).
③
In disassembling, be sure to memorize the processing state of wires and FPC, screws to be xed and their
types, etc.
④
The low-pass lter of the image PCB is easily damaged. Handle it very carefully.
⑤
In the chapter of Disassembly, sometimes a large assembly unit is removed. In case such a unit is further
disassembled , refer to the exploded technical drawings.
⑥
In Disassembly/(re)assembly chapters, the dip-proof sponge is not mentined. In case parts are replaced, be
sure to attach the dip-proof sponge by referring to the exploded technical drawings.
⑦ All wires are special parts (supporting UL), so be sure to use specied wires.
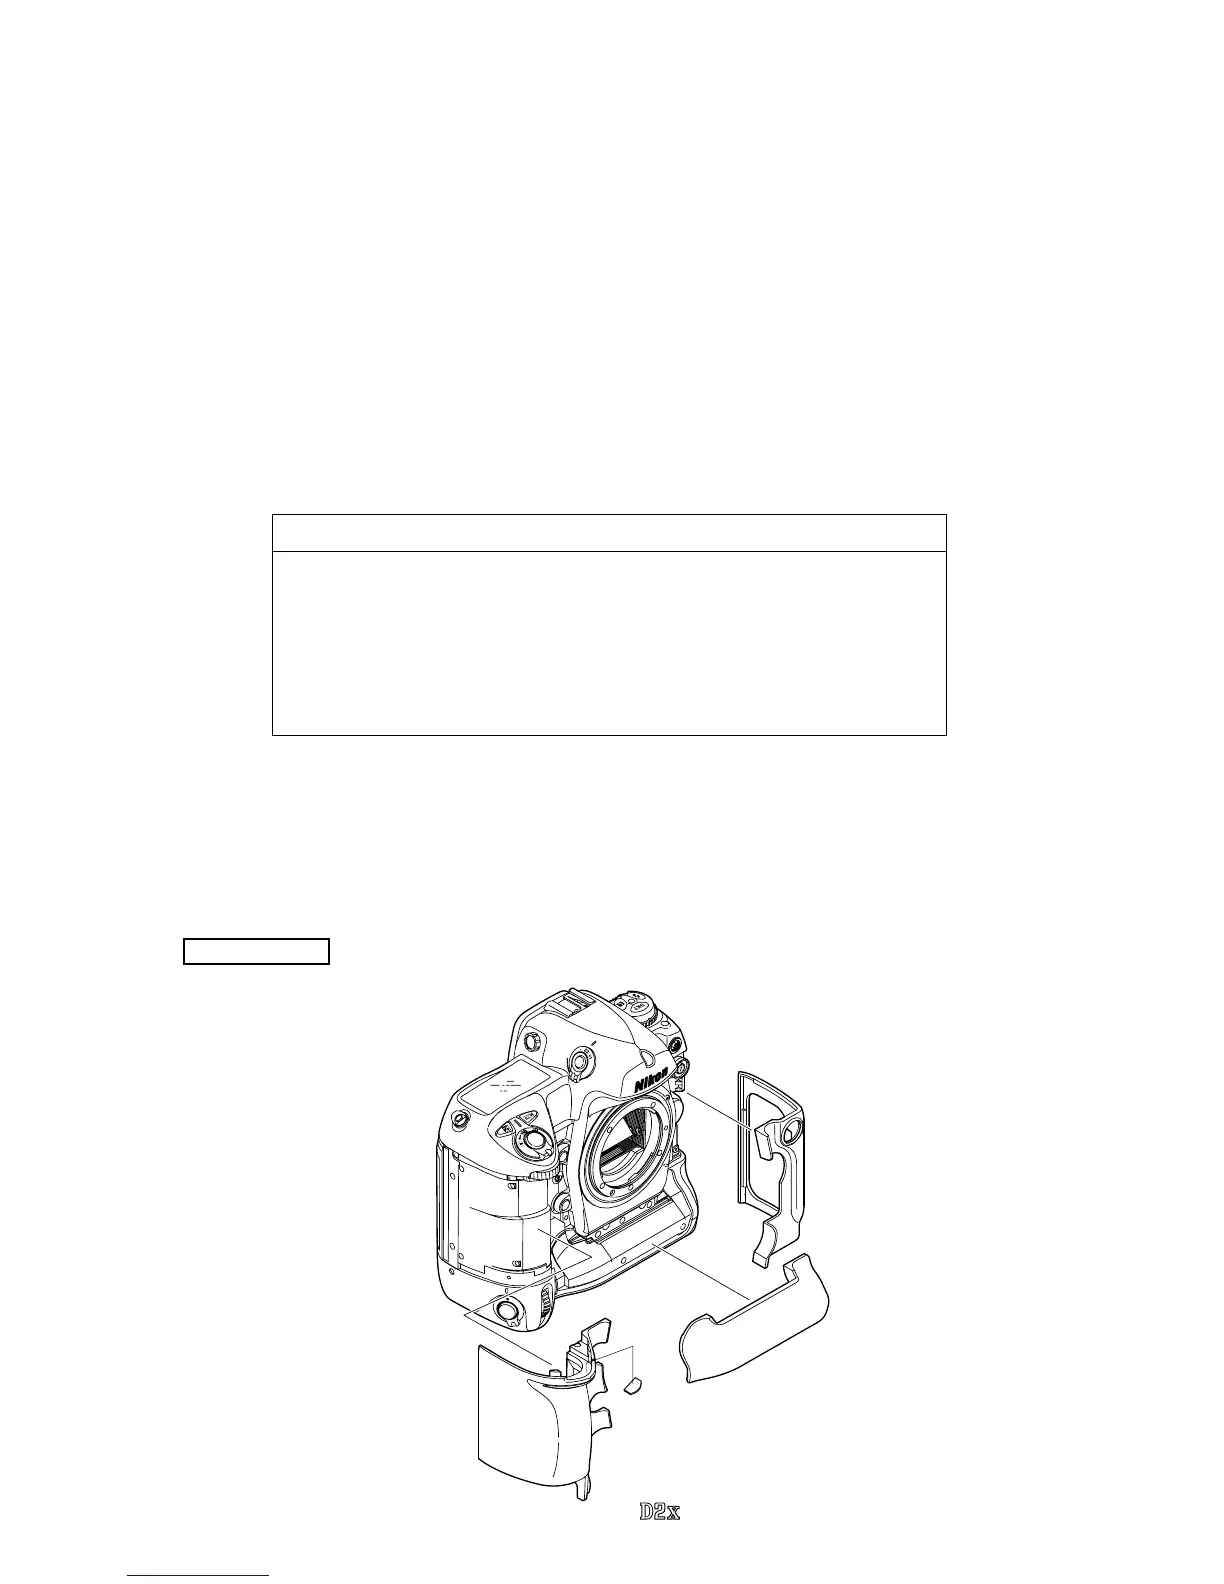
External rubber
#B60-1
1. External units and Imaging-related PCBs
Disassembly
・Lead-free solder is used for this product.
・For soldering work, the special solder and soldering iron are required.
・Do NOT mix up lead-free solder with traditional solder.
・Use the special soldering iron respectively for lead-free solder and lead solder. They
cannot be used in common.
Points to notice for Lead-free solder products
#B66
#B61
・
Remove the grip rubber (#B60-1), apron lower rubber (#B66), and rubber at the lm rewind side (#B61).
Note 1: Before disassembling a camera, of which the main FPC should be replaced, be sure to read and note down the
adjustment value of the environment light sensor by adjustment software for the camera unit.
If the value cannot be
read out from the camera, replace the top cover unit, too. (Refer to Page A28 for the details when replaced.)
Note 2: When "Seprating Front and Rear bodies", "Disassembling Image PCB", and "Disassembling Bayonet", be sure to perform
"Reset of AF defocus compensation amount" by D2X adjustment software after reassembly.
#729