3
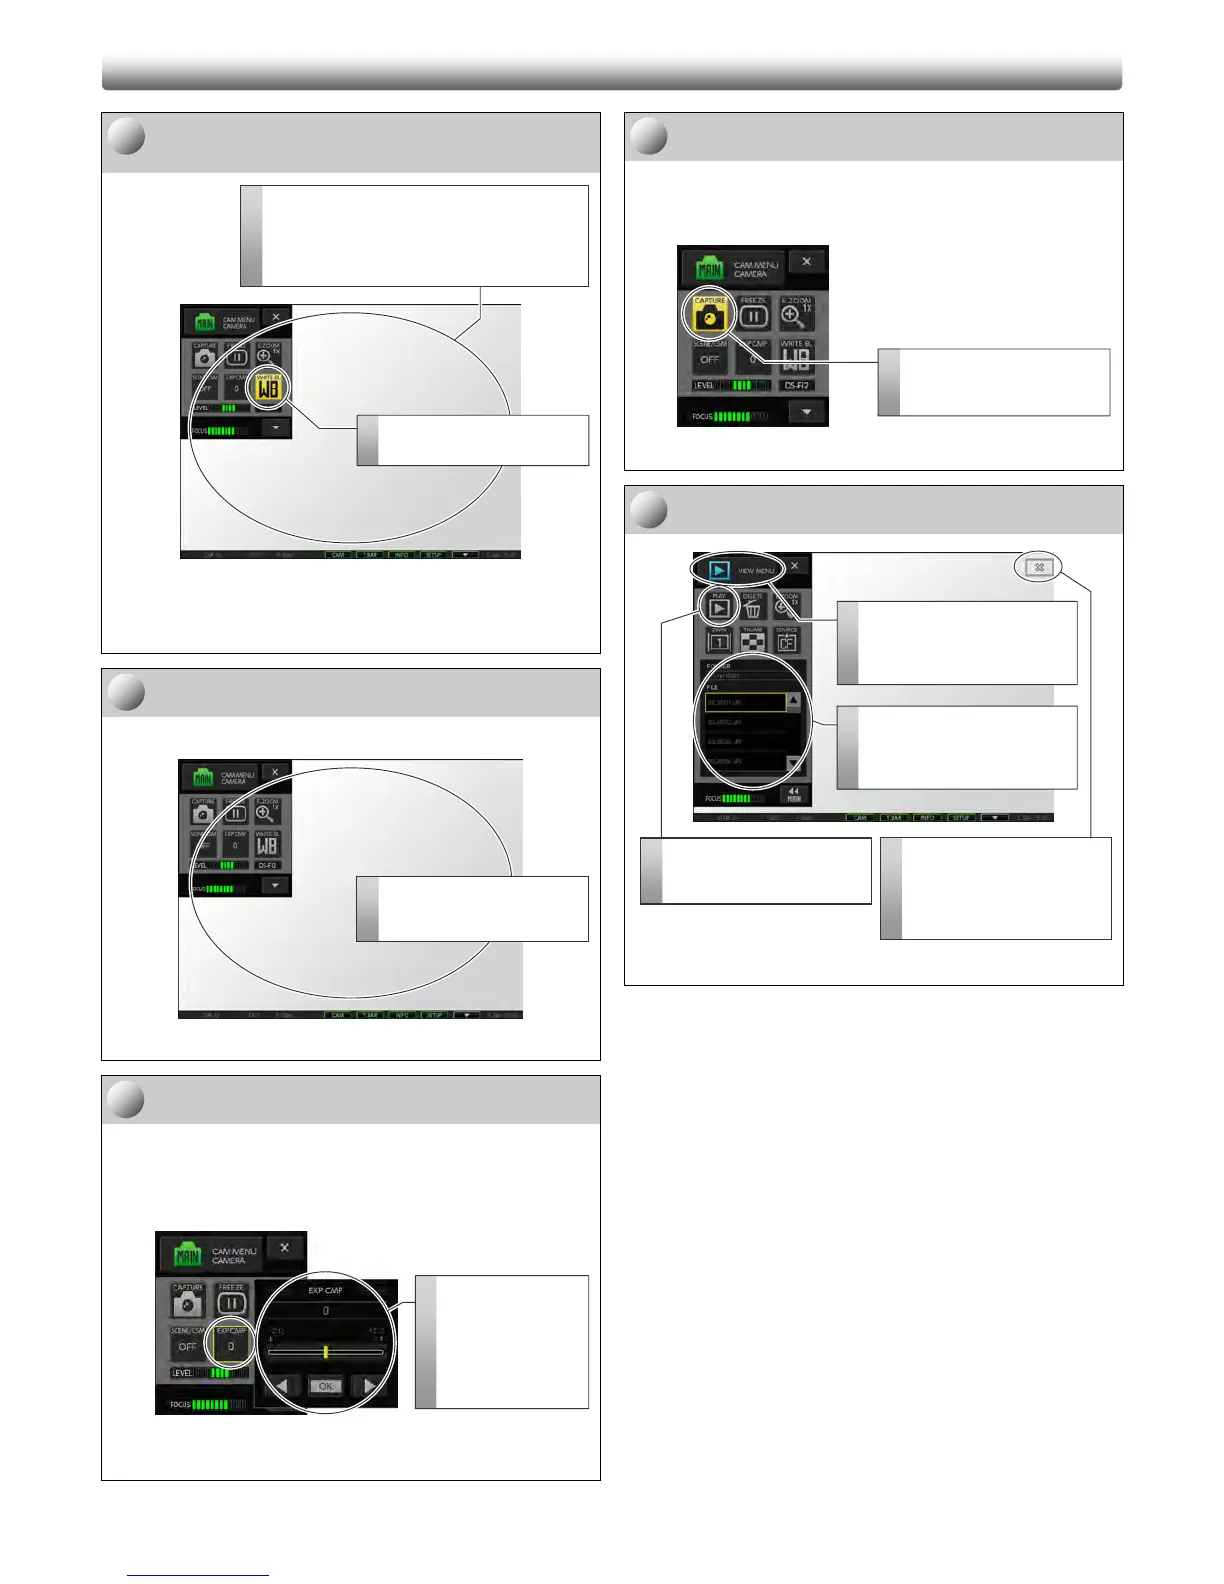
Set the white balance.
(for a color DS camera head only)
[CAMERA MENU] screen (same appearance for all menus)
Note: When the white balance setting is done, a “WB
COMPLETED” message is displayed.
Check the subject with the live image.
Adjust the layout and focus.
[CAMERA MENU] screen (same appearance for all menus)
Perform exposure compensation.
To adjust the brightness of the subject, use the exposure
compensation control shown by pressing the [EXP CMP] button.
Exposure can be controlled within the range of ±2.0 and by 1/3.
Press the [OK] button to finish the setting.
Setting the exposure compensation
(on any [CAMERA MENU] screen)
Capture an image.
Press the [CAPTURE] button to save the displayed image.
You hear a capture sound when capturing an image. When the
image file is saved, “SAVED 1/1” is displayed on the task bar.
[CAMERA MENU] screen (same appearance for all menus)
View the saved image.
[VIEW MENU] screen
B
B
a
a
s
s
i
i
c
c
C
C
a
a
p
p
t
t
u
u
r
r
e
e
O
O
p
p
e
e
r
r
a
a
t
t
i
i
o
o
n
n
<
<
c
c
o
o
n
n
t
t
d
d
.
.
>
>
6
4
1
Prepare an evenly white subject such as a
sheet of paper.
Prepare an evenly white subject such as a
sheet of paper, and place it so that the entire
photographing scope is covered by the subject.
2
Set the white balance.
Press the [White BL] button.
7
8
Capture an image.
Press the [CAPTURE] button
to save the image.
3
4
2
Select the desired image file.
Select a file you want to view
from the list of saved image
files.
1
Open the [VIEW MENU] screen.
Press the menu selection
button to open the submenu
and select [VIEW].
Check the subject.
View the live image and
check the subject.
5
iew the image.
Press the [PLAY] button to
view the selected image.
Stop image viewing.
Press the [X] button on the
top right to stop viewing the
selected image and return to
the live image.
 Loading...