3
INSTALLATION
CONNECTIONS
Refer to figures 1 through 3 on the following pages.
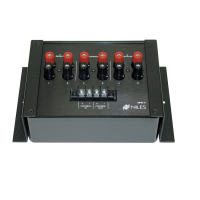
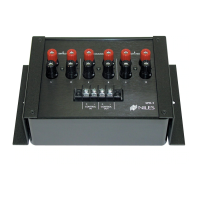
Strip approximately 1/4" –
NO MORE – of insulation from each wire. Twist the free ends of each
wire tightly together and insert them into the appropriate holes in the binding posts. Secure by
turning the binding posts until they are hand-tight. BE SURE TO OBSERVE PROPER PHASING
–
connect the positive terminals of the amplifier(s) and speakers to the positive terminals of the
SPK-1 and connect the negative terminals of the amplifier(s) and speakers to the negative
terminals of the SPK-1.
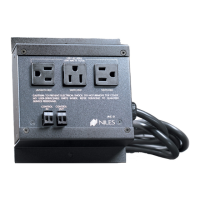
Connect the 12 volt DC source which will activate the SPK-1 to the “CONTROL IN” connector. An
optional DC adapter is available from Niles Audio. BE SURE TO OBSERVE PROPER POLARITY WHEN
MAKING THIS CONNECTION
.
Any other switching devices to be activated at the same time may be “daisy chained” together by
using the “
CONTROL OUT” connector.
 Loading...