USER MANUAL
ENGLISH
BA 451 - BA 451D - BA 531 - BA 531D 909 6748 000(3)2010-03 A
13
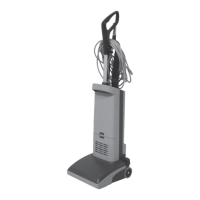
BATTERY INSTALLATION AND BATTERY TYPE SETTING (WET OR GEL)
Set the electronic board of the machine and of the battery charger (if equipped) according to the type of batteries installed (WET or
GEL) as shown below:
Machine setting (only for BA 451 and BA 531)
Press the switch (71) or (73) and pay attention to the following in the very fi rst seconds of machine operation:1.
If the green warning light (81a) is fl ashing, the machine is set to GEL.•
If the red warning light (81c) is fl ashing, the machine is set to WET.•
If the setting is to be changed, perform the following procedure.2.
Turn off the machine by pressing the switch (71) and/or (73).3.
Press and hold the switches (71) and (73) at the same time.4.
Release the switches (71) and (73) at least 8 seconds after starting the machine.5.
Within 3 seconds, press the switch (73) again for a few seconds and check that the warning light for the required setting is 6.
fl ashing (as shown in step 1).
Machine setting (only for BA 451D and BA 531D)
Turn the ignition key (80) to “I” and pay attention to the following in the very fi rst seconds of machine operation:1.
If the green warning light (81a) is fl ashing, the machine is set to GEL.•
If the red warning light (81c) is fl ashing, the machine is set to WET.•
If the setting is to be changed, perform the following procedure.2.
Turn off the machine by turning the ignition key (80) to “0”.3.
Press and hold the switches (71) and (73) at the same time, then turn the ignition key (80) to “I”.4.
Release the switches (71) and (73) at least 8 seconds after starting the machine.5.
Within 3 seconds, press the switch (73) again for a few seconds and check that the warning light for the required setting is 6.
fl ashing (as shown in step 1).
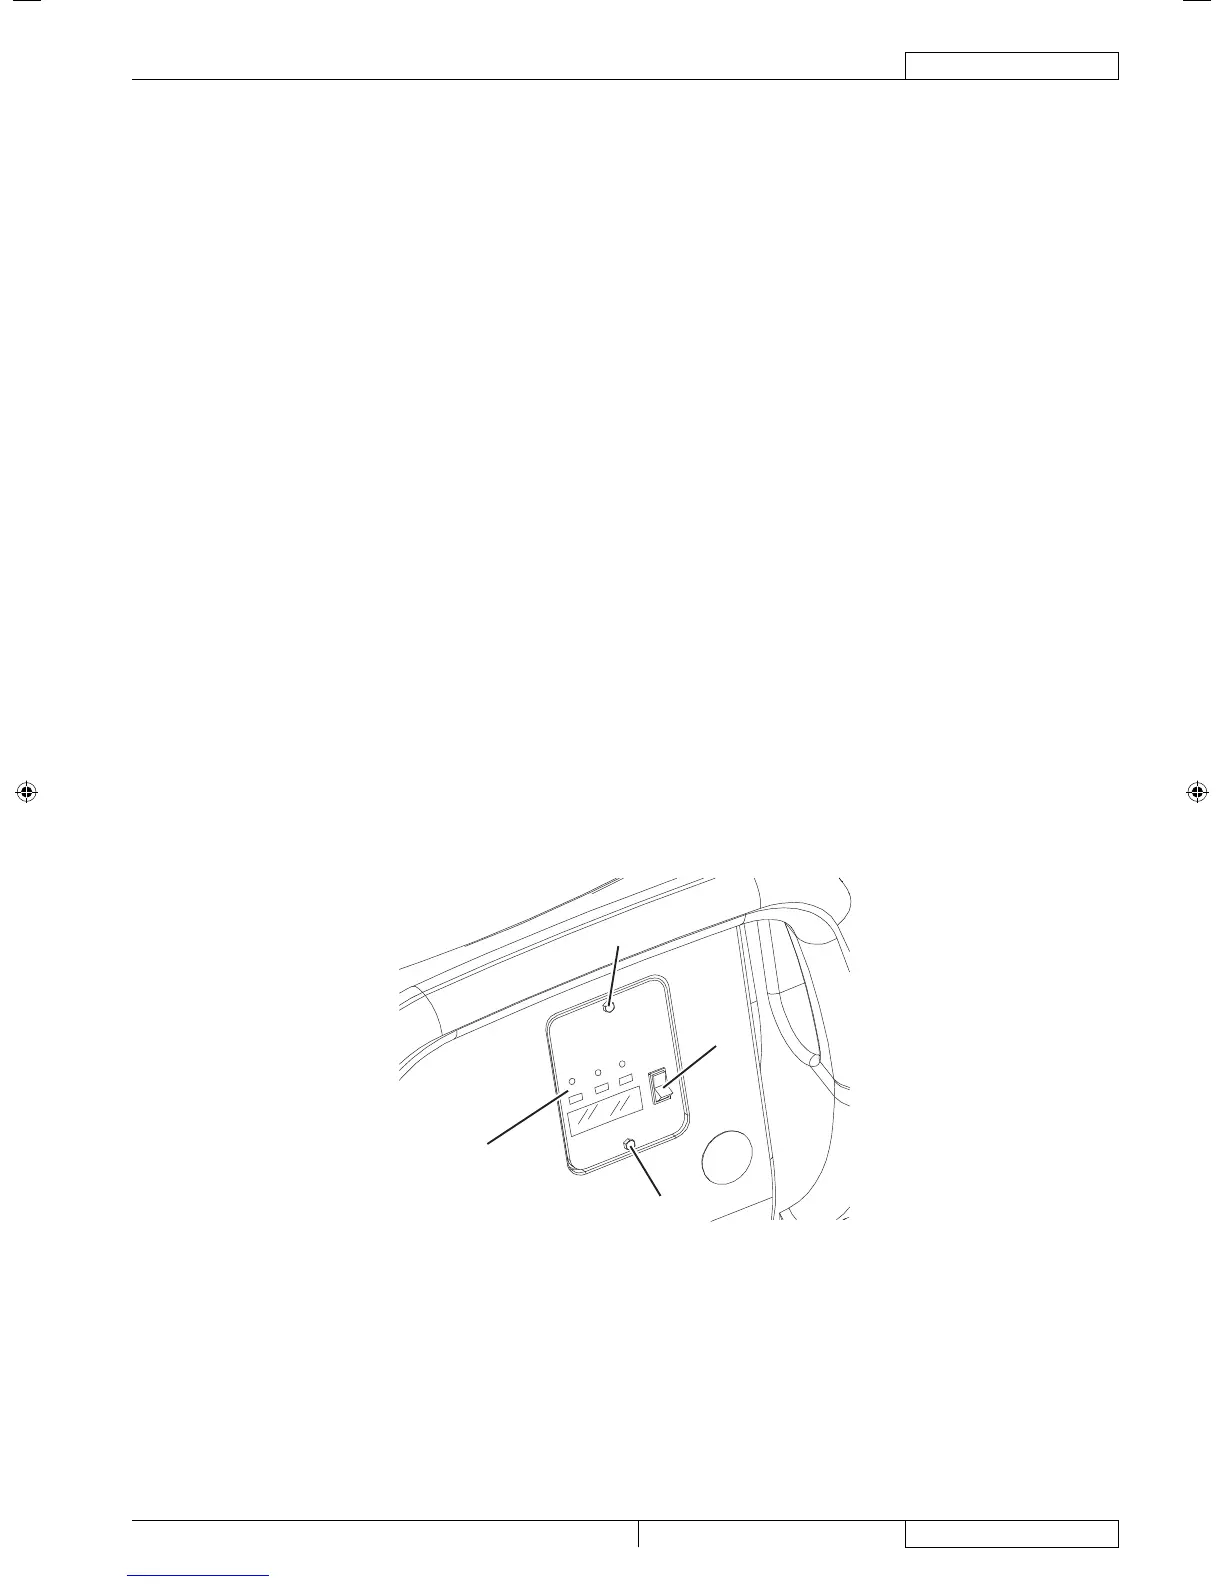
Battery charger setting (for machines with on-board battery charger)
Remove the battery charger data inspection window screws (A, Fig. 1).1.
Remove the window (B).2.
Turn the battery charger selector (C) to WET for lead batteries, or to GEL for gel batteries.3.
Install the window (B) and tighten the screws (A).4.
Battery installation
Open the cover (22) and check that the recovery tank (21) is empty, otherwise empty it with the drain hose (16).1.
Grasp the handle (41) and carefully lift the tank (40).2.
Install the batteries.3.
Battery charging
Charge the batteries (see the procedure in Maintenance chapter).1.
C
A
A
B
Figure 1
S311333
909 6748 000(4)2010-03 A.indb 13909 6748 000(4)2010-03 A.indb 13 04/03/2010 13.56.0904/03/2010 13.56.09
 Loading...