Nintendo GameCube Console Memory Battery Replacement Guide Page 2 of 10
Soldering Techniques:
In order to solder and unsolder correctly you will need a soldering iron, solder and soldering braid. Once
you have these items you can precede forward. For the duration of this project it is not recommend that
you use a cold heat or any other instantaneous heating soldering gun, since these guns use an electrical
current to melt the solder. Passing a strong electrical current through your games is not recommended
and as such should be avoided. We recommend that you use a typical soldering gun, the type that you
have to plug in and wait to heat up. In addition it is recommended that you set your soldering iron to
30watts for the duration of this project.
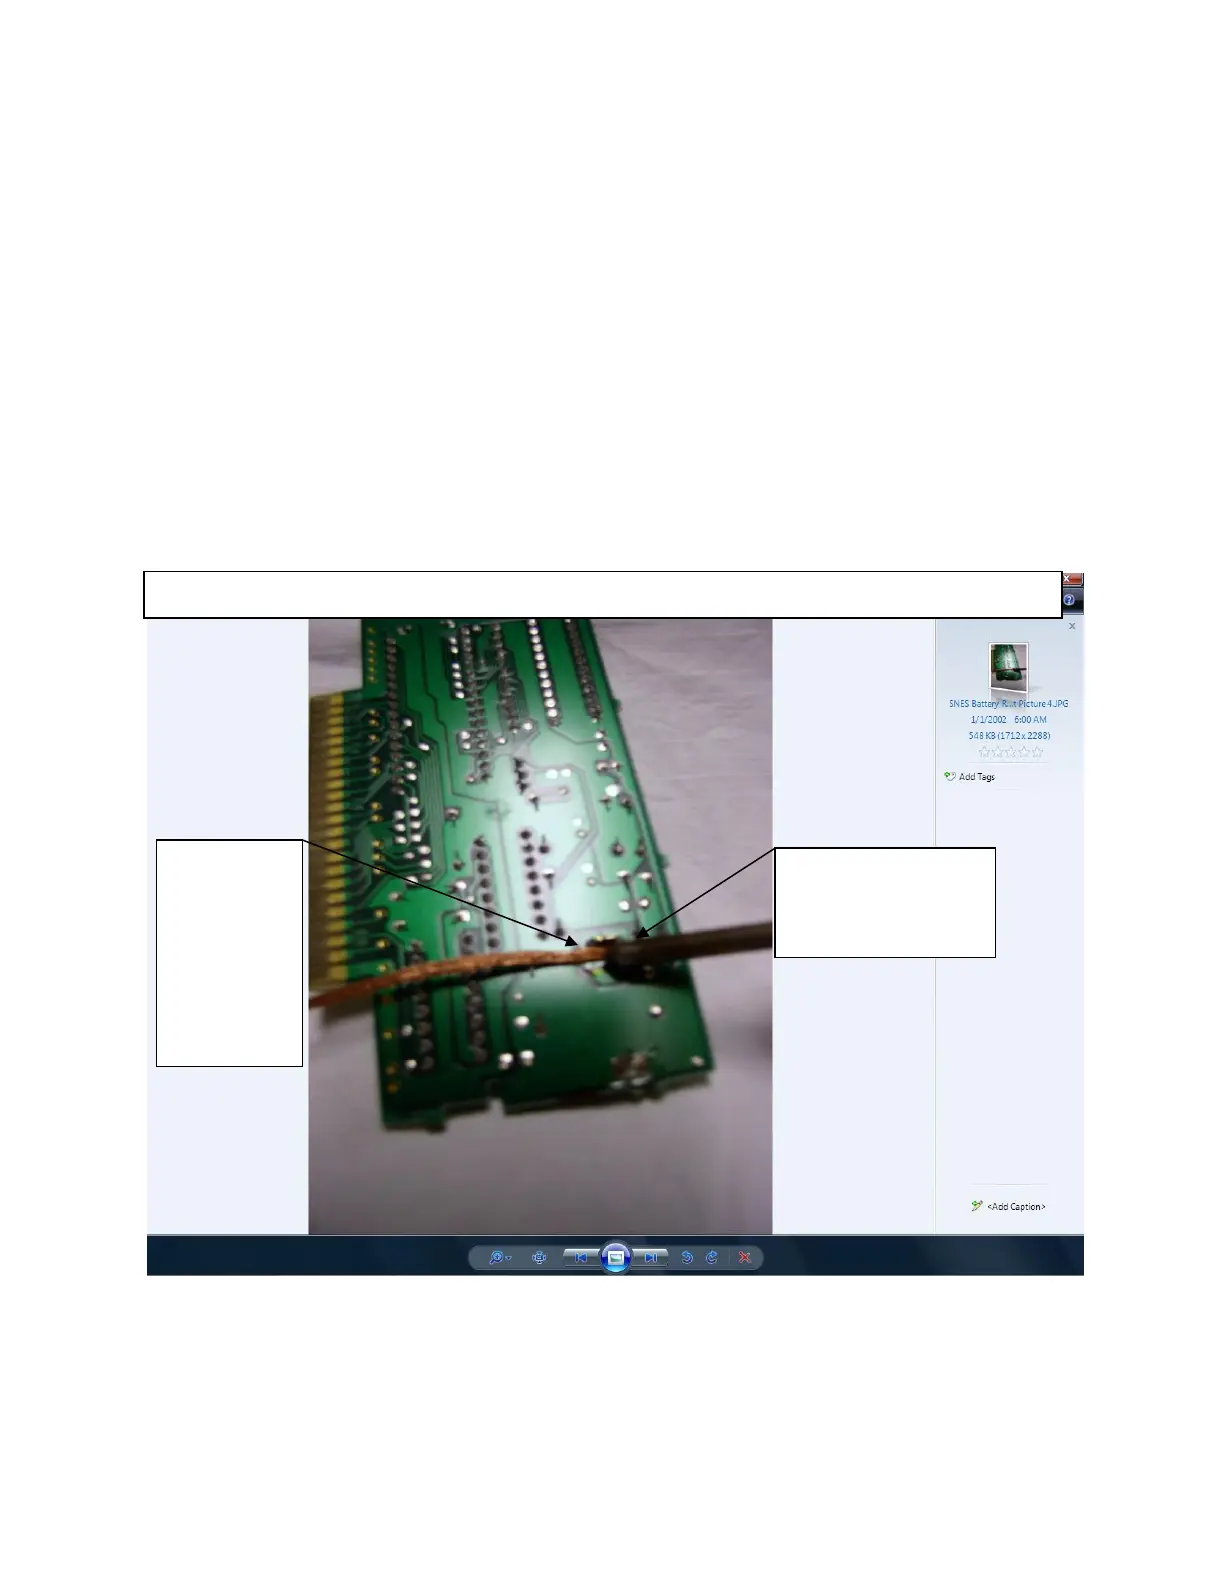
Unsoldering-
Correctly unsoldering a joint is rather easy once you get the hang of it. In order to unsolder a joint place
soldering braid over the solder you wish to remove and then place the soldering iron over the soldering
braid. The soldering iron will heat the braid and in turn the solder will liquefy, which will be sucked up by
the braid. Please see picture one
Picture Introduction
Although it might take a little while to completely remove all of the solder, patience and persistence will
pay off in this case. Every 10-15 seconds remove the soldering braid and check to see if the solder have
been fully removed. Take note to notice that the solder is accumulating on the soldering braid as it is
This is the inside of a Super Nintendo game cartridge.
The
soldering
braid is
placed over
the solder
you want to
remove
The soldering iron is
placed over the
soldering braid