Nokia 6720 classic RM-424 / RM-564
Service Manual Level 1&2
14 Confidential • Copyright © 2009 NOKIA • All rights reserved Version 1.0 ISSUE 1
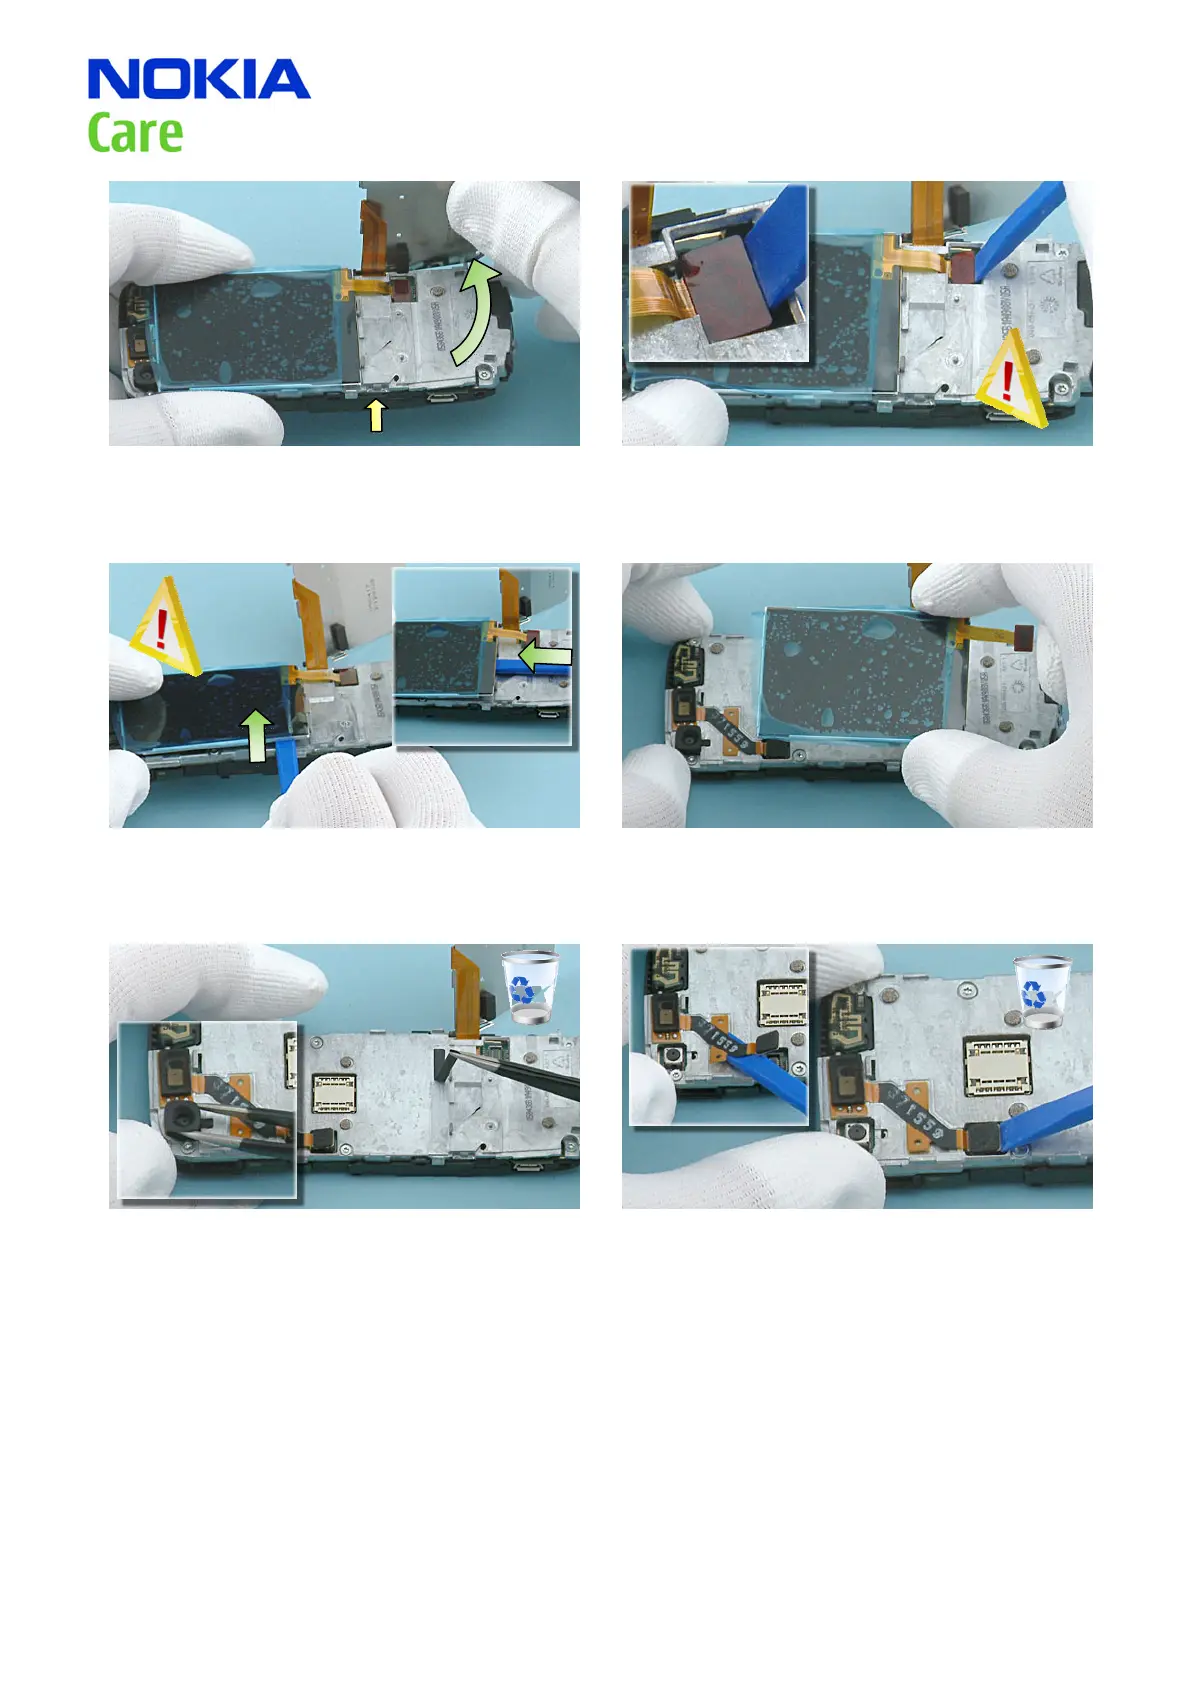
13) The clip located on the left side of the UI-FLEX
ASSEMBLY can be simply released by lifting the UI-
FLEX ASSEMBLY carefully up.
14) Use the SS-93 to open the LCD connector. Be
careful not to damage the connector!
15) Release the LCD by pushing the SS-93 carefully in
to shown place. If the LCD starts to bend, help from
the middle of the LCD as shown in the small picture.
16) Remove the LCD. If there are some adhesive
stains on the back of the LCD remove them with the
SS-93.
17) Use the tweezers to remove the FRONT CAMERA
GASKET and the DISPLAY ADHESIVE TAPE. The DISPLAY
ADHESIVE TAPE cannot be used again. Discard it.
18) Open the EANC TOP FLEX ASSY connector with the
SS-93. The EANC TOP FLEX ASSY is only removed when
it is broken. In that case do not use it again. Discard
it. Replace the new EANC TOP FLEX ASSY immediately.
 Loading...