17
CONFIDENTIAL
Copyright © 2007 NOKIA. All rights reserved.
E90 RA-6
Page (51) ISSUE 1
Service Manual Level 1&2
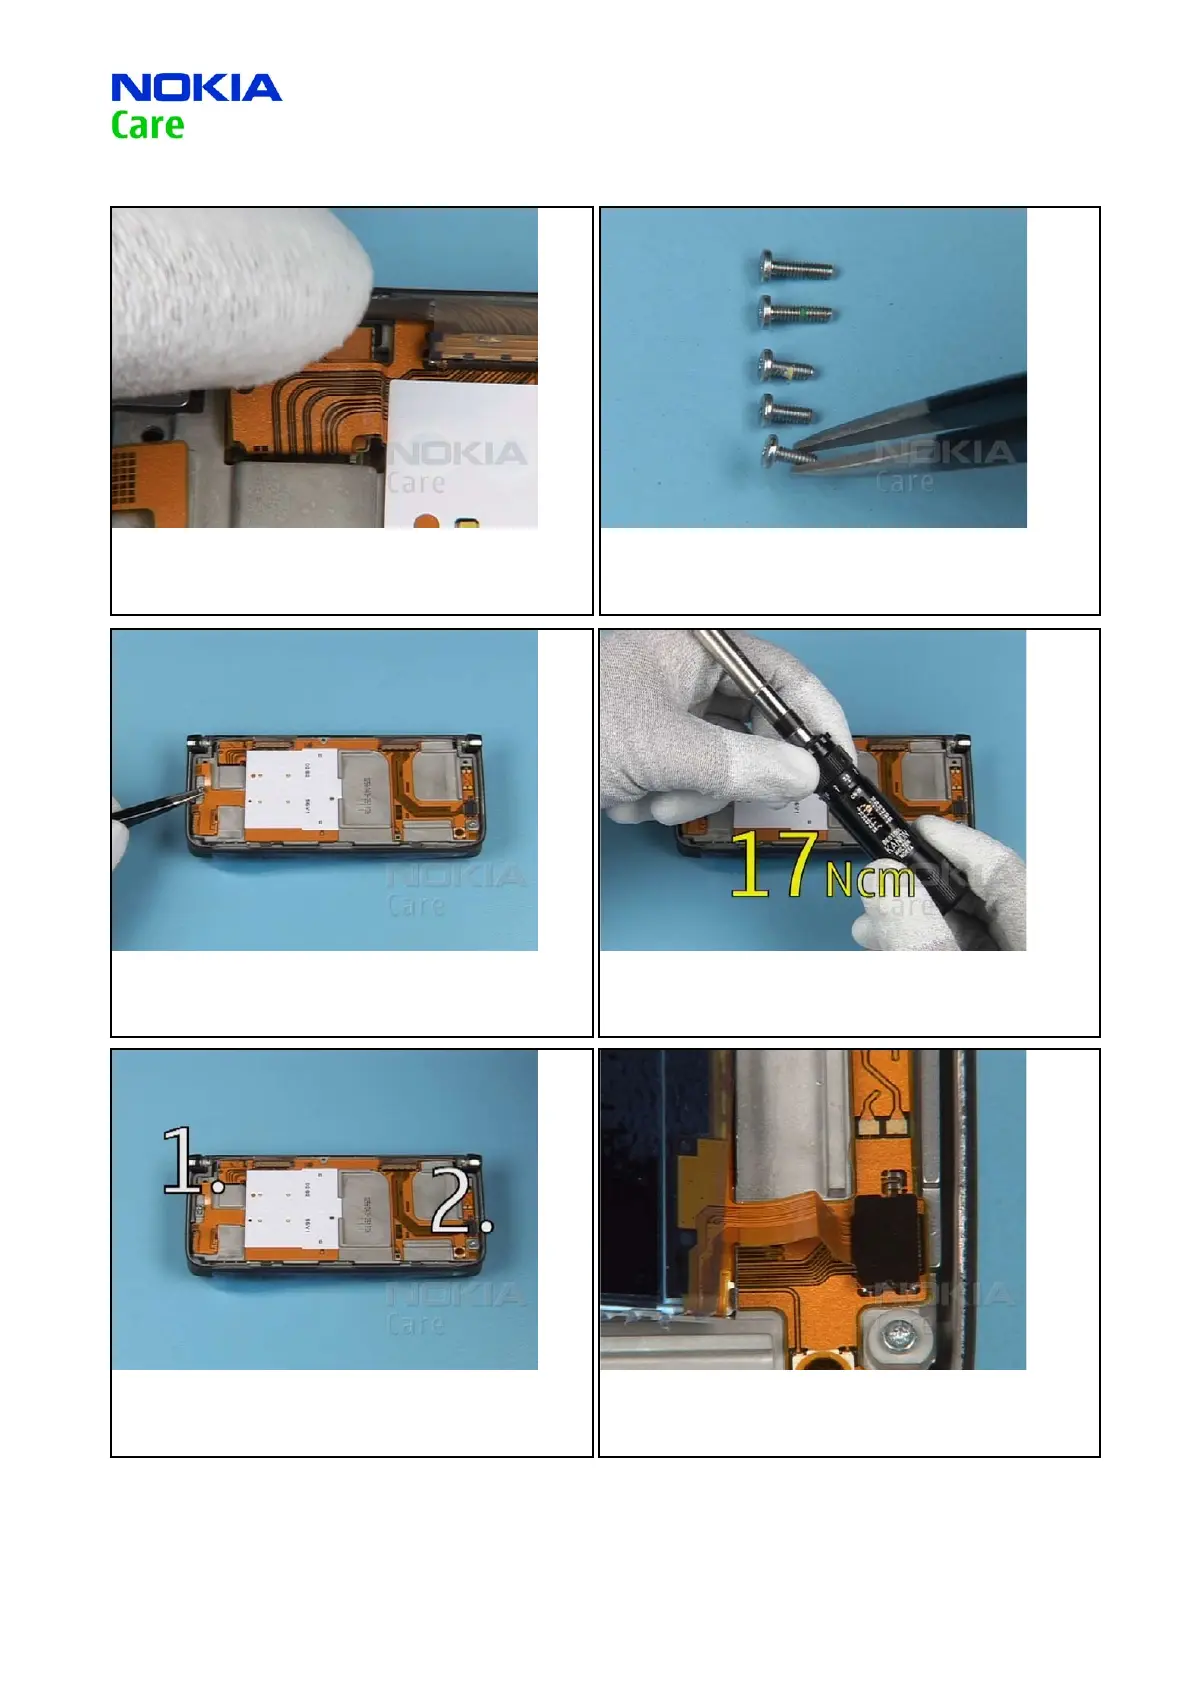
7. Close the LCD connector.
8. Use the short ones of the screws.
9. Insert the two screws.
10. Set the correct torque.
11. Apply the torque to the screws in the shown order.
12. Place the LCD AM 240x320. Close the ex foil connector.
Download free service manual at http://ponsel1.blogspot.com