N79 RM-348 / RM-349 / RM-350
Service Manual Level 1&2
ISSUE 1
Confidential
15
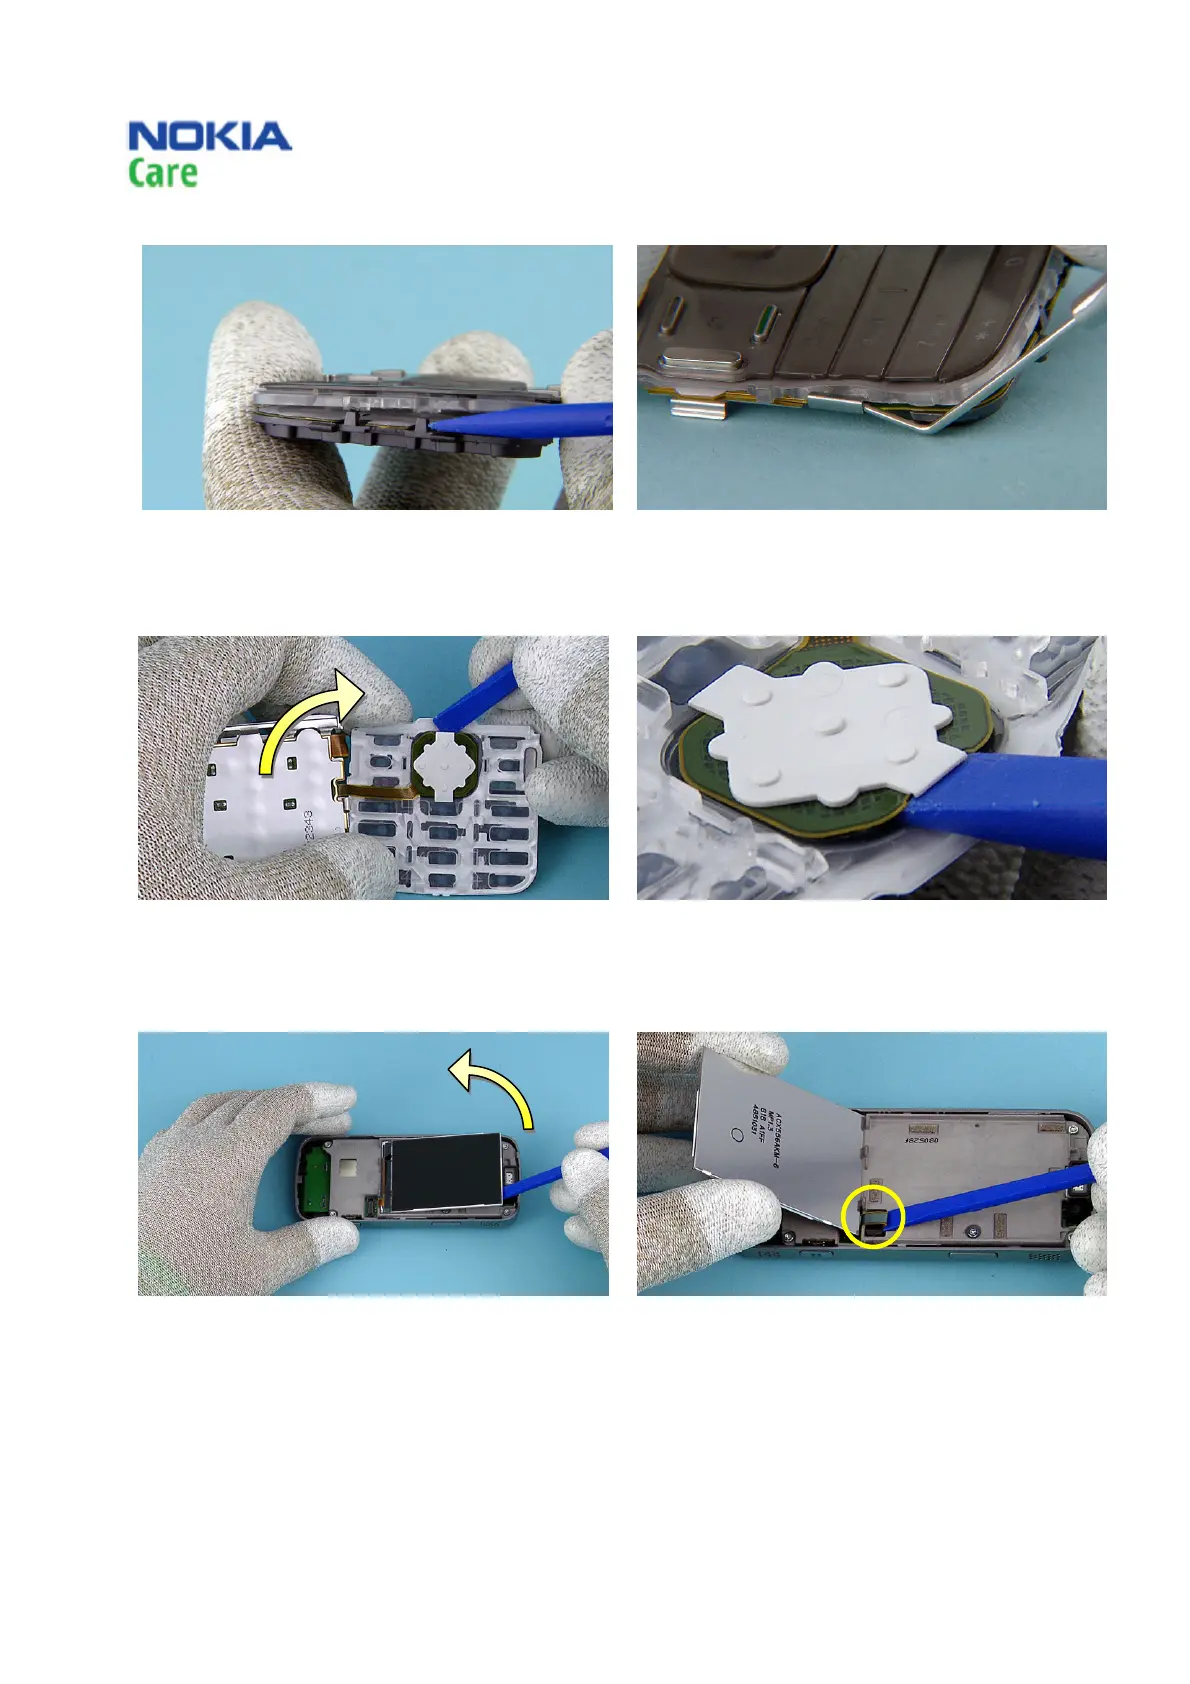
19) Use the SS-93 to release the two clips on the
bottom side of the UI ASSEMBLY.
20) Use the dental tool to open the small clip on the
left side of the UI ASSEMBLY.
21) Turn the KEYMAT ASSY as shown. Insert the tip of
the SS-93 under the UI ASSEMBLY connector.
22) The UI ASSEMBLY connector is glued to the KEYMAT
ASSY. Slowly lift the connector and separate the
KEYMAT ASSY from the UI ASSEMBLY.
23) Lift up the LCD. 24) Open the LCD connector and remove the LCD.
Copyright @ 2008 NOKIA. All rights reserved

 Loading...