Nokia X100 User Guide
Some of the accessories mentioned in this user guide, such as charger, headset, or data cable,
may be sold separately.
*Google Assistant is not available in certain languages and countries. Where not
available, Google Assistant is replaced by Google Search. Check availability at
https://support.google.com/assistant.
Parts and connectors, magnetism
Do not connect to products that create an output signal, as this may damage the device. Do
not connect any voltage source to the audio connector. If you connect an external device
or headset, other than those approved for use with this device, to the audio connector, pay
special attention to volume levels.
Parts of the device are magnetic. Metallic materials may be attracted to the device. Do not
place credit cards or other magnetic stripe cards near the device for extended periods of time,
since the cards may be damaged.
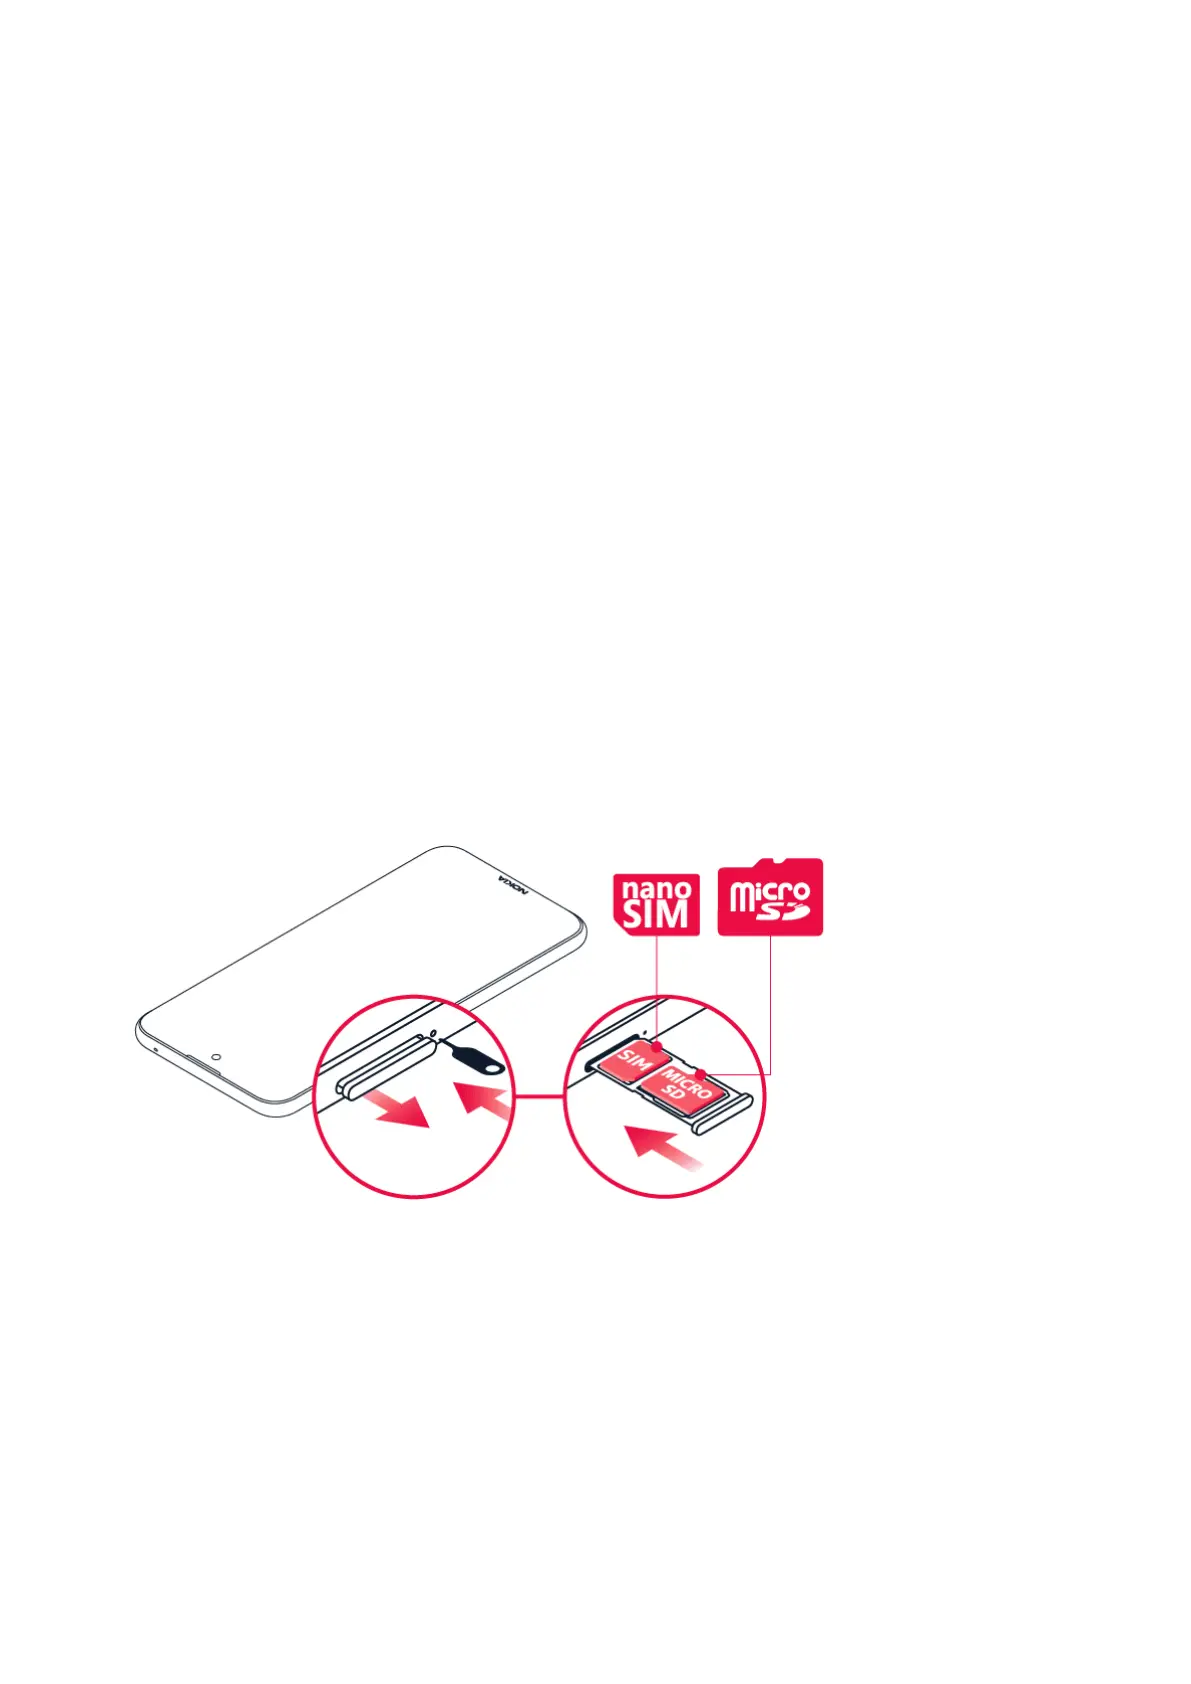
INSERT THE SIM AND MEMORY CARDS
Insert the cards
1. Open the SIM card tray: push the tray opener pin in the tray hole and slide the tray out.
2. Put the nano-SIM in the SIM slot on the tray with the contact area face down.
3. If you have a memory card, put it in the memory card slot.
4. Slide the tray back in.
© 2022 HMD Global Oy. All rights reserved. 7
 Loading...