EasyManua.ls Logo

NOMA CTI1518409 - User Manual

NOMA CTI1518409
3 pages
Print Icon
To Next Page IconTo Next Page
Loading...
7' PRE-LIT MICROBRITE SNOW DUSTED PINE
model no. CTI1518409 | www.noma.com
3. Each tree section is numbered with a sticker. Please identify all sections before assembling.
4. Assemble the tree from the bottom to the top. Start with the bottom section. Remove the protective cap before inserting it into the
already pre-assembled stand. Before proceeding to the next step, make sure the pole is firmly inserted and secured into the stand.
5. Continue by inserting the upper tree section(s) into the lower section(s) until inserting the tree top.
1. Before you start to assemble your tree, choose an appropriate location near a wall outlet. Do not plug the adaptor into the wall
outlet until all of the steps below are completed.
2. First assemble the tree stand and place on a level surface. (See Fig. A)
Carefully follow the instructions below to quickly and easily set up your tree.
Tree top
Section 2
Section 1
Fig. B - Tree and Light Assembly
TREE ASSEMBLY INSTRUCTIONS
Fig. A - Tree Stand Assembly
Click
Swivel the legs of the stand until they snap
into position. The legs should be evenly
spaced once this step is complete. Place the
tree stand on a level surface.
To close the stand, press the metal button
and fold the legs together.
Instruction Manual
For indoor use only
Retain carton for storage purposes
IMPORTANT: Please read this manual carefully before assembly and save it for reference.
Control box
Adaptor
To Be Plugged
Into Wall
Outlet
*Electrical Rating For The Tree
(For Indoor Use Only.)
Input: 120 V, 60 Hz, 0.38 A
Output: 29 V DC, 0.62 A
Foot Pedal
On/Off Switch
Do Not Tamper
With Internal Parts
Open the
protective
cover
Do Not Tamper
With Internal Parts
Open the
protective
cover
100S
100S
50S
100S
100S
100S
100S
Question and Answer IconNeed help?

Do you have a question about the NOMA CTI1518409 and is the answer not in the manual?

Summary

Tree Assembly

Tree Stand Setup

Assemble the tree stand by swiveling legs until they snap into place for a stable base.

Tree and Light Connection

Connect tree sections from bottom to top, ensuring each pole is secure in the stand.

Electrical Specifications

Review the electrical rating and safety guidelines for the indoor pre-lit tree.

Storage Instructions

Tree Disassembly and Packing

Unplug, remove decorations, disassemble tree from top to bottom, and pack sections for storage.

Operating Instructions

Light Effect Control

Customize light functions and brightness using the controller or remote control.

Timer and Memory Features

Understand the default 8-hour timer and the memory function for light settings.

Remote Control Battery

Battery Replacement Guide

Step-by-step instructions for replacing the CR2032 battery in the remote control.

Troubleshooting and Maintenance

Tree Not Illuminating

Check all plug connections and wall outlet if the pre-lit tree does not light up.

Hinge Pin Repair

Use provided hinge pins to repair tree hinges by inserting pin through bracket slot and retainer.

Spare Parts and Warranty

Spare Parts Information

Details on included hinge pins and how to contact customer service for additional parts.

Product Warranty Details

Information on the five-year warranty against defects and conditions for replacement.

Overview

This document provides the instruction manual for the NOMA 7' Pre-Lit Microbrite Snow Dusted Pine artificial Christmas tree, model number CTI1518409. It includes detailed assembly, operation, storage, troubleshooting, and maintenance instructions, along with important technical specifications and warranty information.

Function Description:

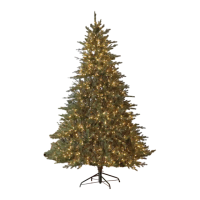
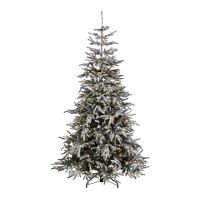
The NOMA 7' Pre-Lit Microbrite Snow Dusted Pine is an artificial Christmas tree designed for indoor use. It features pre-installed Microbrite lights and a snow-dusted finish, aiming to provide a festive and easy-to-set-up holiday decoration. The tree offers customizable lighting functions, including various light effects and brightness levels, controlled via a light controller or a remote control. It also incorporates a timer function for automated operation.

Important Technical Specifications:

  • Tree Height: 7 feet
  • Lighting Type: Pre-Lit Microbrite
  • Power Input: 120 V, 60 Hz, 0.38 A
  • Power Output: 29 V DC, 0.62 A
  • Control Methods: Light Controller (integrated), Remote Control
  • Remote Control Battery: CR2032 button cell battery (not included)
  • Timer Function: Lights stay ON for 8 hours, then turn OFF for 16 hours.
  • Memory Function: Retains the last selected light effect and brightness level after power disconnection.
  • Warranty: Five (5) year warranty against defects in workmanship and materials.

Usage Features:

Assembly:

  1. Location Selection: Choose an appropriate location near a wall outlet. Do not plug in the adaptor until assembly is complete.
  2. Stand Assembly: Assemble the tree stand by swiveling the legs until they snap into position, ensuring they are evenly spaced. Place the stand on a level surface. To close the stand, press the metal button and fold the legs.
  3. Section Identification: Each tree section is numbered with a sticker. Identify all sections before assembly.
  4. Bottom-Up Assembly: Start with the bottom section. Remove the protective cap and insert the pole firmly into the pre-assembled stand, ensuring it is secured.
  5. Sequential Insertion: Continue by inserting upper tree sections into lower sections, working from bottom to top, until the tree top is inserted.
  6. Branch Shaping: Allow branches to fall into place or gently pull them up and out. Ensure all wires are free of branch hinges.
  7. Power Connection: Plug the adaptor into the wall outlet. The entire tree should illuminate.
  8. Detailed Shaping: Begin shaping branches and tips from bottom to top, starting with tips farthest from the pole. Fan out one to the right, one to the left, and one at the center of the main stem.
  9. Final Adjustment: Once shaping is complete, slightly upsweep all branch tips for a uniform look and shift branches to fill any gaps.

Lighting Operation:

  • Control Options: The light functions can be customized using either the integrated Light Controller or the Remote Control.
  • Remote Control Setup: Before using the Remote Control, remove the insulation tab from its rear.
  • Selector Button: Press the Selector Button once on either control and wait a second to activate the pre-programmed light effects sequence.
  • Preset Light Effects (7 modes):
    1. Steady Glow
    2. Slow Fading
    3. Fast Fading
    4. 3 Speeds Fading
    5. Slow Blinking
    6. Fast Blinking
    7. 3 Speeds Blinking
  • Brightness Adjustment: There are 5 brightness levels. Use the controller buttons (up/down arrows) to increase or decrease brightness.
  • Timer Function: The default timer sets lights ON for 8 hours and OFF for 16 hours. The timer restarts if any control button is pressed or the main power supply is reconnected.
  • Memory Function: The product resumes the last selected light effect and brightness level if unplugged and reconnected.

Maintenance Features:

Storage Instructions:

  1. Disconnection: Unplug the adaptor, remove all ornaments and decorations, and disconnect light cords between sections.
  2. Disassembly: Disassemble the tree from top to bottom. Gently lift the tree top straight up from the section below and fold all branches toward the pole.
  3. Separating Poles: If poles are difficult to separate, apply a small amount of lubricant at the joint and gently twist the upper pole in both directions before lifting.
  4. Sectional Disassembly: Continue lifting each section straight up and folding branches toward the pole until the bottom section is removed from the stand.
  5. Protective Caps: Place protective caps on the poles to prevent damage to internal parts.
  6. Packaging: Carefully place all tree sections into the original shipping box and tape it shut.
  7. Storage Environment: Store the tree in a cool, dry place away from direct sunlight to prevent damage from excessive heat or humidity.

Troubleshooting (If the tree does not illuminate):

  1. Connection Check: Ensure all plugs are properly connected and the power cord is plugged into the wall outlet.
  2. Foot Pedal Check: If the tree has a foot pedal, try stepping on the ON/OFF button.
  3. Wattage Limit: If multiple products are connected, do not exceed the lowest indicated maximum wattage on the cord tag.

Loose Hinge Pin Repair:

  1. Spare Parts: Extra hinge pins are included for repairs.
  2. Insertion: Place the branch into the slot of the bracket.
  3. Securing: Insert a new hinge pin through the hole and secure it using the retainer washer.

Battery Replacement (Remote Control):

  1. Loosen Screw: Use a screwdriver (not included) to loosen the screw of the battery cover.
  2. Replace Battery: Replace the used battery with a new CR2032 button cell battery (not included). Ensure correct polarity (+ and -).
  3. Retighten Screw: Retighten the screw to close and secure the battery cover.

Safety Warnings:

  • Lithium Battery Hazard: The product is powered by a lithium battery (CR2032). Ingestion of such batteries can be fatal. Keep batteries out of reach of children.
  • Moisture Exposure: Do not expose the light set to moisture.
  • Battery Removal: Remove batteries when not used for extended periods or when depleted.
  • Proper Battery Disposal: Dispose of used batteries properly as per municipal/provincial law. Do not dispose of batteries in fire, as they may explode or leak.
  • Battery Type: Use only CR2032 battery for the remote controller.
  • Battery Contacts: Clean battery contacts prior to installation.
  • Small Parts: Keep small parts out of reach of children.
  • Power Supply: Use only the provided power supply. Using a different adaptor can damage lights, cause fire, or electric shock.
  • Installation on Trees: Do not install on trees with metal needles, leaves, or branch coverings.
  • Wire Insulation: Do not mount or support strings in a manner that can cut or damage wire insulation.

NOMA CTI1518409 Specifications

General IconGeneral
BrandNOMA
ModelCTI1518409
CategoryArtificial Pine Trees
LanguageEnglish

Related product manuals