This manual is designed to make it as easy as possible for you to assemble, install, operate and maintain
3
1
2
3
Assembly
the ceiling fan. The following tools listed are required for assembly and intallation:
TOOLS REQUIRED FOR ASSEMBLY
1 x star-head screwdriver
1 x flat screwdriver
1 x wrench
1 x stepladder
1 x wire stripper/pliers
1 x electrical tape
After opening the package you should find all the necessary parts for installing this ceiling fan.
The box should also contain:
Parts Pack Containing:
2 wood screws with flat washers
2 5/32” screws with lock washers
3 wire connectors
16 blade screws with washers
1 “J” hook
1 zip tie
3 balance pieces
3 tape
1 instruction sheet
ASSEMBLY
Preparing for installation
Getting ready
. Unpack and inspect carefully to make sure all parts are
included and not damaged (see Fig. 1). Lay all pieces out
on a working space.
possible electric shock (see Fig. 2).
Choosing a location for the ceiling fan
32" (81.3 cm) from adjacent walls or obstructions.
. Choose a location where there is a high enough ceiling clearance (at least 2.1 m (6' 11") from the floor
to the ceiling fan’s lowest moving part).
. Ensure that the outlet box in the room’s ceiling can support the weight of the fan. Typically, if the
outlet box is marked “acceptable for fan support” , it can hold the fan securely.
Mounting options
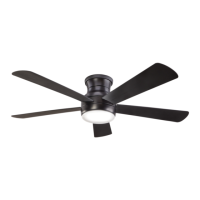
Drop-mount (for normal ceilings)
. This method is preferred if the ceiling is sloped or vaulted, or if the ceiling
is extra high, requiring the need of a downrod (see Fig. 3).
. Follow steps 1 to 9, omitting step 2 in the manual.
re
 Loading...