MAINTENANCE
BLADE RIEPLACEMEHT (FIG. 8-MAINIr)
The cutting blades should be sharp and well-balanced to run
smoothly. Blades should have correct amount of "lift" for
proper cutting and discharge of clippings. Lift is created by up-
turned bent tip edges of blade ends. As cutting edges of
blades wear, the bent tip edges also wear, decreasing blade
lift, resulting in decreased cutting ability. It is recommended
blades be replaced when upturned ends show signs of wear.
IMPORTANT: Stop engine and Inspect blades at once if
you strike any solid unyielding object. Check to make
sure blade mounting screws are tight. To remove blades:
1. Remove mower deck. See Mower Deck Removal para-
graph.
I,A_ DO NOT handle blades with bare hands. Wser_
gloves or wrap blade with newspaper or other J
material white removing or Installing blade. J
2. With a 9/16 inch wrench, remove blade mounting screws by
turning screws counterclockwise.
When replacing blades, be sure all parts are reassembled in
proper order (see Repair Parts section/manual) or severe
vibration will occur. Bent tip edges of blades must be up
toward top of mower deck or blades will not cut. NOTE: Make
sure blade mounting screws are tightened securely. We
recommend using a 10 inch wrench or atorque wrench, ff a
torque wrench is used, torque blade mounting screws to
between 30 and 35 foot pounds.
3. Reinstall mower_leck.
TO SHARPEN BLADE (FIG. 9-MAINT)
Care should be taken to keep blades balanced. An unbal-
anced blade will cause excessive vibration and eventual dam-
age to mower and engine.
1. Blade can be sharpened with a file or on a grinding
wheel. Do not attempt to sharpen while on mower.
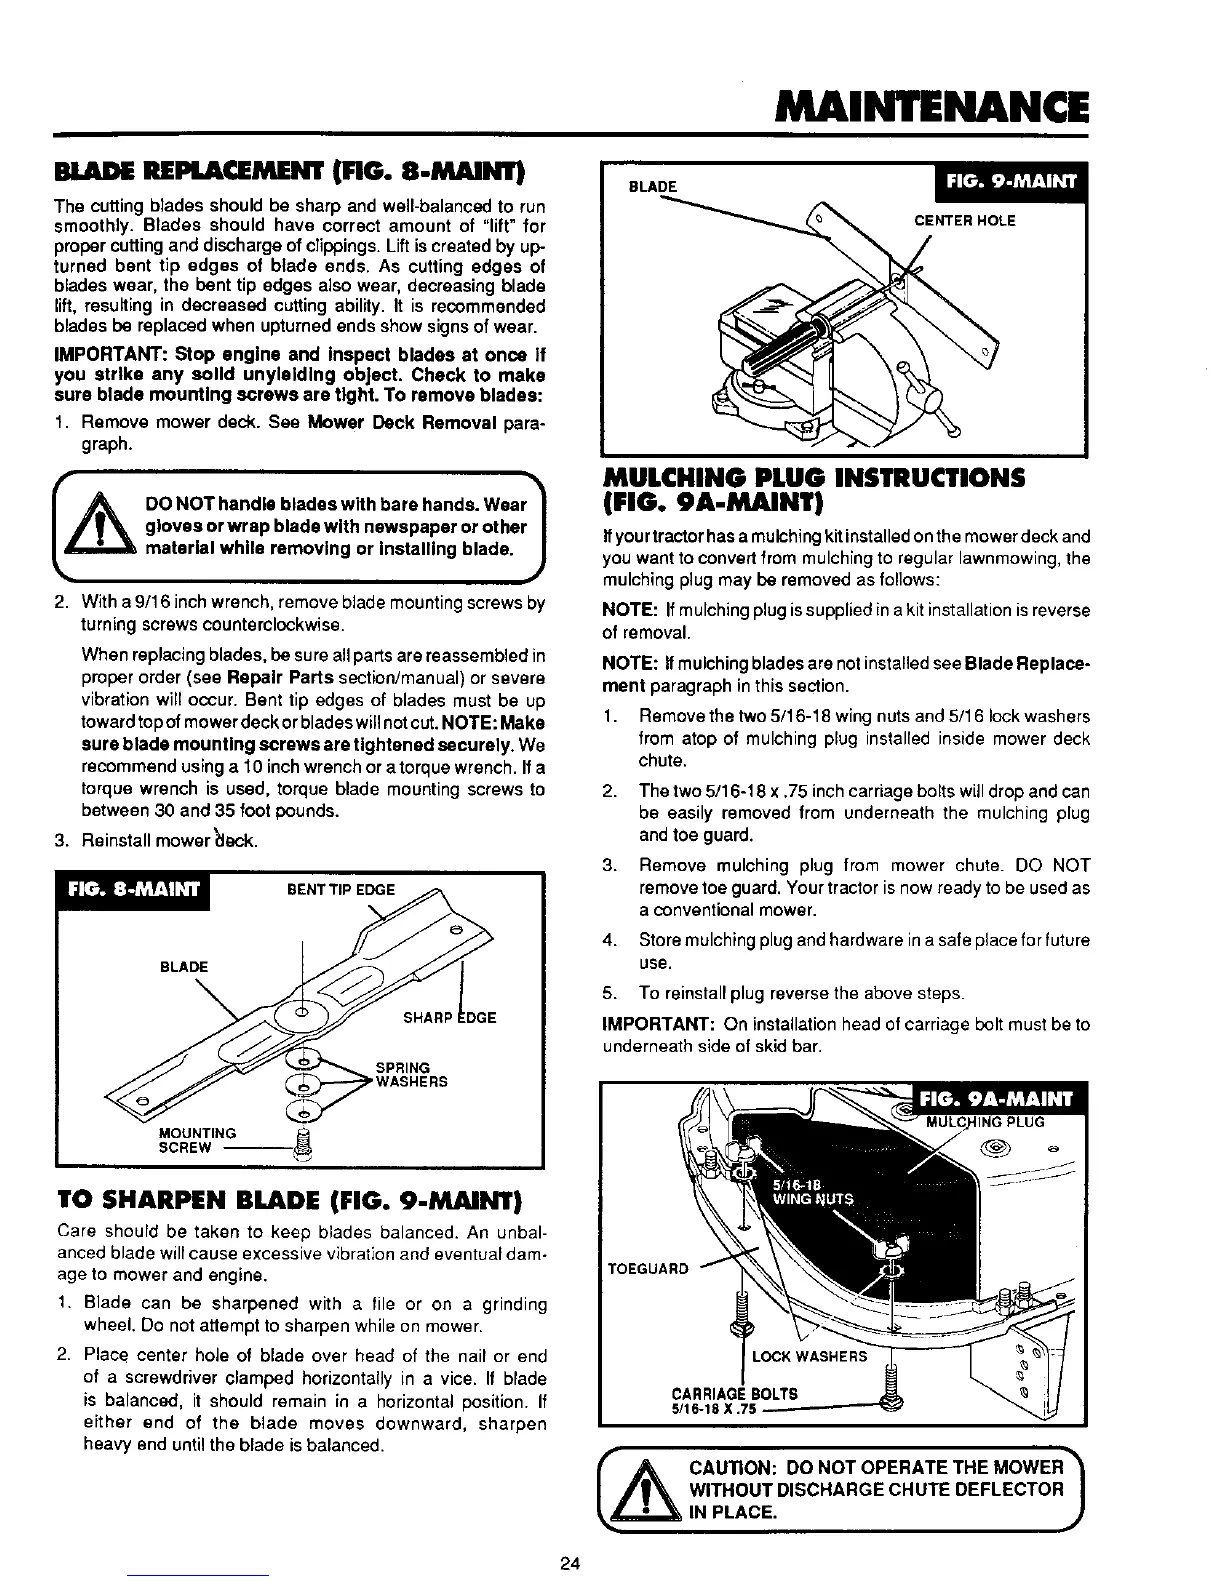
2. Place center hole of blade over head of the nail or end
of a screwdriver clamped horizontally in a vice. If blade
is balanced, it should remain in a horizontal position. If
either end of the blade moves downward, sharpen
heavy end until the blade is balanced.
BLADE
CENTER HOLE
MULCHING PLUG INSTRUCTIONS
(FIG. 9A-MAINT)
It yourtractor has a mulching kitinstalled on the mower deck and
you want to convert from mulching to regular lawnmowing, the
mulching plug may be removed as follows:
NOTE: If mulching plug issupplied in a kit installation isreverse
of removal.
NOTE: If mulching blades are not installedsee Blade Replace-
ment paragraph in this section.
1. Remove the two 5/16-18 wing nuts and 5/16 lock washers
from atop of mulching plug installed inside mower deck
chute.
2.
3.
4.
The two 5/16-18 x .75 inch carriage bolts will drop and can
be easily removed from underneath the mulching plug
and toe guard.
Remove mulching plug from mower chute. DO NOT
remove toe guard. Your tractor is now ready to be used as
a conventional mower.
Store mulching plug and hardware in a safe place for future
use.
5. To reinstall plug reverse the above steps.
IMPORTANT: On installation head of carriage bolt must be to
underneath side of skid bar.
TOEGUARD
CARRIAGE BOLTS
5116-18X .75
_,_l CAU'RON: DONOT OPERATETHE MOWER_
IWNITpHLOUT.DISCHARGECHUTE DEFLECTORJ
24

 Loading...