Nomadic Cooling Co 9 NC-X
3
Instalation Manual Version 231226
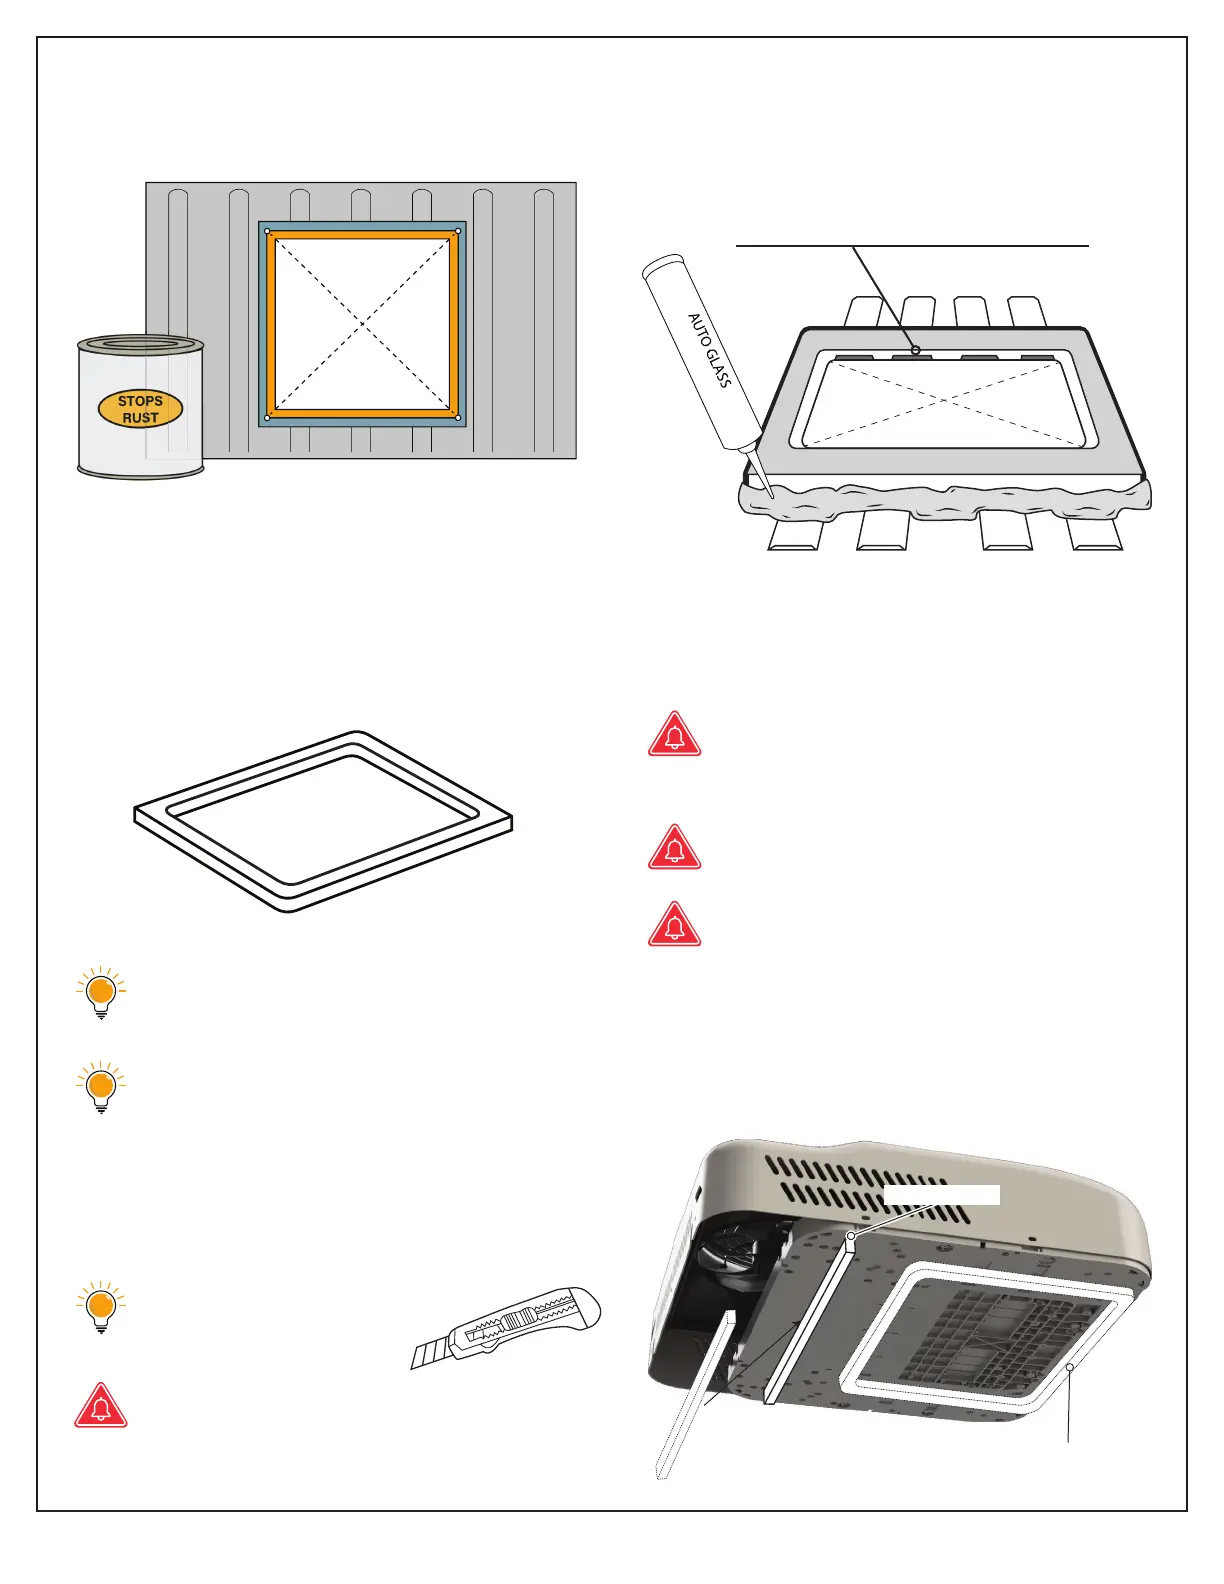
5. Paint around the edges of the cut roof
opening to prevent rust. You can use any
color rust-preventative paint.
6. Remove tape and clean exterior surface.
7. Remove 14”x 14” waterproof gasket
from box.
Make sure area/paint is clean, dry and
clear of all debris.
Use alcohol wipes or PrepSol to
remove oil or wax from vehicle roof.
If pacing gasket over a high or uneven
roof surface, remove small amounts of the
14”x 14” gasket to match roof contours.
Use bade to cut away gasket
if needed.
Remove gasket adhesive only after
making any necessary cuts. Pace the
gasket sticky side down.
8. Apply window weld/adhesive around
14”x 14” gasket, after sticking it down on
vehicle roof. DIY kit includes a tube of
polyurethane adhesive seaant.
9. Pace AC unit on roof over 14”x 14” gasket
gently. Measure side-to-side until unit is
centered on all four sides.
Be careful not to puncture, rip
or tear the gasket with the AC
unit’s mounting bolts.
Do not put adhesive on top of gasket.
Do not damage electrical components
when pacing AC unit.
10. Adhere optional leveling strip behind the
14”x14” gasket. If you do, remove the two
rubber feet at the back of the AC unit.
Exterior Roof
Exterior Roof
URETHANE ADHESIVE
CUTAWAYS FOR ROOF RIDGES
Leveling strip
14” x 14” gasket
Adhesive side