NC-X
3
Instalation Manual 231226 10 Nomadic Cooling Co
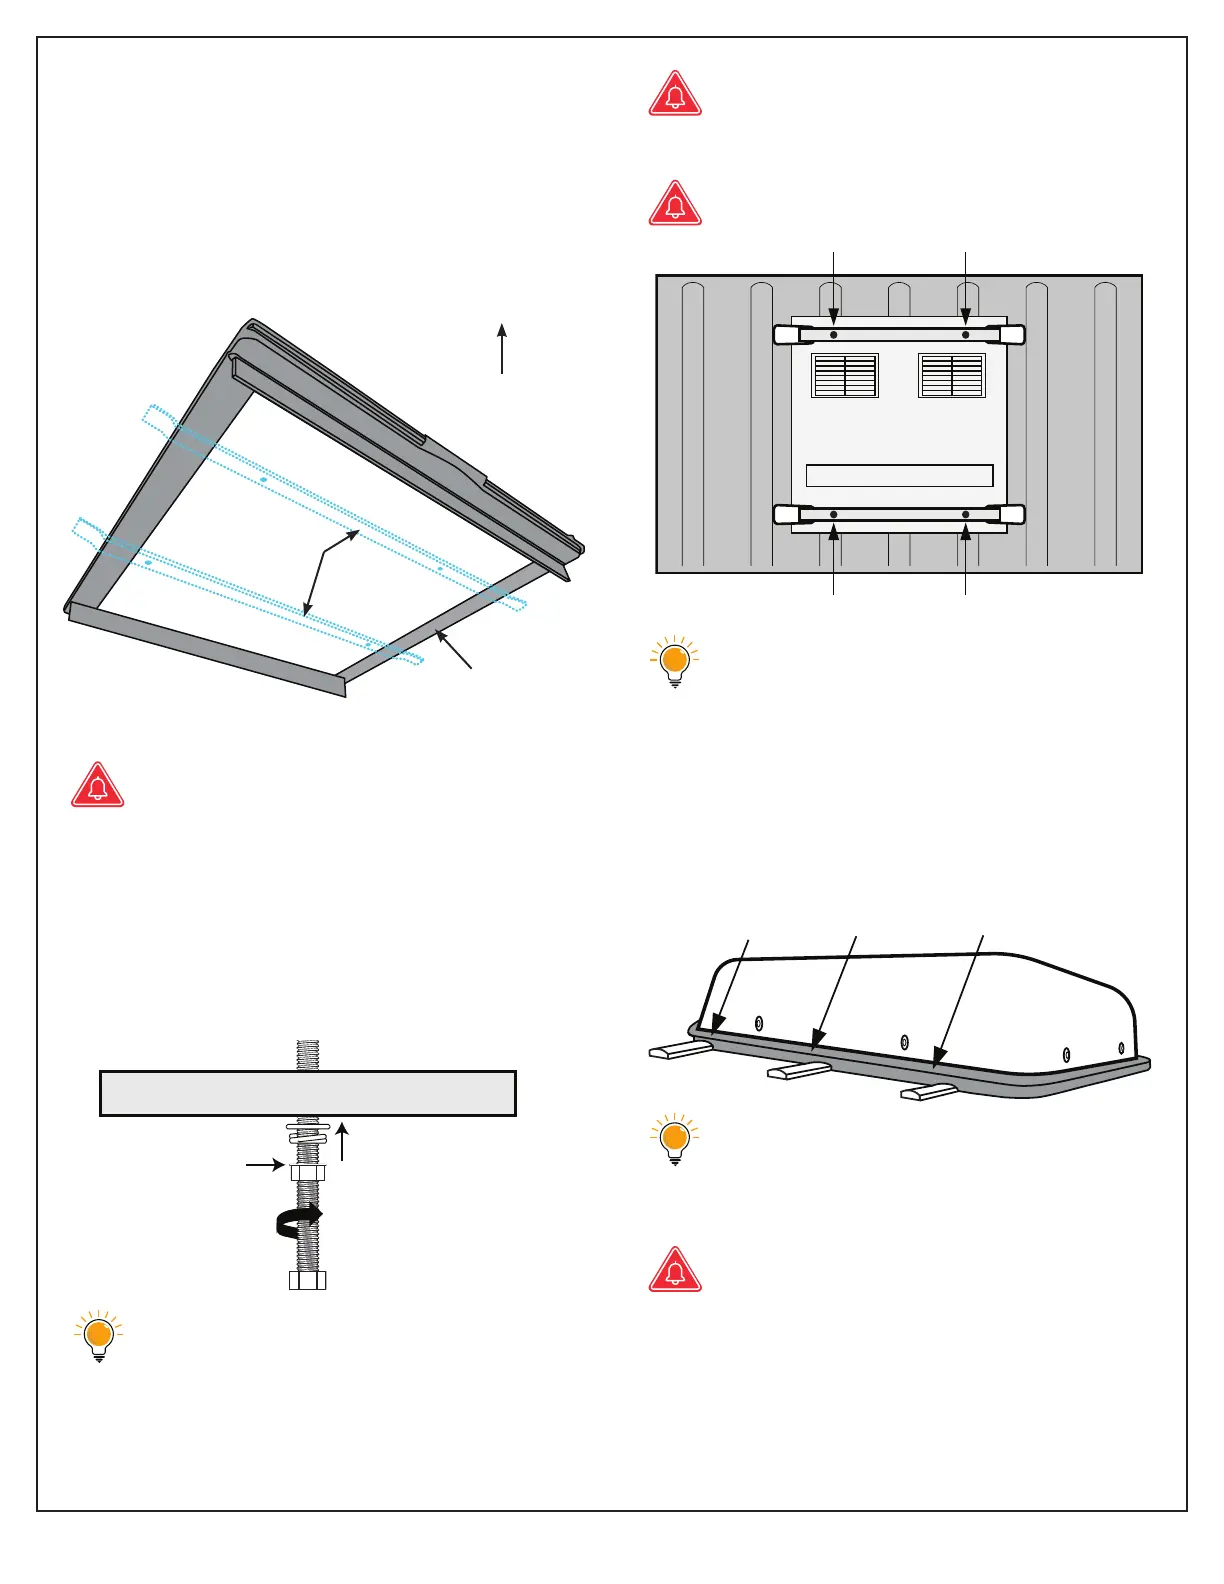
11. From inside the vehicle add the crossbars
with mounting bolts to securely attach
AC unit to the roof.
A trim ring (included with DIY kit) should be
paced between the vehicle roof and the AC
unit before crossbars are added.
Do not use electric drill on crossbars.
Put the washer/lock washer on each M8 bolt
and hand tighten (+1/4 turn) bolt into the AC
base pate until the crossbars are secure.
Tighten all four of the nuts to the crossbar to
3.7 lbs. of torque (~5 nm).
AC unit will help to create pressure.
When securing AC unit to the vehicle,
increased compression of the gasket
will level the unit against the roof. No
light should be visible.
Do not over-tighten mounting bolts.
Bolts will rotate if over torqued, and
may break from AC base pate.
Over-tightening will void warranty.
Our gaskets are used for vibration
absorption. It is very high density and
can’t be compressed more than 10%.
Use gasket tension to control AC unit’s
distance from roof surface.
AC unit should be resting on foam gasket
and not on the vehicle’s roof.
Over-compression of the AC unit to
the roof may cause the internal fan to
rub against the fan housing.
Be sure the fan bades rotate freely
prior to starting the AC unit.
Interior Roof
Trim Ring
Crossbars
Interior Roof
1. Hand tighten bolt un-
til flush with crossbar.
2. Then tighten nut to
3.69 lbs. (5 nm.) of
torque.
Fat side up
 Loading...