9
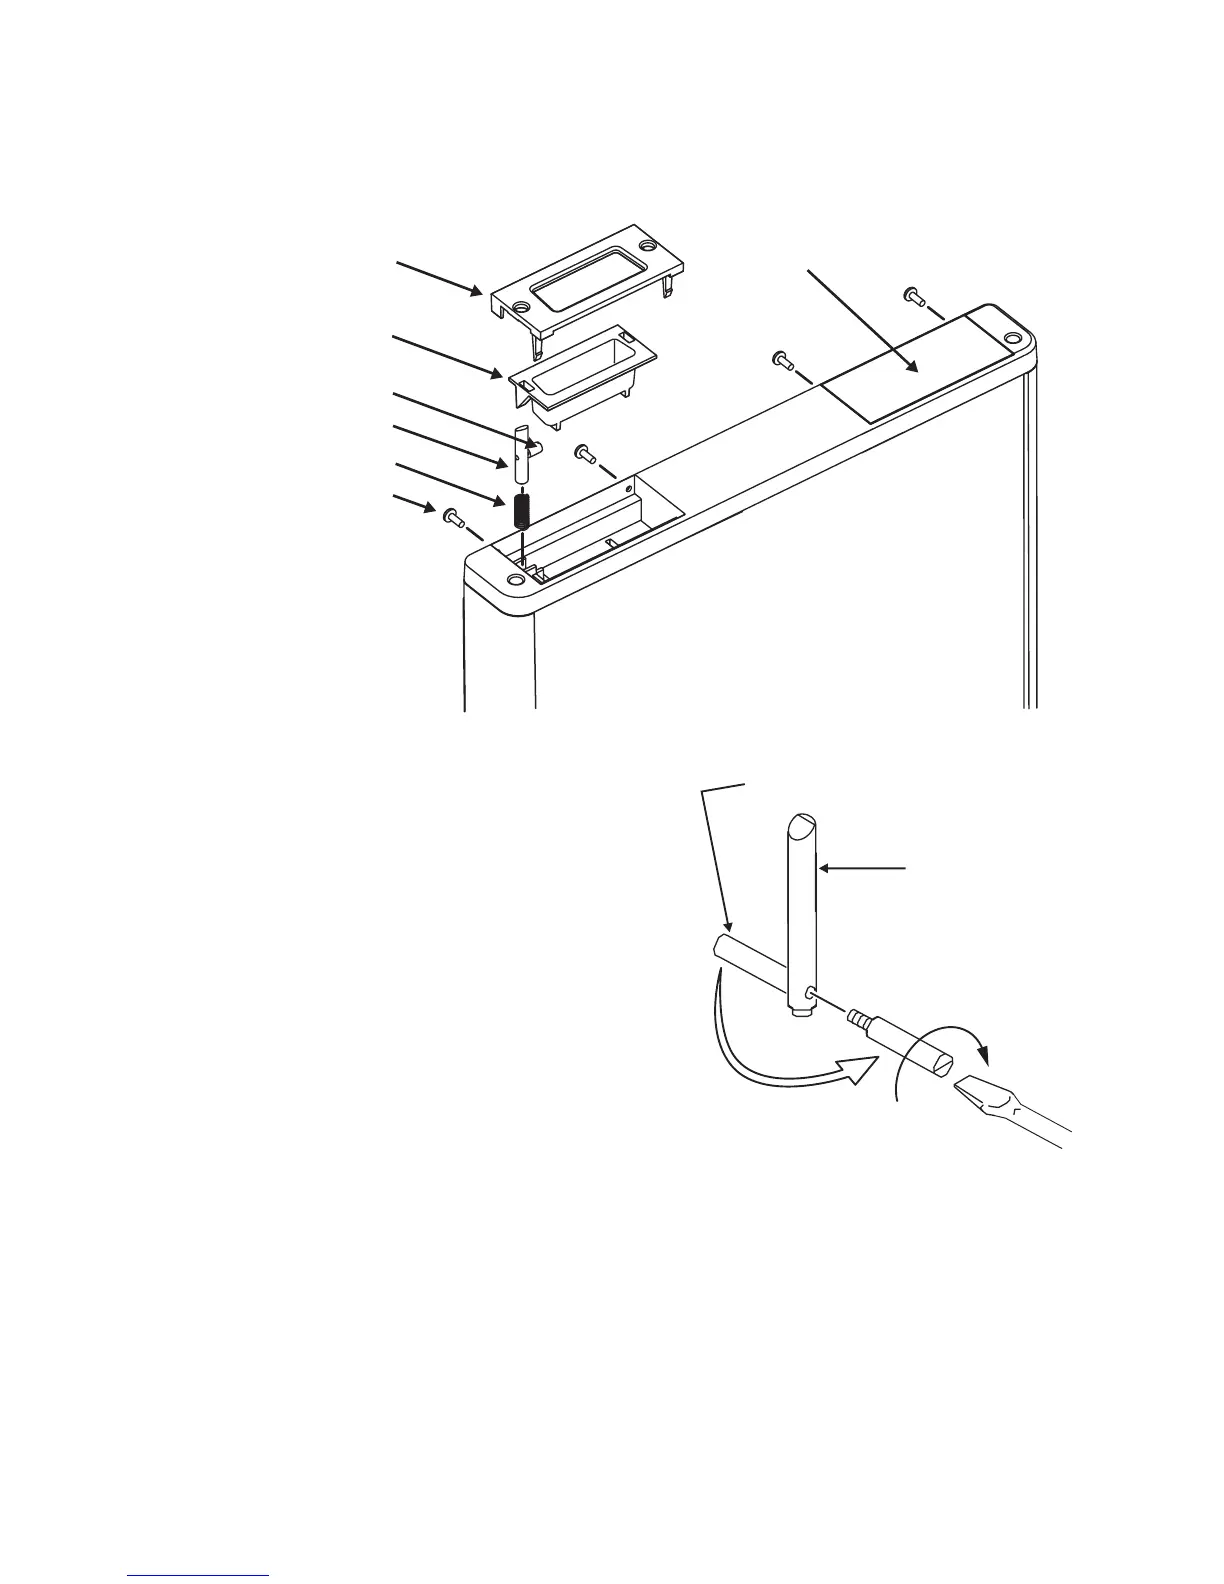
6. Move the latch to the opposite side of the door (See Art01892):
- Remove the four (4) screws that attach the latch plate and the cover plate to the
door.
- Remove the cover plate, the latch plate,
the latch pull, the latch handle pin, and
the coil spring from the door.
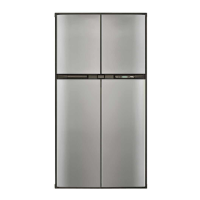
- Move the latch handle pin to opposite
side of the latch pin (See Art01897).
- Assemble the cover plate, the coil spring,
the latch handle pin, the latch pull, and
the latch plate into the opposite side of
the door.
- Make sure that the angled end of
the latch handle pin is up.
- Make sure that the latch pin points toward the latch pull.
- Install and tighten the screws that attach the latch plate and the cover plate to the
door.
7. Put the door onto the refrigerator and make sure that the gasket seals correctly.
8. Install and tighten the two (2) screws that attach the door hinge to the bottom of the
refrigerator.