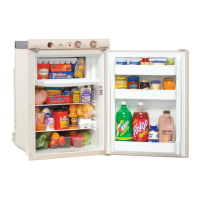
To accomplish this refurbishment, a lot depends on just how detailed you want to get. To be
done thoroughly, you will need to remove the insulation around the heat pipes and chimney.
There you will also see the actual 12V heat element and the 110V heat element. Both can be
removed and a little emery cloth used to shine up the working end of the heat elements.
You can begin by carefully cutting the aluminized foil wrap around
the insulation. Look at the next photo and you will see that this
insulation is really two half round pieces that are held together by
nothing more than the aluminized foil. You can see or feel exactly
where the pieces join together. Use a razor blade or sharp knife to
cut right along this joint. Remove the two halves of insulation to
expose the heat pipe area.
With the insulation removed, you can
see where the two heating elements are
attached to the heat pipe. Now the
design of the entire heating area
becomes obvious. Either the propane
flame or one of the electrical heating
elements are used to heat up the gas
inside the large tube. The two electrical heating elements merely sit in a round tube of there own.
All of these vertical heat tubes are welded to the main tube that contains the ammonia gas. The
idea here is simple: whatever form of energy is used, it's only function is to apply heat to this
area of the tube with the ammonia gas. The insulation is only used to concentrate the heat in one
area and to keep ambient air from cooling off this area.
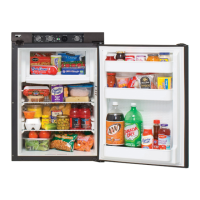
You can remove the electrical heating elements and used some
emery cloth to remove surface rust. With the entire heating area
now exposed, its clear that a lot of rust forms in this area. Use a stiff
wire brush wheel on an electric drill to remove as much of the
surface rust as possible. Use sandpaper or emery cloth to get into
the areas the wire wheel can't reach. Continue to clean up as much
of the black painted areas of the refrigerator as you determine to be
necessary.
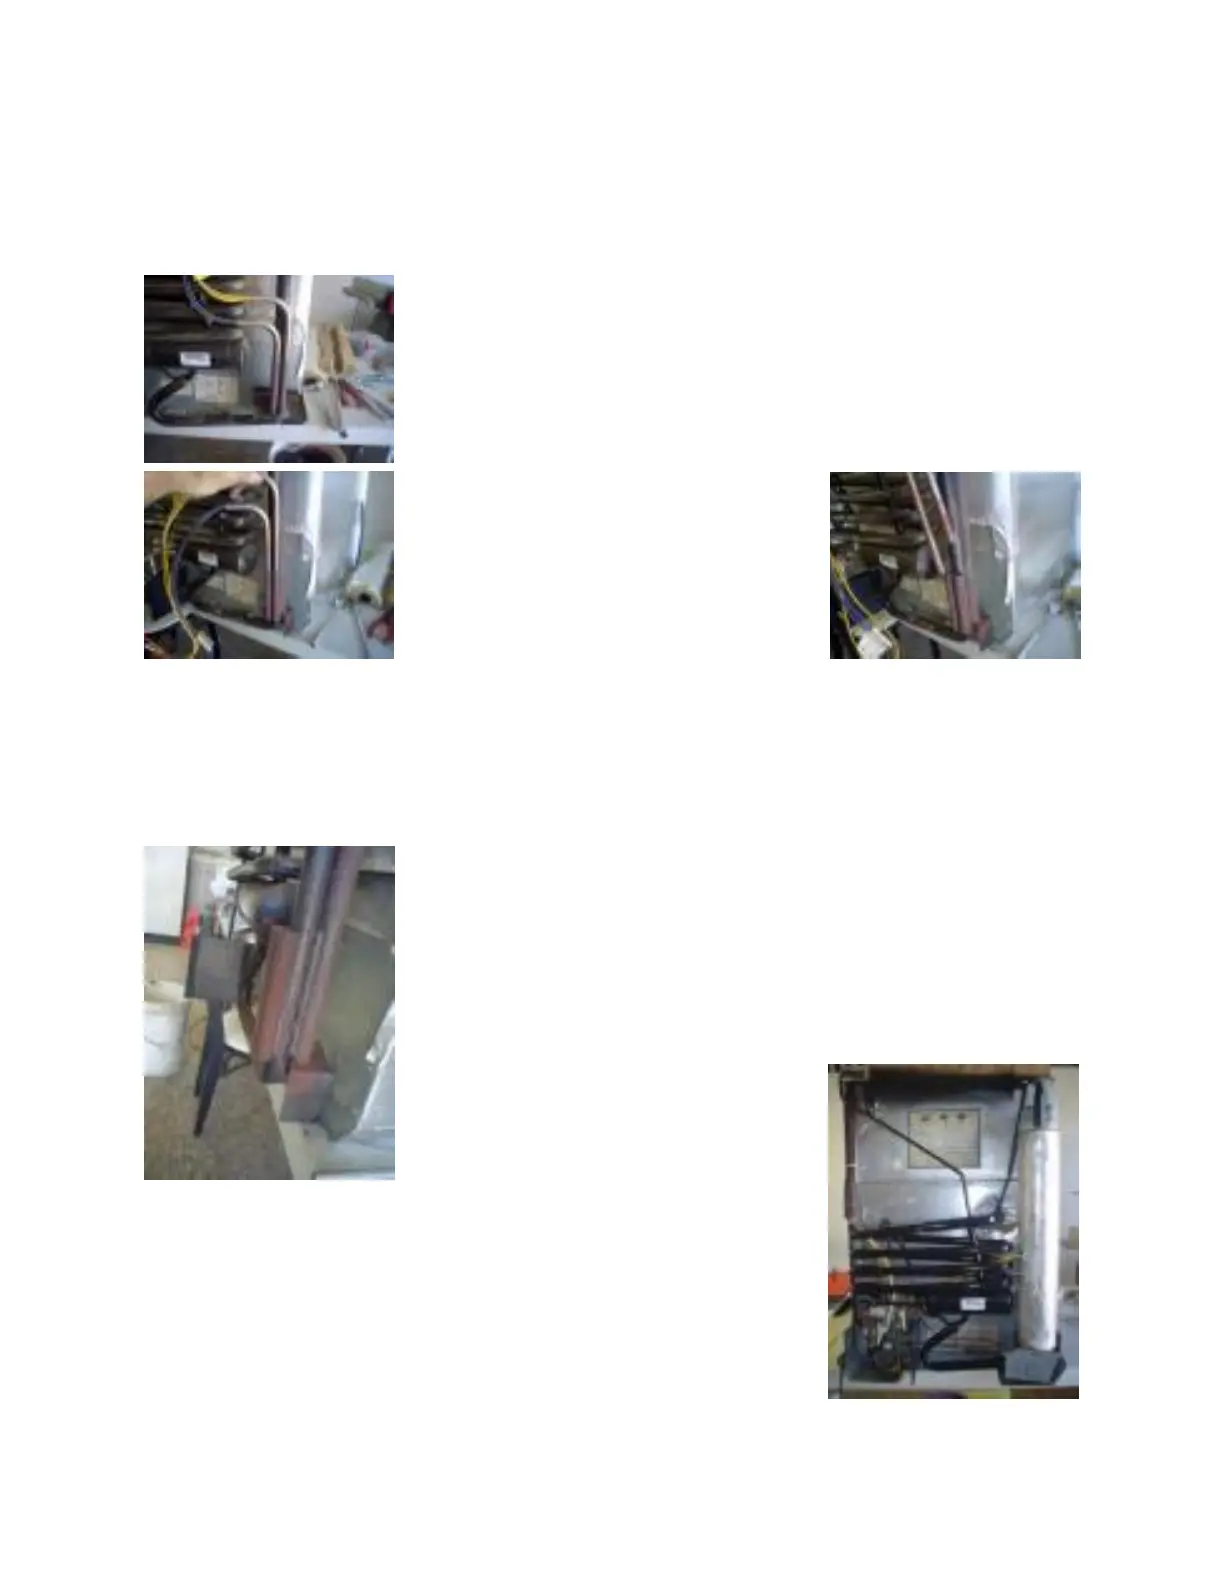
When you are satisfied (you won't get
everything down to bare smooth
metal), you are now ready to apply a
new coat of black paint. Try to be neat
here as you don't want black
overspray all over the other areas of the refrigerator covering wires
and other gas tubing parts. Use newspaper to cover those areas and
mask off with tape. It only takes a few minutes where you can
protect everything. Here's a tip: it will take three or more light coats
of a gloss black enamel to get a good looking coat. Use a fast
drying paint so that you don't have to wait a day between coats.
With a little patience, you finished product should look something
like the photo on the right. And when you first use your thoroughly
 Loading...