19
5. Follow your progress with the display.
See step 4 on page 17.
6. Measure your heart rate if desired.
See step 5 on page 15.
7. Turn on the fan if desired.
See step 6 on page 15.
8. When you are finished exercising, the console
will turn off automatically.
See step 7 on page 15.
HOW TO USE A HEART RATE PROGRAM
1. Turn on the console.
See step 1 on page 14.
2. Select a heart rate program.
To select one of the heart rate programs, press the
Heart Rate Programs button repeatedly until the
words HEART RATE 1 or HEART RATE 2 appear
in the display.
3. Enter a target heart rate setting.
A few seconds after you select a heart rate pro-
gram, the words ENTER MAX TARGET HEART
RATE FOR THIS WORKOUT will appear in the
display and the number 110 will begin to flash.
During heart rate program 1, the same target
heart rate setting will be programmed for all seg-
ments of the program. If you have selected heart
rate program 1, press the increase and decrease
buttons above the Heart Rate Programs button to
enter the desired target heart rate setting (see
EXERCISE INTENSITY on page 23).
During heart rate program 2, different target
heart rate settings will be programmed for different
segments of the program. If you have selected
heart rate program 2, press the increase and
decrease buttons above the Heart Rate Programs
button to enter the desired maximum target heart
rate setting for the program (see EXERCISE
INTENSITY on page 23).
4. Hold the handgrip pulse sensor.
It is not necessary to hold the handgrip pulse sen-
sor continuously during heart rate programs; how-
ever, you should hold the handgrip pulse sensor
frequently for the programs to operate properly.
Each time you hold the handgrip pulse sensor,
keep your hands on the metal contacts for at
least 30 seconds.
10
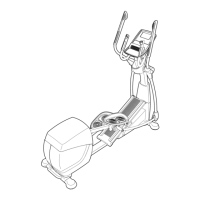
10. Attach the Left Link Arm (30) to the Left Pedal
Arm (32) with an M8 x 15mm Button Screw
(106), an M8.5 x 16mm x 1.5mm Washer (103),
a
nd an Axle Cover (66).
A
ttach the Left Link Arm (30) to the left Upper
Body Leg (24) with an M8 x 25mm Button
Screw (110), two M8.5 x 16mm x 1.5mm
Washers (103), two Axle Covers (66), a Link
Arm Spacer (74), and an M8 x 15mm Button
Screw (106) as shown.
Attach the Right Link Arm (31) in the same
way.
11. Plug the power cord (not shown) into the power socket (not shown) at the rear of the elliptical exer-
ciser.
Make sure that all parts of the elliptical exerciser are properly tightened. Note: Some hardware may be
left over after assembly is completed. To protect the floor or carpet from damage, place a mat under the
elliptical exerciser.
10
66
74
103
110
66
32
30
31
103
106
2
4
6
6
103
106
 Loading...