INDEX
1. General information 2
Weight 2
Adjustment 2
Floor plate 2
Acrylic glue 2
Minor damage 2
Fine ssures 2
Painting 2
2. Before Installing a new replace 3
Chimney Draught 3
Air Supply 3
Floor plate 3
Dimensional drawing 3
3. Technical Information 3
4. Safety distances 4
5. Assembly 4
Assembling bracket leg 4
Initial setting the blocker 4
Rear connection 4
Fresh air supply set 4
Surround Assembly 4
Operating Control 5
Removing self-closing door mechanism 5
6. Lighting the re for the rst time 5
Lighting a re 5
7. Maintenance 5
Cleaning and inspection 5
Ashes 5
Thermotte™ Insulating Plates 6
Door and glass 6
Disassembling / Assembling Thermotte 35
8. Warranty 6
9. Advice on lighting a re 6
Some advice in case of combustion problems 8
Dimensional drawing 21
Safety distances 23
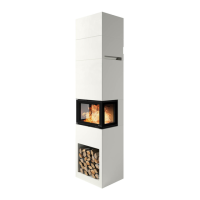
the surround is mounted straight. The insert will expand
with heat and for this reason the surround must not rest
on the insert. (Above the insert there must be a gap
of 3 to 5 mm. Laterally there is no need for gaps, but
between the lower part of the insert and the surround
there must be a gap of at least 2 mm.)
Floor plate
A reproof oor plate must be put in front of the replace
if the oor is of a combustible material.
Acrylic glue
The replace is to be assembled using acrylic glue.
Make sure all dust is removed and that the surfaces are
clean. When the replace is assembled, use the same
acylic glue for lling joints (FIG Z)
Minor damage
The replace can sustain minor damage during
transport and handling.
This can be repaired with acrylic/light ller. For perfect
results, you can ll and sand with a suitable ller. Minor
damage and uneven surfaces can be lled. If the
damage is deep or in the event of signicant damage,
you are recommended to ll repeatedly with tile
adhesive or cement putty to avoid sinking. Smooth off
with e.g. a damp sponge or a oat.
Fine Fissures
The building material around the replace can move.
In new houses in particular, it is common for building
materials to settle substantially in the early years. In
addition, all concrete elements shrink to a decreasing
extent for up to 15 months.
The result is that small cracks may appear in the
concrete/masonry.
Use the replace for a few months. If cracks appear,
scrape them out with a screwdriver or similar (to provide
more space for acrylic joint ller). Vacuum the surfaces
to remove any dust.
Inject acrylic joint ller and even it out with a spatula or
a nger wetted with soapy water.
The joint can be painted after a couple of days.
Painting
When the replace has been lled/sanded and the
glued joints are dry, the replace is ready to be painted.
Use only breathable paint (acrylic) intended for masonry
For your own safety, comply with the assembly instructions. All
safety distances are minimum distances.
Installation of the insert must comply with the rules and
regulations of the country where installed. Nordpeis AS
is not responsible for wrongly assembled inserts.
We accept no liability for typographical errors and changes.
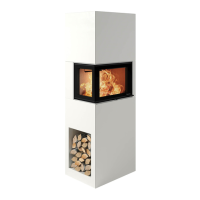
1. General information
Weight
The home owner must ensure that the oor can
withstand the load according to the total weight of the
replace. When installing the product on a oating wood
oor, the oor boards underneath the replace must be
removed, this to avoid the that the oor boards lock and
crack.
Adjustment
We recommend to stack the surround without glue in
order to adjust the insert prior to perforating the chimney
for the ue connection. Use a spirit level to ensure that

 Loading...