This document is a user manual for refurbished Norpole portable air conditioners, specifically models R-NPPAC6KWM, R-NPPAC8KWM, and R-NPPAC10KWM, with BTU ratings of 6000, 8000, and 10000 respectively. It provides essential information for safe operation, installation, and maintenance of the appliance.
Function Description
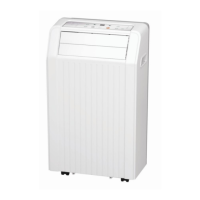
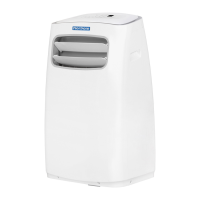
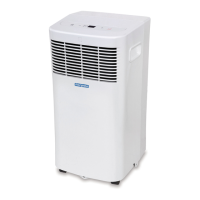
The Norpole portable air conditioner is designed to provide cooling, fan, and dry (dehumidification) modes for indoor spaces. It is a self-contained unit that can be easily moved and installed in various rooms. The unit extracts warm air from the room, cools it, and exhausts the warm air outside through an exhaust hose and window slider kit.
Usage Features
The air conditioner can be controlled either via its integrated control panel or a remote control. The control panel features a Mode button to cycle through COOL, FAN, and DRY modes, and Up (+) and Down (-) buttons to adjust the set temperature. The temperature can be set in a range of 62°F to 86°F (17°C to 30°C), and the display can be switched between Fahrenheit and Celsius by pressing and holding the Up and Down buttons simultaneously for 3 seconds. An LED display shows the set temperature in COOL mode and room temperature in DRY and FAN modes. A Power button is used to turn the unit on or off.
The remote control offers more comprehensive control, including:
- Power On/Off: To turn the unit on or off.
- Mode: Cycles through AUTO, COOL, DRY, and FAN modes.
- Temp: Adjusts the set temperature.
- Fan: Sets the fan speed (HIGH, MEDIUM, LOW, or AUTO). Not all models have a medium speed.
- Sleep/Eco Mode: When activated in COOL mode, the set temperature will gradually increase by 2°F (1°C) after 30 minutes, and again after another 30 minutes. The unit will maintain this new temperature for 7 hours before returning to the original setting. This feature is not available in FAN or DRY modes.
- Timer On/Off: Allows users to program the unit to turn on or off at a specified time (0-24 hours). This feature can also be used to set both an Auto-On and Auto-Off timer.
- Short Cut (for NPPAC6KWM remote): Used to set and restore preferred operating modes, temperatures, fan speeds, and sleep features.
- Reset (for NPPAC8KWM & NPPAC10KWM remote): A recessed button to reset all remote control settings.
- Cancel (for NPPAC8KWM & NPPAC10KWM remote): Cancels Timer modes.
- Clock (for NPPAC8KWM & NPPAC10KWM remote): Used to set the current time, which is necessary for the AUTO-TIMER feature to operate.
- LED: Turns the LED display on the A/C unit on and off.
- Lock (for NPPAC8KWM & NPPAC10KWM remote): A recessed button to lock or unlock current settings on the remote.
The unit features an Auto-Restart function, which restores previous settings if power is unexpectedly lost. A 3-minute delay protects the cooling system by preventing immediate restarts after being turned off or losing power. Airflow direction can be adjusted using either fixed or manually adjustable louvers, depending on the model.
Installation Instructions
The portable air conditioner requires a level, sturdy surface for installation, away from heat sources and areas prone to getting wet. It must be installed near a grounded plug, and the collection tray drain should be accessible. A minimum clearance of 12 inches (30cm) from the nearest wall is recommended for proper air conditioning. The unit's intakes, outlets, and remote signal receptor should not be covered.
The window installation kit is designed for hung or sliding windows ranging from 26.5 to 48 inches (67.5-123cm) and can be shortened for smaller windows. The installation process involves:
- Preparing the Exhaust Hose Assembly: Connecting the exhaust hose to the unit adaptor and window slider adaptor.
- Attaching the Exhaust Hose Assembly to the Unit: Pushing the exhaust hose into the air outlet opening of the unit.
- Preparing the Adjustable Window Slider: Measuring the window opening and adjusting the window slider to the correct length. This may involve sliding Window Slider B into Window Slider A and fastening them with a bolt.
- Installing in Hung Windows: Applying adhesive foam seals (A and B) to the window sash and frame, inserting the window slider assembly into the window opening, and then inserting a non-adhesive foam seal (C) between the glass and window frame to prevent air and insects from entering. A security bracket with screws can be installed for added security.
- Installing in Sliding Windows: Similar steps to hung windows, with adhesive foam seals (A and B) applied to the window sash and frame, the window slider assembly inserted, and a non-adhesive foam seal (C) placed between the glass and window frame. The window slider adaptor is then inserted into the hole of the window slider.
It is crucial not to overextend or bend the exhaust hose and to ensure the air outlet of the exhaust hose has a clearance of about 20 inches (48cm).
Draining the Water
The unit collects water in a bottom tray during operation. There are two methods for water removal:
- Manual Emptying: When the water level in the bottom tray reaches a predetermined level, the unit will beep and display "P1," stopping the air conditioning/dehumidification process (the fan motor will continue to run). The unit must be turned off, unplugged, moved to a drain location, and the bottom drain plug removed to allow water to drain. The drain plug must be firmly reinstalled before restarting the unit.
- Continuous Draining: For continuous drainage, a drain hose can be connected to the drain connector (5/8” universal female mender) on the unit. The connection must be tight and leak-free, and the open end of the hose should be placed directly over a floor drain, sloping downward to ensure smooth water flow.
Maintenance Features
Regular maintenance is essential for optimal performance and longevity of the air conditioner.
- Safety First: Always turn off and unplug the unit before any maintenance or cleaning. Do not use flammable liquids or chemicals, immerse the unit in water, or spray water on it. Do not operate the unit if the power cord is damaged.
- Water Bucket Cleaning: The water bucket should be cleaned every few weeks or as needed. It must always be emptied before storage or when the "P1" error code is displayed.
- Air Filter Cleaning: The air filters should be cleaned with water at least every two weeks for optimal performance. The unit should not be operated without the filters. In households with animals, grills should be periodically wiped to prevent animal fur from blocking airflow.
- Unit Cleaning: The portable air conditioner can be cleaned using a damp, lint-free cloth and mild detergent (if necessary), then dried with a dry, lint-free cloth.
- Storage: Before storing the unit, drain the water collection tray, run the unit in FAN mode for 12 hours in a warm room to dry it and prevent mold, then turn it off and unplug it. Clean and reinstall the air filter. Remove batteries from the remote control. Store the unit in a cool, dark place, as direct sunshine or extreme heat can shorten its lifespan.
Troubleshooting
The manual includes a troubleshooting guide for common issues:
- Unit not turning on: Check for "P1 Error Code" (water collection tray full) or if the room temperature in COOL mode is lower than the set temperature.
- Unit not cooling well: Check for blocked/dirty air filter, disconnected/blocked exhaust hose, low refrigerant, high-temperature setting, open windows/doors, oversized room, or internal heat sources.
- Noisy/vibrating unit: Check if the unit or ground is not level.
- Gurgling sound: This is normal and caused by refrigerant flow.
For any persistent issues or error codes (E1: Room temperature sensor error, E2: Evaporator temperature sensor error, E4: Display panel communication error), users are advised to turn off, unplug, check for obstructions, restart, and if the error persists, contact customer service or a service technician.