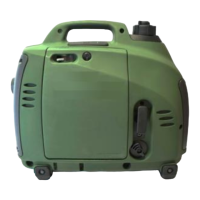
The Novatio 900W Defender (MAP0002000-E) is a portable generator designed for various power needs.
Function Description
The 900W Defender is a generator that provides AC power and can be started manually or via an E-start system. It is designed to be user-friendly with clear indicators for operation and troubleshooting. The generator supports multiple fuel types, making it versatile for different environments. It also includes features for safe operation, such as an oil alert system and an overload indicator.
Important Technical Specifications
- Platform Technology: Honda EU1000i
- Dry Weight: 33 Pounds
- System Dimensions (L x W x H): 17.8" x 11.5" x 14.9"
- AC Output:
- 120V 0-900 W continuous (sea level)
- 120V 0-750W continuous (above 4000 ft, 104°F)
- 120V 1000W Peak
- Operating Range: 0°F - 125°F
- Fuel Tank Capacity: 0.6 gallons
- Fuel(s) Supported: JP-8, F24, JET A, JP-5 (gasoline and nDF2 can be used in select models)
- Run Time on JP-8 @ 1250 W AC: 5.2 hours
Usage Features
Before Operation:
Before starting the engine, users must perform several checks:
- Check Oil: A low oil level will activate the Oil Alert system, shutting down the engine.
- Check Air Filter: A dirty air filter restricts airflow, reducing engine and generator performance.
- Check Fuel Level: A full tank helps prevent interruptions for refueling.
- Check Appliances: Ensure all appliances are turned off or disconnected to avoid difficulty starting the generator under load.
Starting Engine (Manual):
- Turn the FUEL TANK CAP VENT LEVER to the 'ON' position.
- Turn the ECO-THROTTLE SWITCH to 'OFF'.
- Ensure the CHOKE LEVER is in the 'OPEN' position.
- Turn the ENGINE SWITCH to 'ON'.
- Confirm the fuel selector switch is set to the appropriate fuel type.
- Once the 'READY' indicator (green) lights up, pull the STARTER GRIP. The engine should start within 1-3 pulls. Do not pull more than 25 times.
- If the engine does not speed up after several seconds, briefly turn the CHOKE LEVER to 'CLOSED'.
- Allow the engine to warm up for 20 seconds to 1 minute, then turn the CHOKE LEVER to the 'OPEN' position.
- The yellow light on the User Interface indicates "warm-up" mode. Full load can be applied once the yellow light is no longer illuminated.
Starting Engine (E-start):
- Plug the Amphenol connector into the front of the generator.
- Turn the FUEL TANK CAP VENT LEVER to 'ON'.
- Ensure the CHOKE LEVER is in 'OPEN' position.
- Turn the ENGINE SWITCH to 'ON'.
- Confirm the fuel selector switch is set to the appropriate fuel type.
- Press the power button to start the generator.
Jump Starting Engine:
In case of low batteries (LEDs on UI board do not illuminate):
- Turn the ENGINE SWITCH to 'OFF'.
- Remove the MAINTENANCE COVER by unscrewing the COVER SCREW and tilting the cover away.
- Unbundle the JUMP START CABLE and remove the DUST CAP.
- Attach the JUMP START CABLE to a fully charged 2590 BATTERY and allow 1 minute to charge before powering up the generator. (Note: Fuse may fail if unit is powered up too soon).
- Turn the ENGINE SWITCH to 'ON' and start the generator. Allow it to run for 2-5 minutes.
- With the generator running, disconnect the JUMP START CABLE and install the DUST COVER.
- Reinstall the SIDE COVER and allow the generator to run for at least 1 hour.
Important: Turn off or disconnect all appliances connected to the generator before jump starting.
Stopping Engine:
- Turn the ENGINE SWITCH to the 'OFF' position.
- Allow the engine to cool, then turn the FUEL TANK CAP VENT to 'OFF' position.
Important: Turn off or disconnect all appliances connected to the generator before stopping.
AC Operation:
- Ensure the OUTPUT INDICATOR (green) is illuminated.
- Plug the appliance into the receptacle.
DC Operation:
The NEI-1001-H-E is not approved for charging external batteries. Caution must be used with generator DC output. Contact Novatio for support if DC power is required.
Maintenance Features
All maintenance should be performed with the engine turned off.
- Engine Oil:
- Change oil according to the schedule (e.g., every 3 months or 50 hours for normal use).
- If operating below 20°F or with average load less than 500W, change oil every 25 hours.
- Change oil if engine exhaust shows excessive white smoke.
- Oil Change Procedure:
- Open the MAINTENANCE COVER.
- Tilt the engine away from the OIL FILLER NECK to avoid spilling oil, and unscrew the OIL FILLER CAP.
- With a suitable container in place, pour the oil by tipping the engine toward the OIL FILLER NECK.
- With the engine in a level position, fill to the bottom of the first threads of the oil filler neck (350ml) with the recommended oil.
- Reinstall the OIL FILLER CAP and MAINTENANCE COVER securely.
- Air Cleaner: Check and clean regularly (more frequently in dusty areas).
- Spark Plug: Check-adjust and replace as needed.
- Spark Arrestor: Clean regularly.
- Valve Clearance: Check-adjust (serviced by a qualified mechanic).
- Combustion Chamber: Clean (serviced by a qualified mechanic).
- Fuel Tank and Filter: Clean (serviced by a qualified mechanic).
- Secondary Fuel Filter: Clean (serviced by a qualified mechanic).
- Fuel Tube: Check (serviced by a qualified mechanic).
- Electrical Connectors: Regular inspection.
- Measuring and External Charging of Battery Pack: Regular inspection.
- Clearing Fuel Lines: Regular maintenance.
For complete maintenance details and instructions for unusual operating conditions (sustained high-load, high/low-temperature, dusty conditions), refer to the full user manual or consult Novatio Engineering.