Do you have a question about the now! DRIVE and is the answer not in the manual?
For 4-hole pattern, ensure washer arrows point towards the squares.
No washers are required for EST/Channel mounting.
For 3-hole pattern, ensure washer arrows point towards the triangles.
Position and center the toe cap strap at the tip of your boots.
Pull lever, move forward lean block, then relock lever.
Snowboarding is hazardous; use bindings at own risk. Always wear a leash.
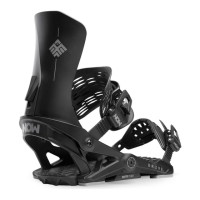
This manual describes the Now Drive and O-Drive snowboard bindings, a revolutionary design inspired by skateboard trucks, offering unparalleled performance and comfort. The bindings are designed for customization to suit individual needs and riding styles.
The Now Drive and O-Drive bindings utilize "Skate-Tech" to enhance energy transfer and reduce foot fatigue. Inspired by how easily and efficiently a skateboard turns, the system's major components mimic skateboard trucks. The 'Hanger' component powerfully transfers energy from the straps to the bushings and onto the board's edges. The Kingpin acts as a fulcrum, magnifying this energy through leverage. Unlike traditional bindings that diminish energy transfer by flexing and bending their baseplate, forcing riders to crank straps harder or use stiffer highbacks, Now bindings bypass the middle of the snowboard. Instead, they direct energy directly onto the board's edges, transferring more power with less effort. This design allows feet to remain more relaxed and comfortable for longer periods.
To access the disc cover and adjust settings, the soft EVA Foot Pillow at the heel needs to be opened. Simply grab the EVA pad and pull upward. To close the foot pillow, push down on the EVA while pulling the heelcup upwards. A "CLICK" will be heard on both sides when the foot pillow is properly closed.
The bindings accommodate various hole patterns and EST/Channel configurations.
The disc allows for adjustment of the stance width. The manual illustrates how to orient the disc to achieve the desired width, with indicators for "toe" and "heel" to guide placement.
The disc also facilitates boot size adjustment to ensure the boot is centered across the board. Since snowboard boots vary, it's essential to check settings and confirm proper centering. The manual provides charts for Medium and Large bindings, indicating disc orientations for different boot sizes (e.g., Boot Size 7, 8, 10 for Medium; Boot Size 10, 11, 12+ for Large). Arrows on the disc indicate the direction for adjustment.
The straps feature a tool-free NOW lever for easy adjustment. To adjust, open the lever, unscrew it, move the straps to the desired location, tighten, and then close the lever.
The toe cap strap is designed to be positioned and centered at the tip of the boots. Adjustments follow the same tool-free process as the main straps.
FlipIt Straps allow riders to interchange ankle straps between left and right bindings for a customized riding experience.
For riders who prefer a "NoBack" setup, HighCups can replace the highbacks.
To change the forward lean, pull down the lever and move the forward lean block either up or down. Once the desired position is reached, flip the lever back to the locked position.
Now Drive and O-Drive bindings come assembled with either Medium (50 shore) or Hard (60 shore) bushings. These can be changed based on riding style, snow conditions, rider weight, or personal preference. To remove bushings, simply pop them out with a finger. It's important to note that toe and heel bushings are different; check the underside label before installing. Additional bushing options (e.g., Soft 45 shore) are available through the NOW online store or authorized dealers.
Snowboarding is a hazardous sport with risks of serious injury or death. Riders use Now bindings at their own risk. It is crucial to read the instruction manual before installing and using the bindings. Only snowboard-specific boots should be used. The binding does not release on impact. A runaway snowboard is dangerous, so a leash is required at all times, attached to the binding's baseplate and securely fastened to the body, in compliance with ISO code 14573.
Now Snowboarding offers a lifetime warranty to the original purchaser on baseplate components (Hanger, Alumi-ring, and forge disc). All other parts have a one-year limited warranty. The warranty is non-transferable, and Now reserves the right to repair or replace faulty parts at its discretion. Further warranty policy details are available on now-snowboarding.com.
| Brand | now! |
|---|---|
| Model | DRIVE |
| Category | Sports & Outdoors |
| Electrolytes | Yes |
| Sport | Endurance |