3
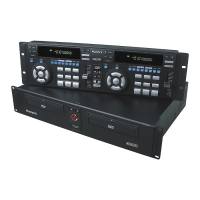
Front Panel Features
1. Menu Navigation Buttons: Use these
buttons to navigate through the DVD menu
and setup pages.
2. Playback Buttons: Contains Play, Pause,
Cue, Fast Forward, Rewind, Next Track,
Previous Track, Slow Motion and the
Program Function.
3. Pitch Fader: Adjusts the playback
pitch/speed. This feature can be disabled
by pressing the Pitch button (7).
4. Setup Button: Selects Setup Mode, which
can be navigated by using the Menu
Navigation Controls.
5. Function Buttons: Toggles DVD title and
subtitle, changes the volume output,
adjusts the key, changes the angle, and/or
zooms in/out.
6. Display: This product features a VFD
matrix-style display. Refer to the display
section of this manual for further
information.
7. Pitch Bend, Pitch Lock, and Looping
Buttons: These features are used for beat
matching and described in further detail in
this manual.
8. Eject, Random Mode, Repeat Mode, and
Display Buttons: These buttons add
functionality to the DVD Player and are
described further in this manual.
9. Master Video Switch and On Screen
Display (OSD) Toggle Buttons: This
section allows you to switch the Master
Output between Video 1 and Video 2. The
On Screen Display toggle suppresses text
generated by the DVD player from the video
output.
10. Disc Tray: This is where the disc is loaded.
11. Power Button: Turns the unit on and off.
12. Eject Buttons: Opens and closes Disc
Tray. BE SURE TO USE THE BUTTON TO
OPEN AND CLOSE THE TRAY.
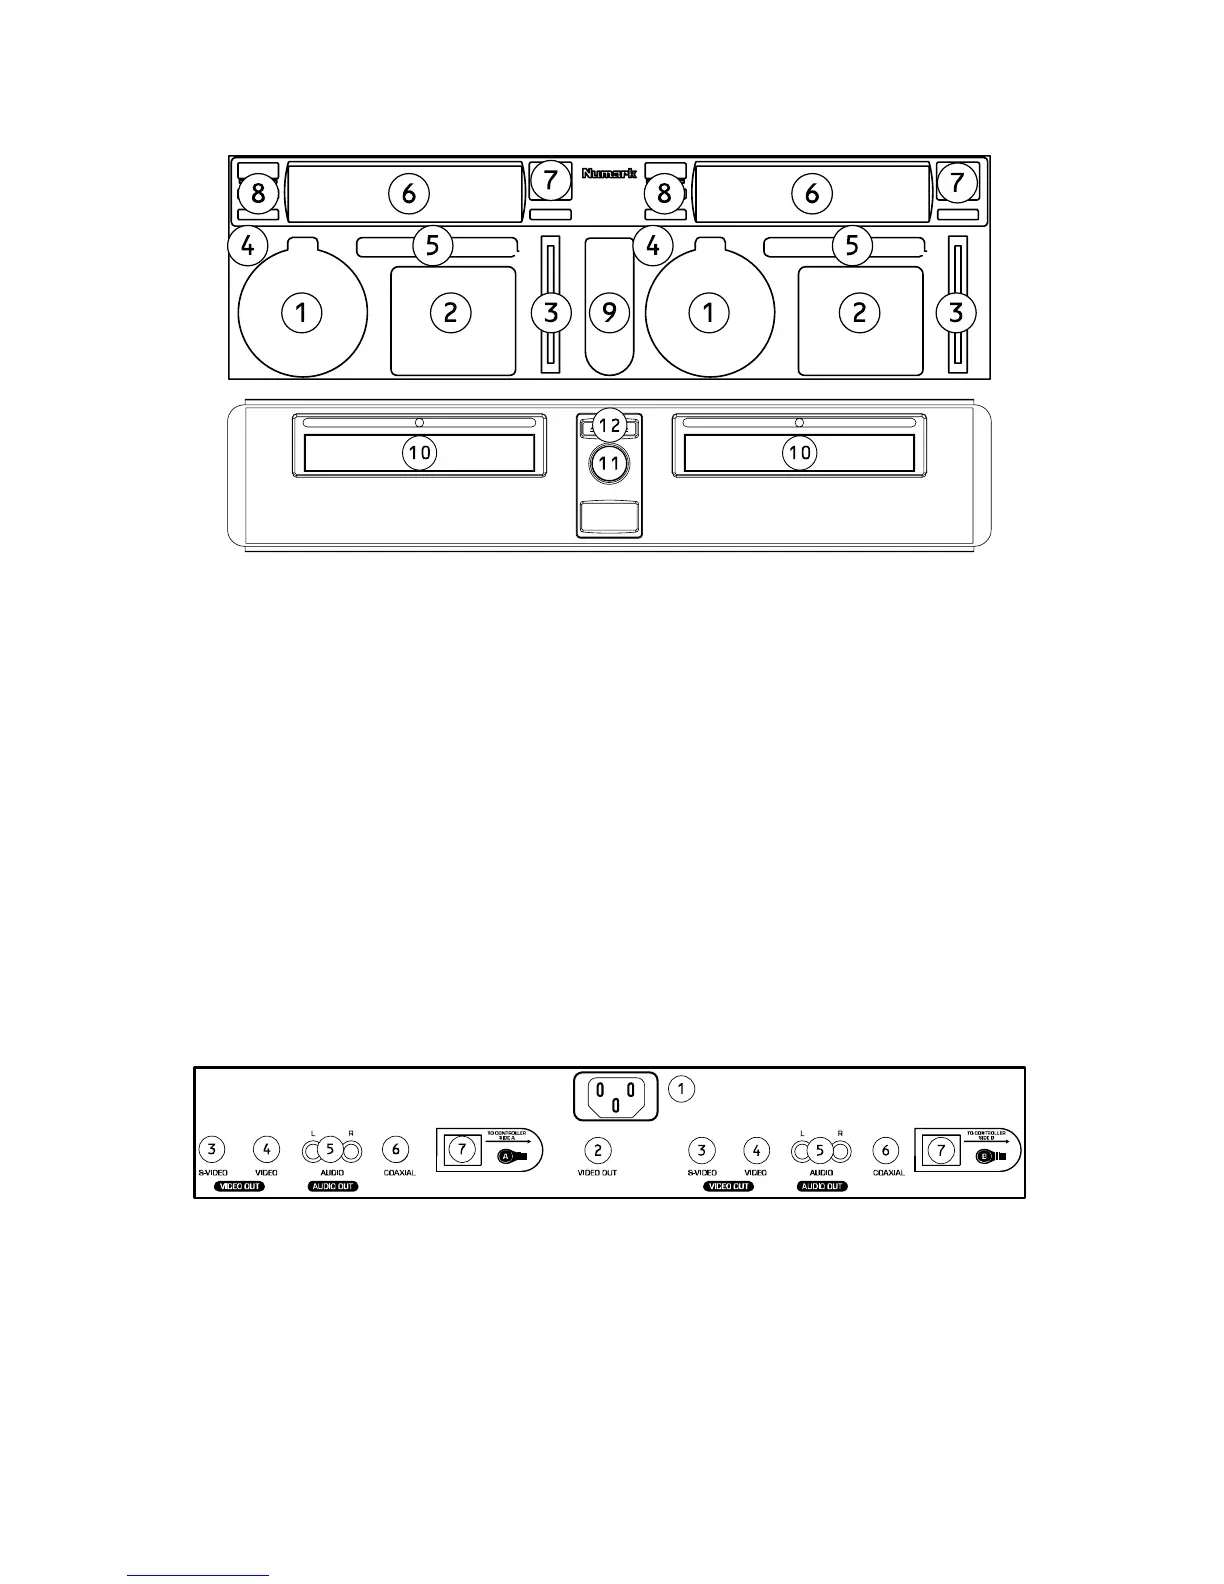
Rear Connections
1. Power Input: Plug in the supplied power
cable here.
2. Master Video Output: This is a switched
composite video output that will send either
Video 1 or Video 2. You can use this for
monitoring, or as your main output if you
don’t have a video mixer.
3. S-Video Output: Connect to a monitoring
device with S-Video inputs.
4. Composite Video Output: Connect to a
monitoring device with composite video
inputs.
5. RCA Audio Stereo Output: Connect to an
audio mixer or amplifier.
6. Coaxial Digital Audio Output: Connect to
compatible decoder.
7. Controller Connectors: Connect to the
respective side of the controller section.
See the Quick Setup Guide.