15TRIV next instructions
4
2
3 6
5
1
14 TRIV next instructions
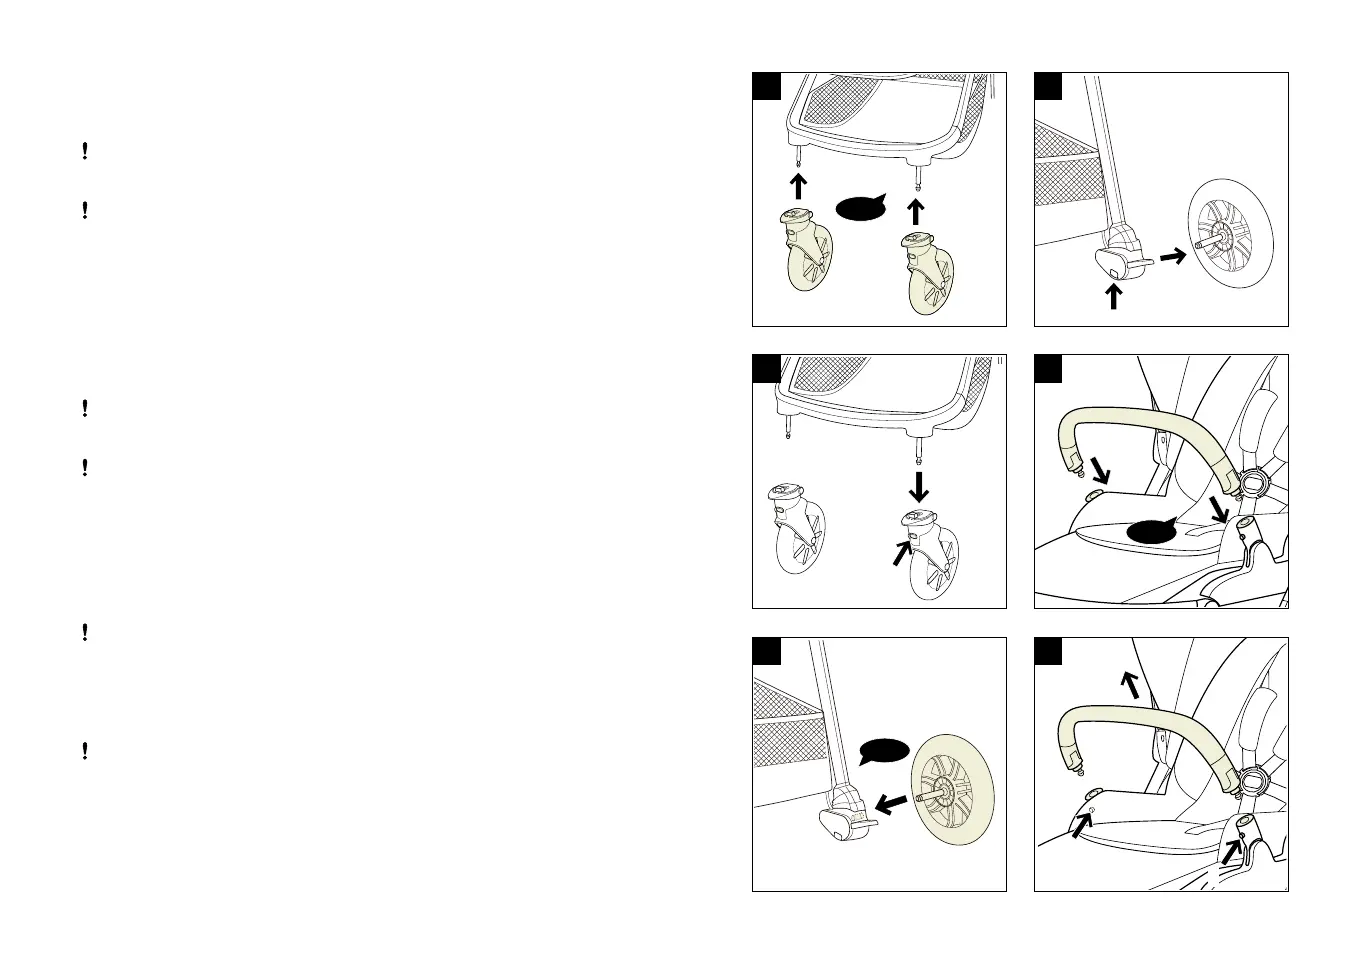
Front Wheels
1 - Insert the front wheel into the front leg.
A “click” sound means the front wheel is assembled
completely.
Check the wheel is securely attached by pulling out.
Repeat on opposite side.
2 - To remove the front wheel, press the release button (1)
and detach the front wheel from the front leg (2).
Rear Wheels
3 - Insert the rear wheel into the rear leg.
A “click” sound means the rear wheel is assembled
completely.
Check the wheel is securely attached by pulling out.
Repeat on opposite side.
4 - To remove the rear wheel, press the release button (1)
and detach the rear wheel from the rear leg (2).
Arm Bar
Always secure the child with the harness. The arm bar is
not a restraint device.
5 - Align the arm bar ends with the arm bar mounts, and
insert until it clicks into place.
A “click” sound means the arm bar is assembled
completely.
6 - To remove the arm bar, press the arm bar release
buttons (1) and remove the arm bar (2).
2
1
2
1
click
click
1
1
2
click
 Loading...