9
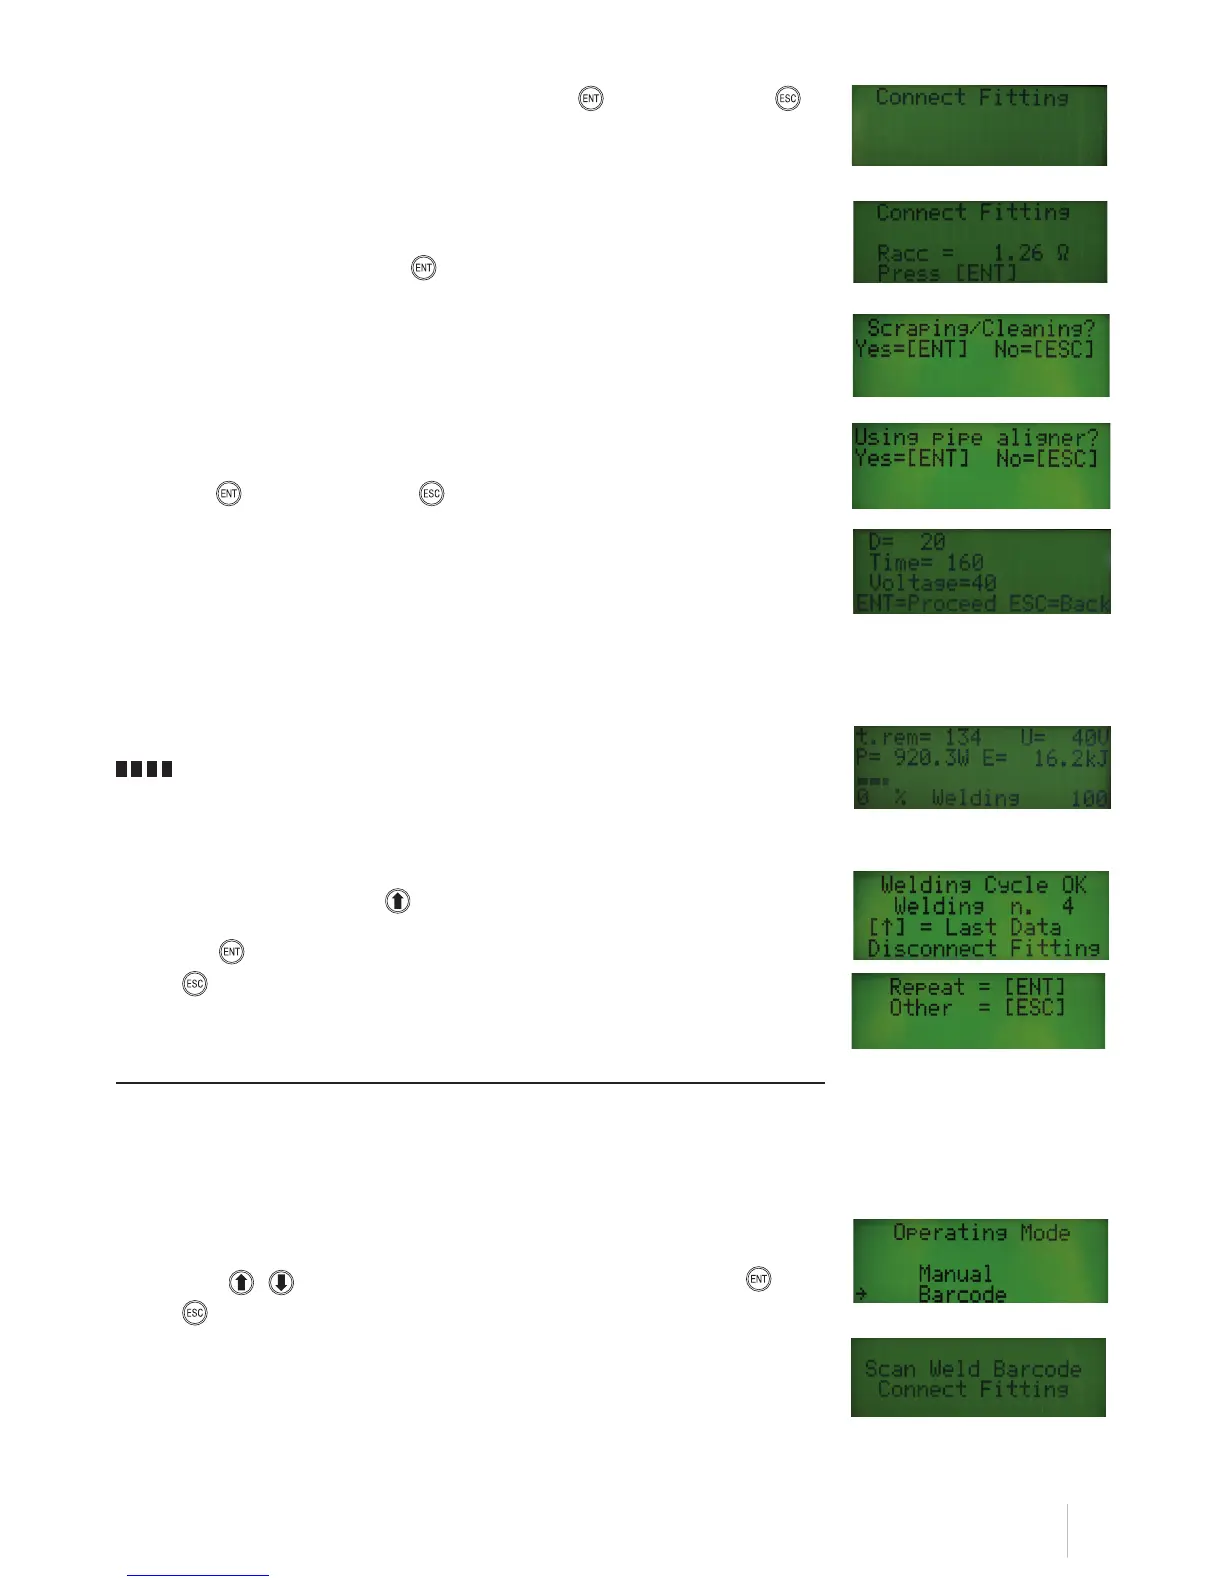
After checking the entered data once again, press either ENTER to confirm or ESCAPE to
delete the action and return to the previous screen display.
If the fitting connection has not been carried out yet, you will be prompted to carry out fitting
connection in the next screen display.
After connecting the fitting press ENTER to continue.
The next screen shows a message reminding the operator that, before welding, all the required
preparatory actions must have been completed (scraping and cleaning).
You will also be reminded that, in order to ensure good welding, an alignment clamps must be
used.
Press ENTER to continue or ESCAPE to return to the previous screen display.
A summary of the information entered so far will be displayed at this point as shown here below:
D Fitting diameter
Time Welding time
Voltage Welding voltage
By pressing ENTER you will control the welding cycle start and the following screen page will be
displayed:
t.rem Residual welding time in seconds
P Power output in Watts
Welding progress %
U Welding voltage in Volts
E Dissipated energy in Joules
A sound signal marks the end of the welding cycle and the information shown opposite is
displayed. Press the ARROW UP key to display a detailed welding report.
Press ENTER to carry out a new welding cycle using the same data. Or alternatively, press
ESCAPE to enter new data.
Welding by barcode scanning
After entering general details, if you have chosen to carry out welding by barcode scanning a
screenshot will be shown, containing the menu allowing to choose between two possible operating
modes.
After powering on your welding unit, completing the GENERAL DATA ENTRY procedure and
selecting an operating mode, the screenshot on the right will be shown.
Use the keys to select your required function and confirm with ENTER . Press
ESCAPE to return to the previous screen display.
This selection enables to carry out welds by electric melting via barcode scanning.
Connects the welding unit to the fitting to weld via the welding cables.
 Loading...