INSTALLATION, USE & CARE INSTRUCTIONS
INSTALLATION
11
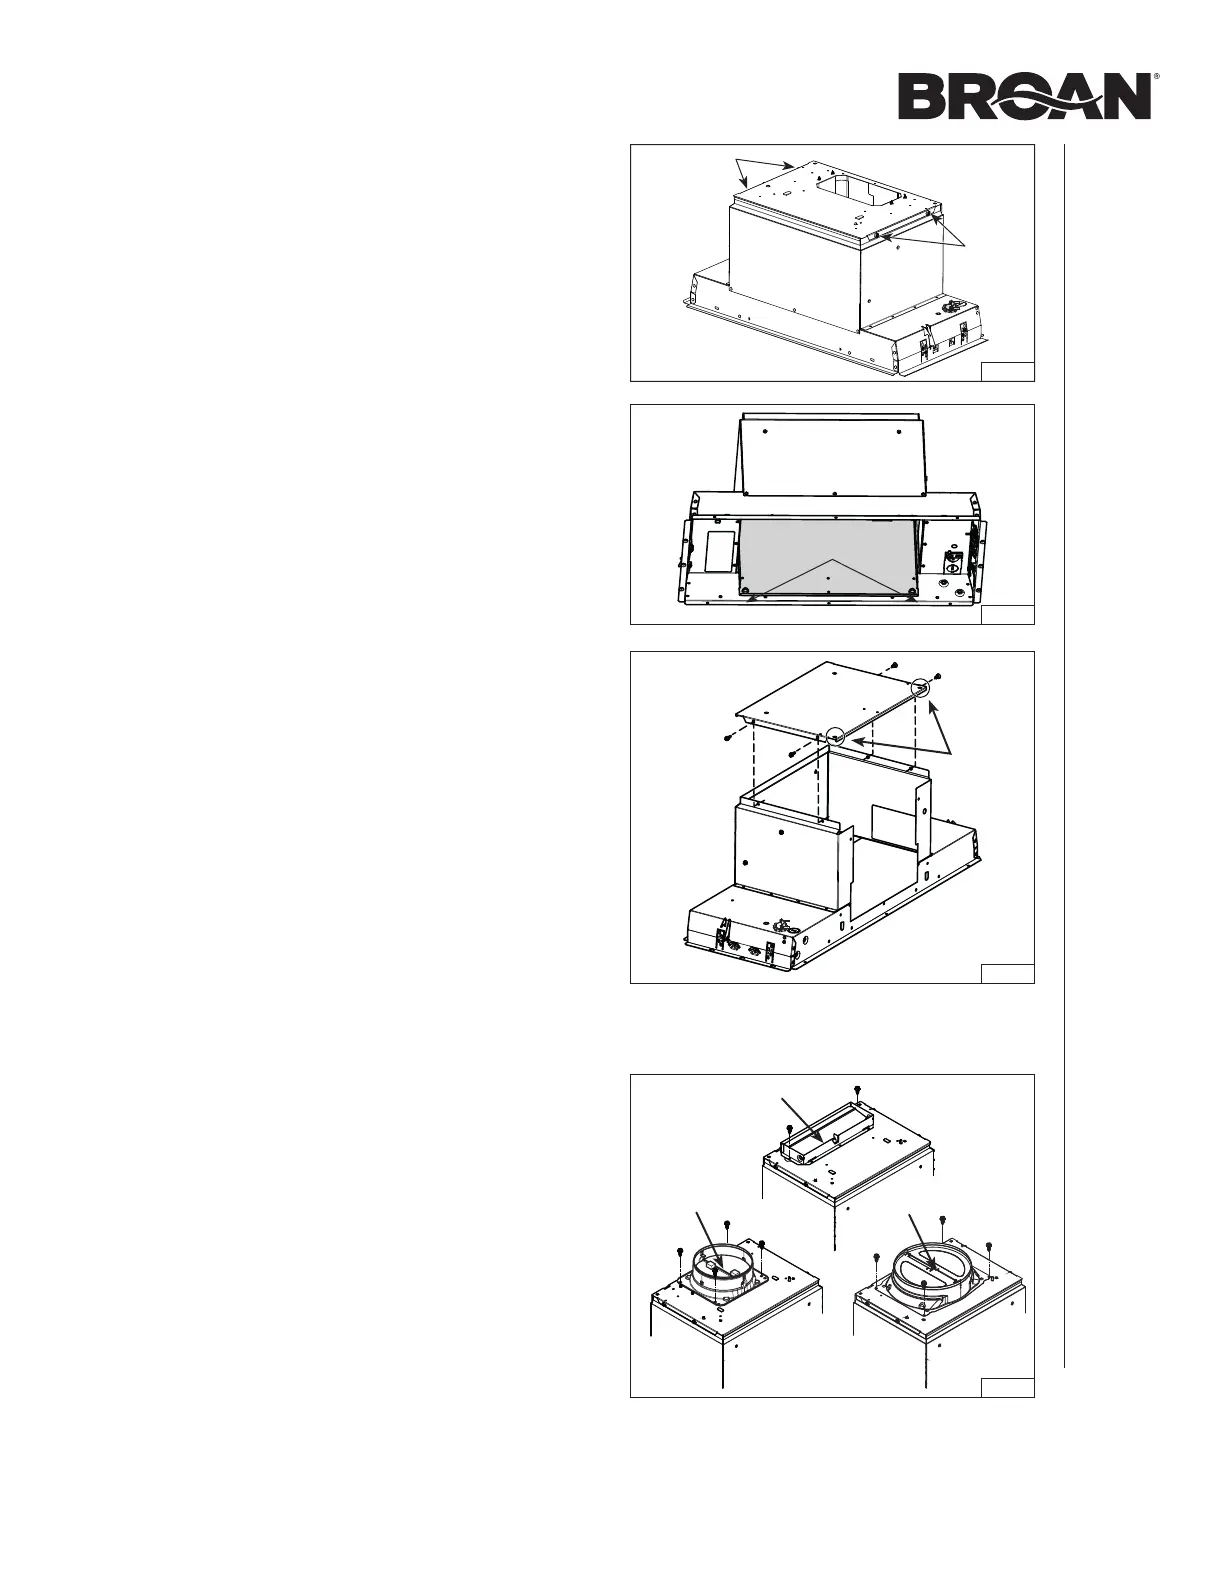
FIG. 20
NUTS
PREPARE THE UNIT (CONT’D)
HORIZONTAL EXHAUST INSTALLATION ONLY (CONT’D)
7. Remove the 4 screws (two per side) retaining the blower
support plate to the top of the unit (FIG. 19). Carefully lift
out and set aside the blower with its support plate. The
blower will be reinstalled later in the unit.
8. From inside the unit, detach the back plate (grey part in
FIG. 20) by removing its both retaining nuts using
3/8” diameter socket. Set aside the nuts and plate.
9. Install the back plate on top of the unit, where the blower
support plate was. Orient the holes nearby the corners
towards the back of the unit. Assemble to the top of the
unit using 4 screws previously removed in step 7 (FIG. 21).
FIG. 19
SCREWS
SCREWS
FIG. 21
HOLES
FIG. 22
HINGE
HINGE
HINGE
VERTICAL EXHAUST INSTALLATION ONLY
10. For rectangular ducting, use 2 included no. 8-18 x 1/4”
metal screws to attach the included 3¼” x 10” adapter
damper on top of the unit, over the blower exhaust opening
(FIG. 22).
NOTE: The damper hinge must be towards the front of
the unit.
For round ducting, use 4 included no. 8-18 x 1/4” metal
screws to attach the included 6-in. round (or 8-in. round,
PM600SSV unit only) adapter damper on top of the unit,
over the blower exhaust opening (FIG. 22).
NOTE: The damper hinge must be parallel to the sides of
the unit.