- 10 -
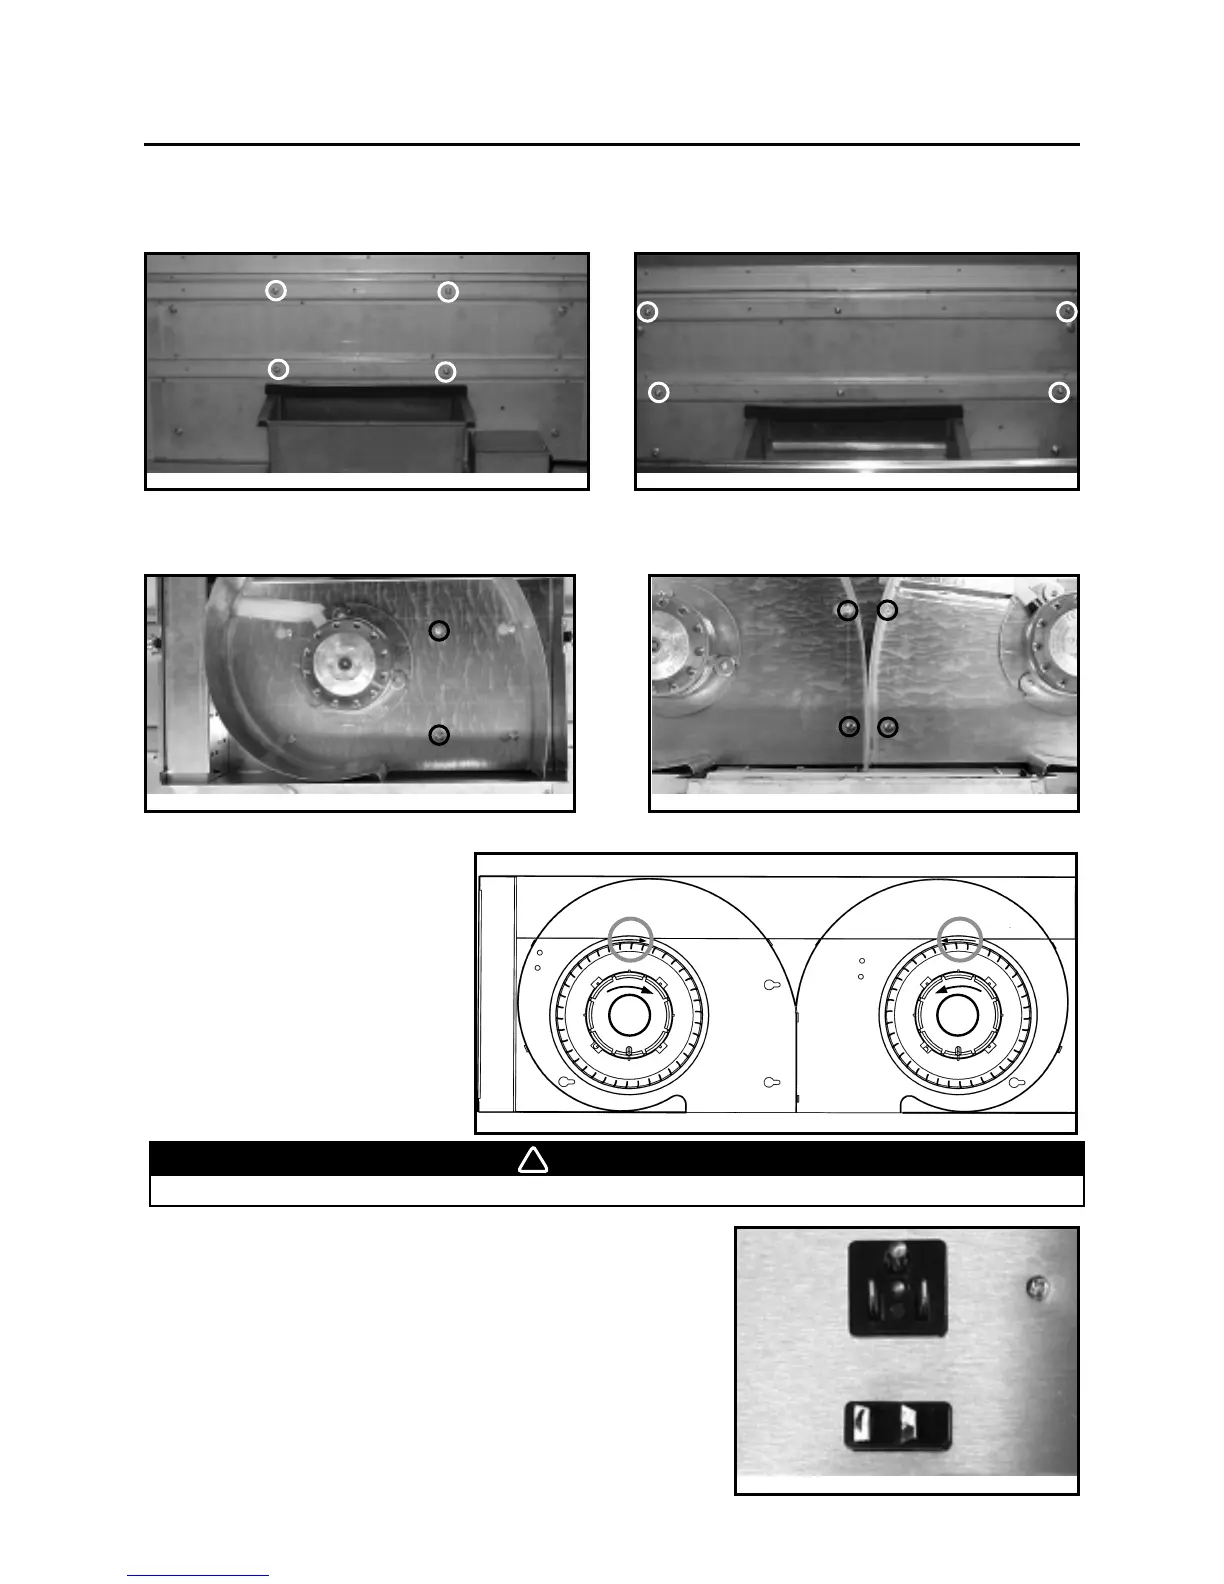
Secure the blower by installing 2 more #8 x 3/8’’ screws for the P5 blower and 4 more #8 x 3/8’’ screws for P8
into the locations shown in the pictures below (single blower or dual blower). Reinstall impeller(s) and cover.
HD0080
HD0081
Single blower (P5)
Dual blower (P8)
18. INSTALL THE BLOWER (INTERIOR BLOWER) (CONT’D)
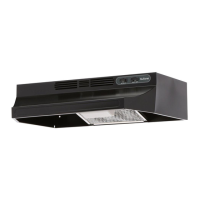
Install (4) #8 x 3/8’’ screws into the location as shown in the pictures below (single blower or dual blower). Do
not tighten screws down fully, leave a 1/8” gap.Hang blower unit onto blower plate (screws through the large
part of the keyhole). Slide the blower to its position (screws in the small part of the keyhole). Tighten the
(4) screws.
HD0044
HD0044
Single blower (P5)
Dual blower (P8)
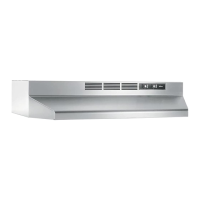
WARNING
Never plug the 2-prong blower cord to the 3-prong power supply cord.
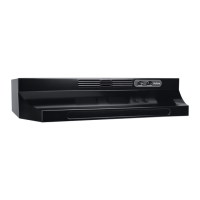
FOR DUAL BLOWER UNIT, MAKE
SURE THE IMPELLERS ARE
CORRECTLY INSTALLED, THE
INSERT WILL NOT WORK
PROPERLY IF REVERSED. Both
impellers are different in the dual
blower, one rotates clockwise and
the other counterclockwise. Each
wheel and motor have an arrow and
a number on them, you have to
match them correctly (see drawing
beside).
FRONT
1
2
HD0023
Plug the power supply to the 3-prong male connector (A) and the
blower unit into the 2-prong female receptacle (B) inside the
insert.
HE0022
A
B