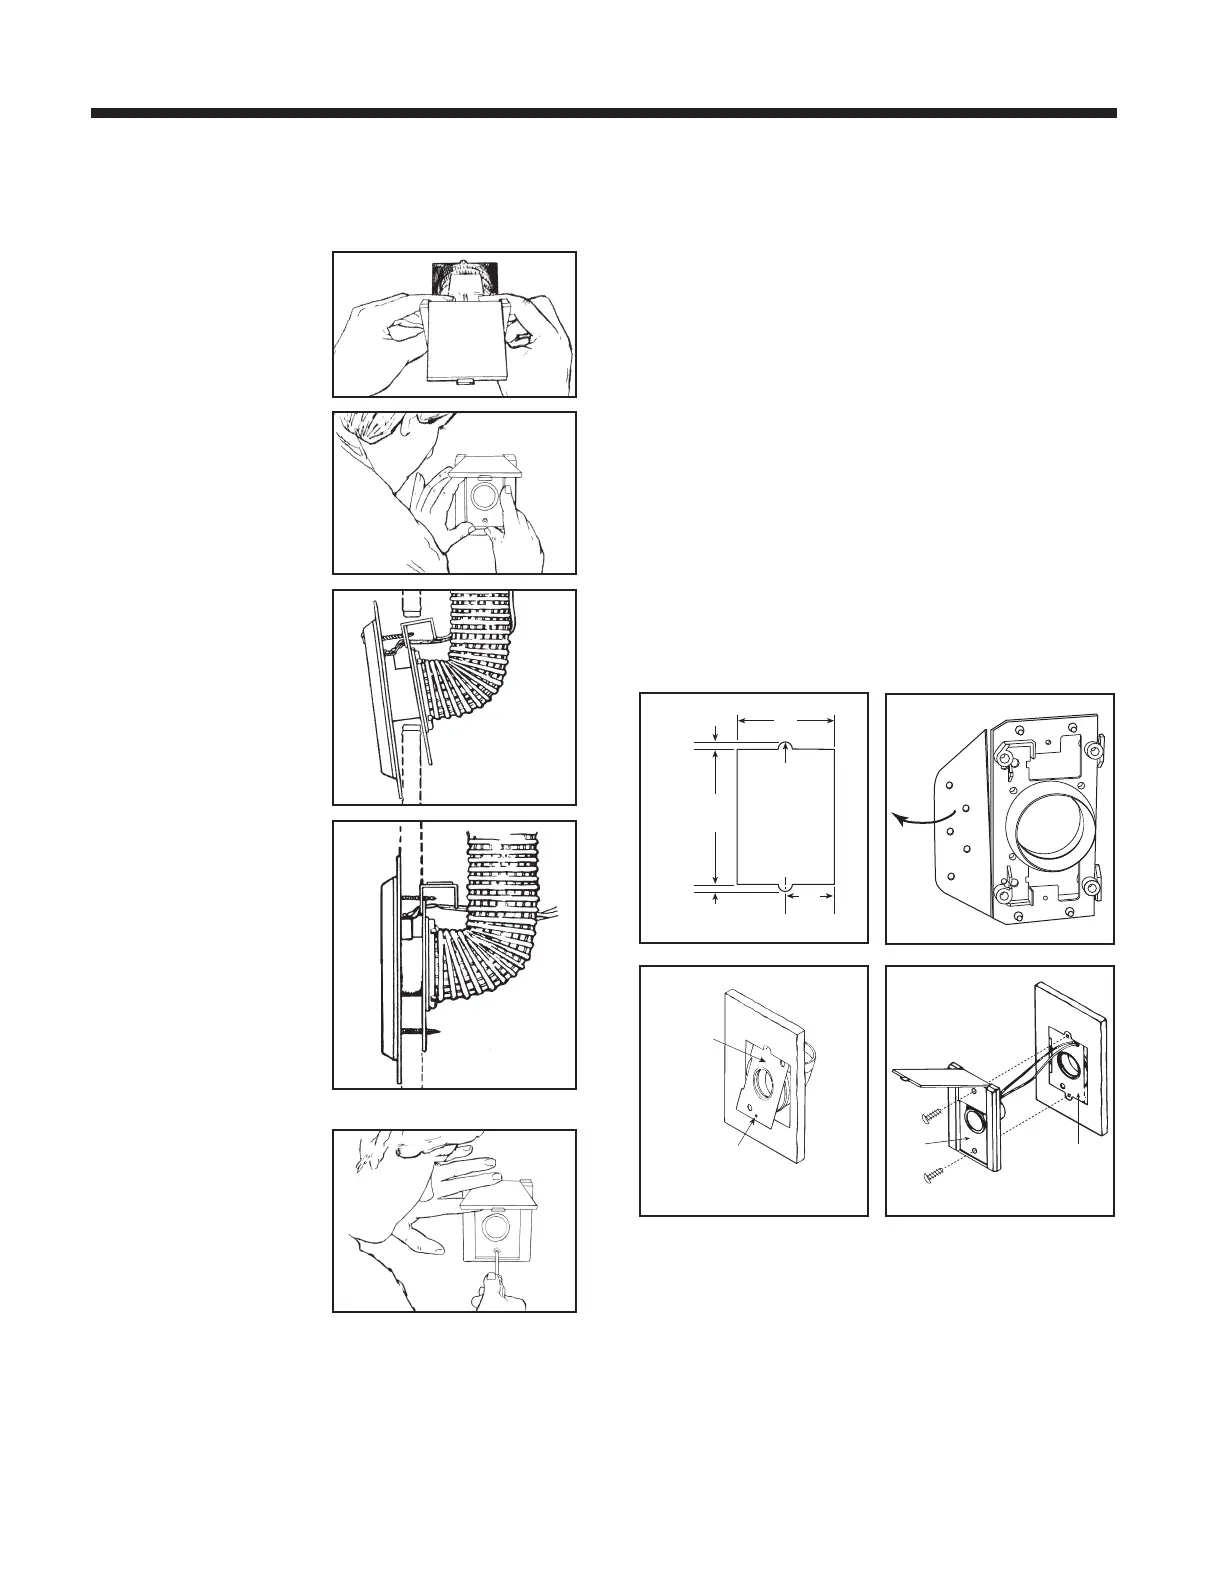
Installing the Inlet
When you place the inlet
into the wall cutout, the
mounting plate and tube
guard slip inside the wall;
the inlet cover remains on
the outside.
Holding the inlet assembly
between your thumbs and
fingers, angle the bottom
of the mounting plate into
the cutout. Push the
assembly downward until
you have clearance at the
top of the cutout.
Push the top of the mounting
plate into the cutout and
lift the assembly upward
until the top screw seats in
the predrilled hole. At this
point, the wall should be
sandwiched between the
mounting plate and the
frame plate.
Insert the bottom screw
into the inlet cover and
through the other parts.
Give the screw a few turns
until it firmly engages in
the mounting plate. Now,
level and slightly lower the
assembly. Make sure the
wall is sandwiched
between the inner and
outer parts―you’ll be able
to feel if mounting plate is
firmly centered on the
inside of the wall.
Hold the inlet in place and
gradually tighten down
each screw a little bit at a
time. (If you completely
tighten down one screw at
a time, the mounting plate
may pull away from the
wall at the loose end and
slip back into the cutout.)
Complete all your wall inlet installations in this manner. If your
cutouts are accurate, each wall inlet will install more quickly
and easily.
V111 Series Wall Inlet Installation
(V144 Mounting Plate)
1. Make cutout according to dimensions in Figure 20.
2. Refer to Figure 21. Break off nail plate at scored line.
3. Refer to Figure 22. Glue elbow to mounting plate, place
assembly into cutout, and attach elbow to tubing inside
the wall.
4. Make sure mounting holes are exactly at top and bottom.
5. Connect 2-conductor low-voltage wire to terminal screws
on back of wall inlet.
6. Refer to Figure 23. Align inlet mounting holes with
mounting plate holes, place inlet into mounting plate, and
secure with provided screws.
NOTE: If V122 shorter radius elbow is used, it may be
necessary to use the short mounting screw to avoid
interference with elbow.
page 11
INSTALLATION IN EXISTING CONSTRUCTION (CONT’D)
 Loading...