CANCEL button
START button
Use to cancel any operation.
Pressing this button will return
the unit to standby mode.
Use to start cooking program.
9
8
SKIP PREHEAT button
Press to bypass automatic
preheating.
6
1. Air Fry
2. Bake
3. Roast
4. Reheat
Cooking Programs
7
4 Presets
4 Main cooking programs
1. Fries
2. Chicken
3. Burger
4. Steak
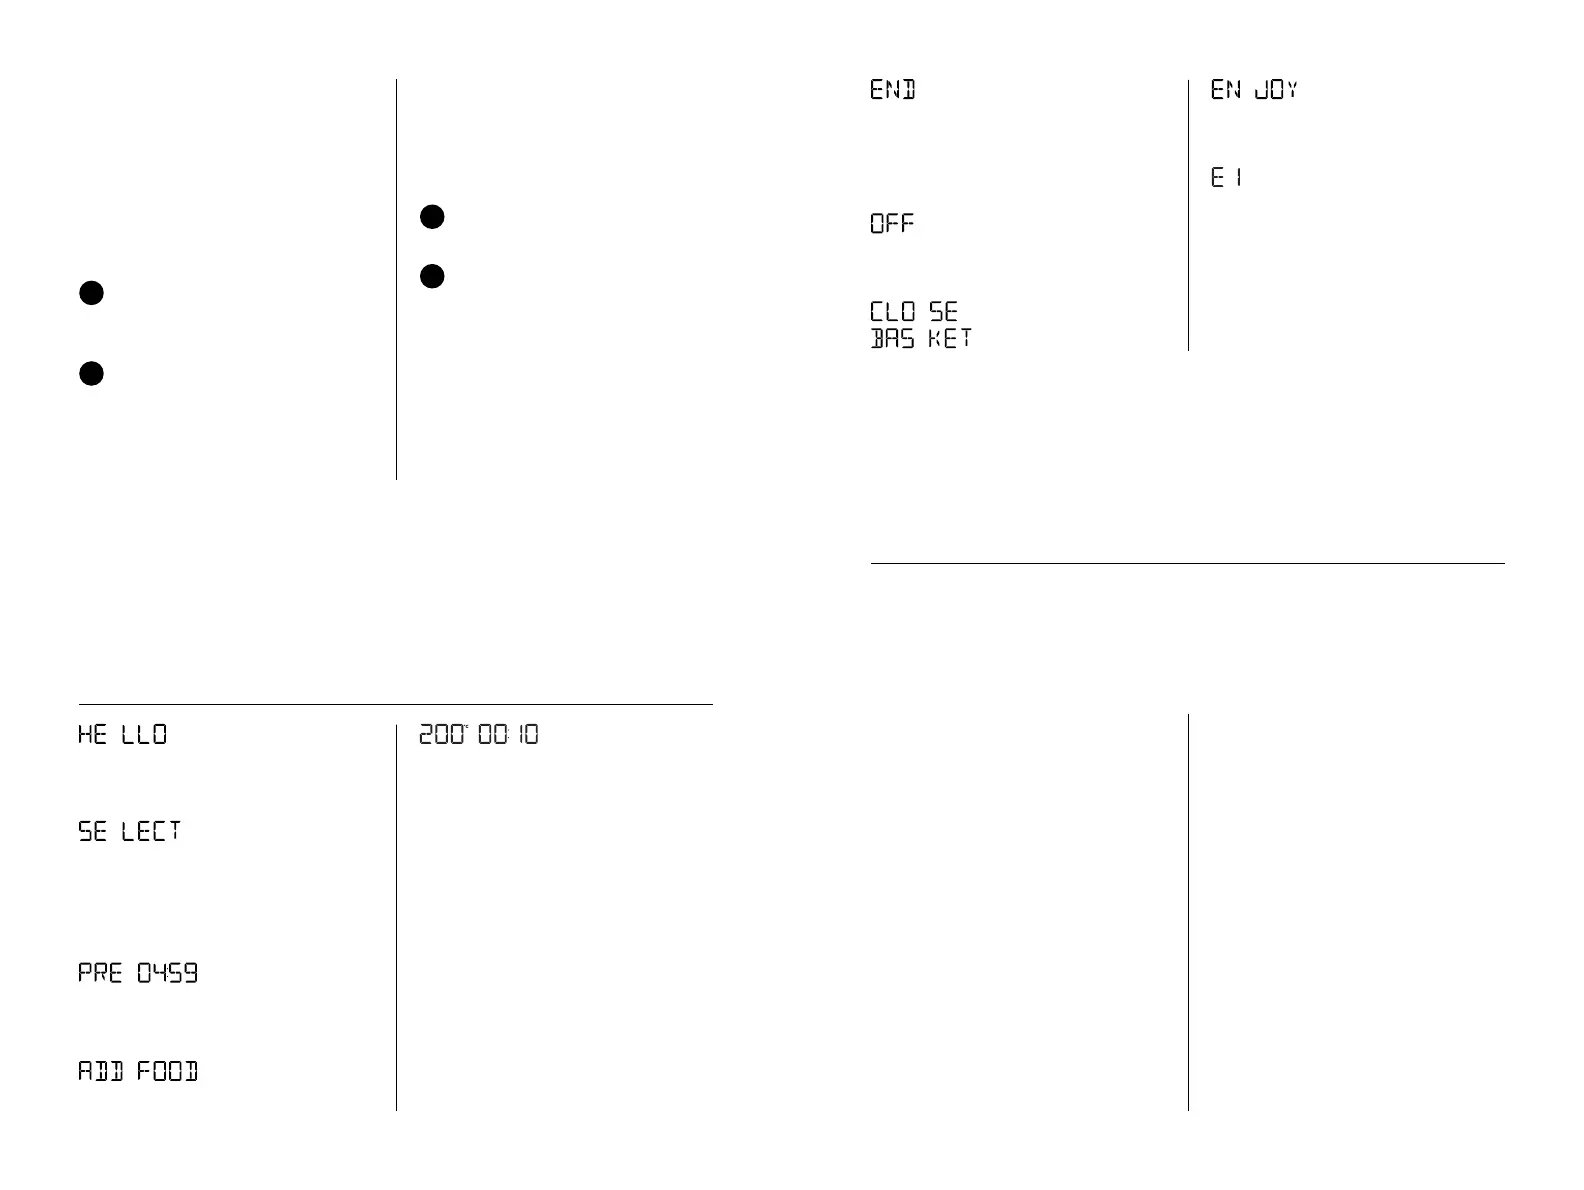
Display messages
Display message
when the unit is
plugged in.
Temp and time
display
Notes on time
format:
During program
selection and
entering settings,
the time format
is HH:MM (00:10
means 10 minutes)
During preheating
and cooking, time
counts down in
MM:SS format.
Display message
when unit is
preheating.
Display message
when CANCEL is
pressed after a
cooking program
has started.
Display message
when unit is on
standby mode.
Indicates to select
a cooking program
Display message
when cooking time
is complete.
Display message
when preheating is
complete.
Display message
for error
codes. Refer to
Troubleshooting
section of this
user guide for a
complete guide on
the do’s and don’ts
when an error code
appears.
Display message
when unit is
powered OFF.
Display message
when basket is
open.
- illuminates halfway
through cooking
for some cooking
programs indicating
to shake/flip food for
even frying.
- illuminates when
cooking time is
complete.
SHAKE
DONE
Initial test run
This step is optional but recommended to get yourself familiarized with the
Air Fryer Mini and ensure it is working properly. It will also help eliminate any
residue or traces of odor in the Air Fryer Mini that may remain after shipping.
NOTE: This process must be done with no food in the Air Fryer basket.
1. Place air fryer on a stable, level,
clean, heat-resistant, and dry
surface, close to an electrical
outlet.
2. Ensure the cooking tray is
inserted into the air fryer basket
without any food.
3. Plug in unit to a power outlet.
4. Press AIR FRY.
5. Adjust time to 10 minutes and
press START.
6. Unit preheats and displays
ADD FOOD after preheating is
complete.
7. When ADD FOOD appears,
open and close basket. DO NOT
add any food.
8. Unit displays countdown time.
9. When SHAKE appears, open
and close basket.
10. After cooking time is complete,
ENJOY appears on the display.
11. Allow unit to cool.
You’re all set. Happy cooking!
1312