6
• Larger legumes will mill slowly, while small grains like wheat or millet will mill quickly.
Rice tends to mill more slowly as well.
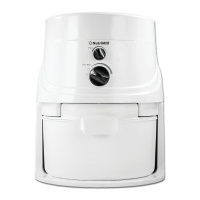
GRAIN INLET COVER
To better understand how your mill works follow these simple steps:
• Unplug mill so motor does not turn on while adjusting grain feed (lower) knob.
• With hopper empty, look under grain inlet cover (located at bottom of hopper). A
ashlight may be helpful. Do not touch or disassemble the inlet cover.
• When knob is set to OFF, most grains cannot ow through the inlet.
• Turn lower knob back and forth. You will see the size of the opening into the milling
chamber gradually changing.
• As you turn the knob further to the right, inlet size increases. This allows grain to ow
more rapidly.
• Depending on size of grain in the hopper, knob setting has a point at which grain
begins to ow. (For example, barley or millet will begin to ow into the mill at a
setting much further to the left than corn or beans because they are smaller in size.)
• When you nd the point where grain begins to ow, turn the knob another 1/4” to
the right.
OPERATING INSTRUCTIONS
1. Attach Separator Cup - Must be attached when milling.
Align handle on cup with the handle guide on the bowl lid and snap securely into
place. This cup collects the nest our and the our in the cup is useable. After
milling, empty the separator cup each time.
2. Insert air lter on top of bowl lid - Must be in place when milling.
Clean lter and cavity it ts into after each milling session. Clean lter by tapping out
our. Washing lter is not recomended.
3. Attach bowl lid to top of our bowl. Lids twists counterclockwise to lock into place.
Bowl lid has a durable rubber gasket that creates a seal and prevents our leakage.
Gasket will have a tight grip, this also happens sometimes during regular use. For
tight gaskets, we suggest lubricating the gasket by rubbing on either our, cornstarch
or non-stick cooking spray.
4. Lock on hopper extension ring - (not necessary to use when milling small amounts).
The hopper extension ring comes packed in the our bowl and should be removed
when milling. Extension ring has 3 locking tabs to secure it to the mill. It is best to
 Loading...
