11 • THE NUWAVE COMPLETE COOKBOOK
OWNER’S MANUAL • 12
GENERAL RULES :
• Place foods that need a long time to cook on the rack closest to the heating
element like potatoes, carrots, etc. and place soft vegetables on the lower
racks, like mushrooms, tomatoes, etc. -OR- Reverse the order and place
longer cooking foods on liner pan and NuWave until almost done. Then place
faster foods above and continue until all levels are done.
• Use food combinations that take about the same time for each to cook. For
example: pork or chicken and potato wedges; fish and stewed tomatoes; or
frozen beef with baked potatoes.
• Place tin foil under any foods that might drip onto other foods.
• Remember that the infrared rays do not penetrate the aluminum but the heat
will circulate throughout the oven.
• If top layers are done earlier, remove rack(s) from above and continue cooking
bottom foods until done.
• Use shallow dishes or light aluminum pans for cooking.
• For warming bread, place it on the bottom rack or liner pan and cover. For
grilling bread, place it on the top rack.
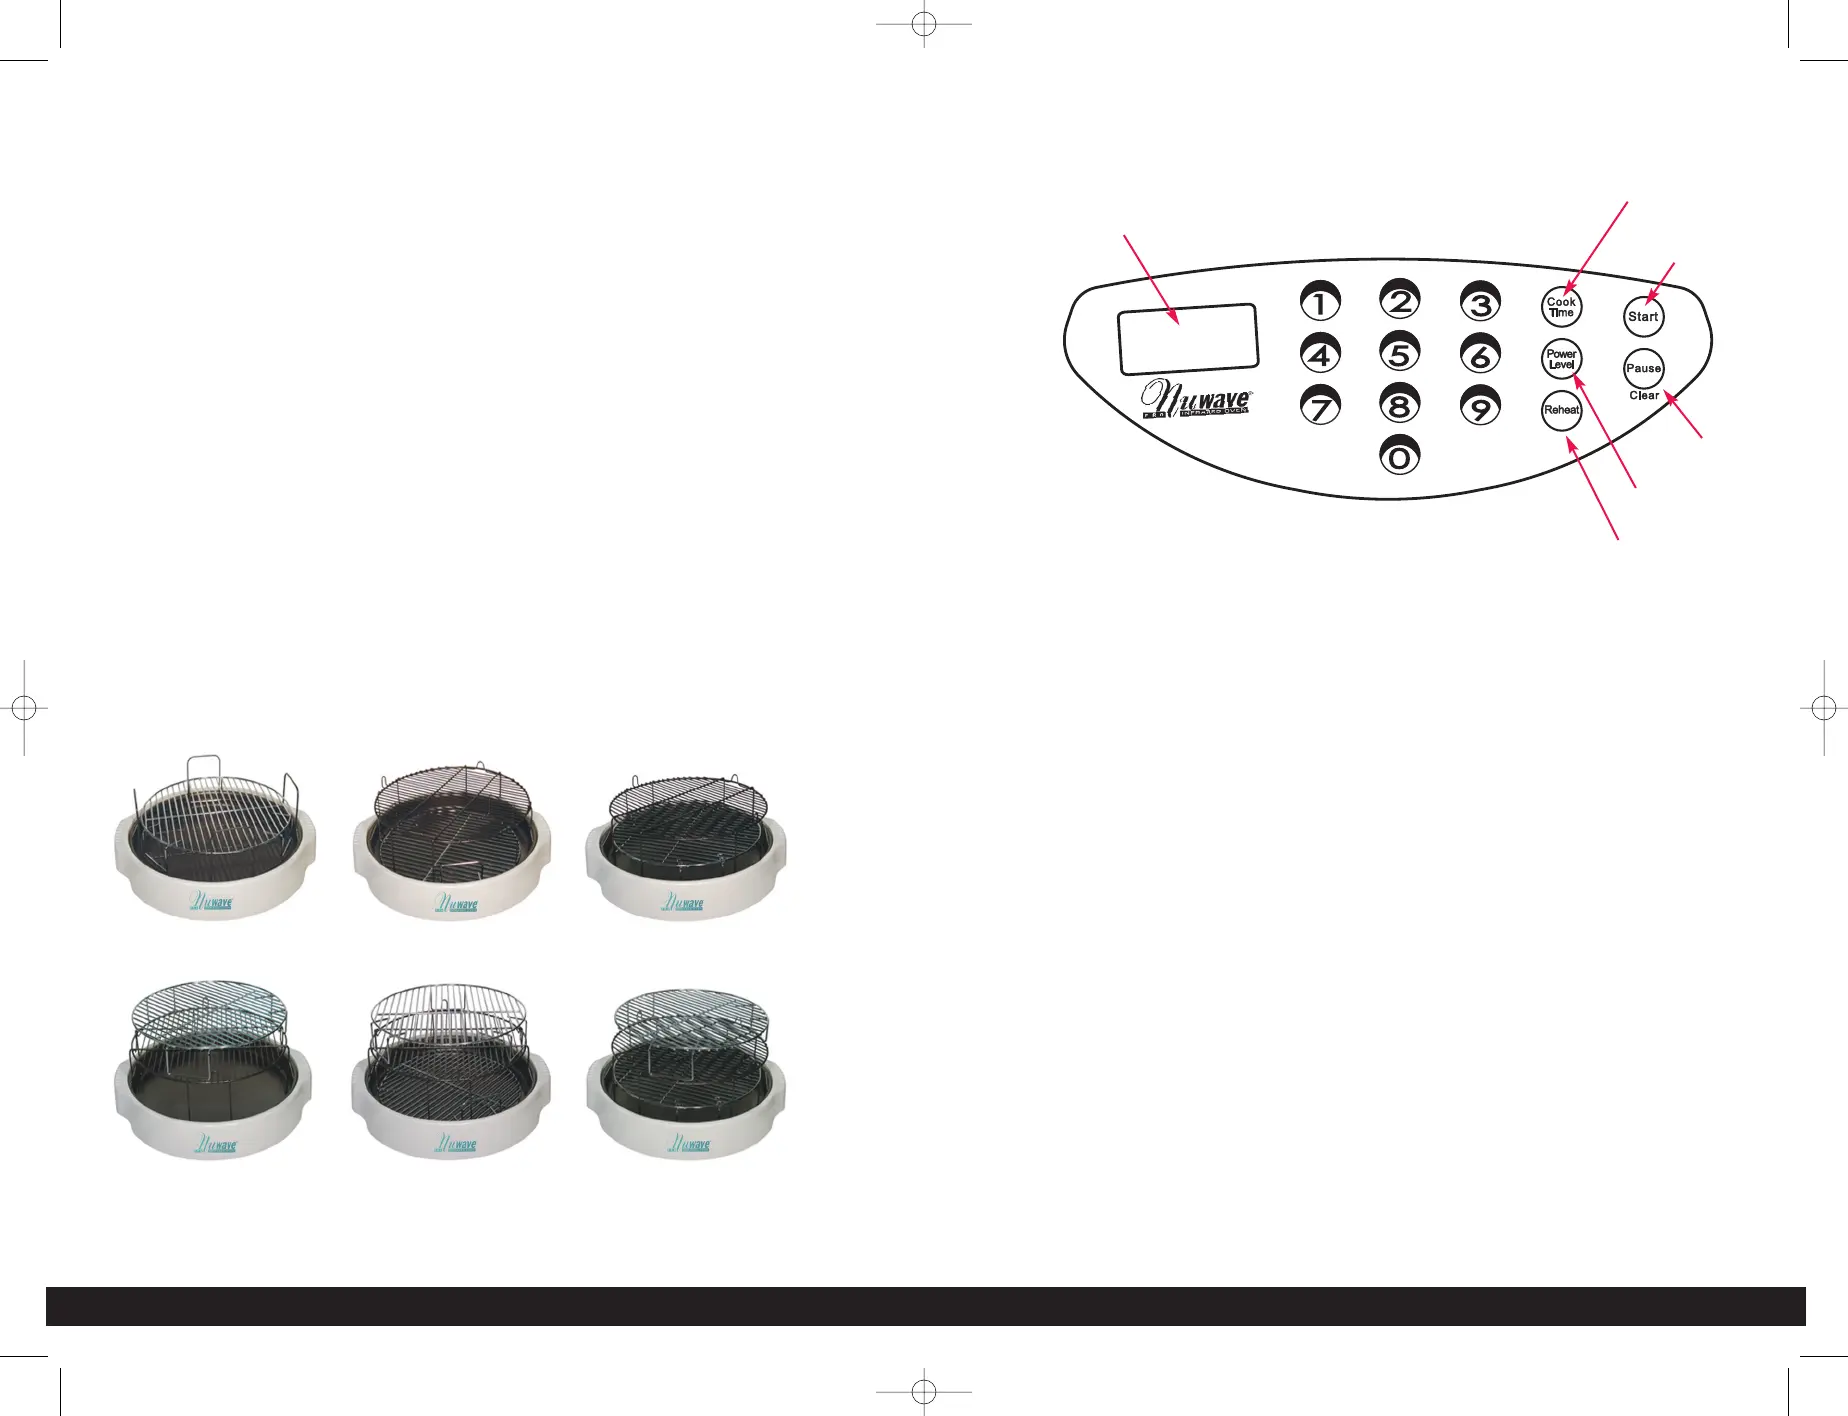
DIRECTIONS FOR DIGITAL NUWAVE OVENS
EASY START:
Oven is preset to cook at Power Level 10
To start cooking, press COOK TIME button, enter time required, and press
START. If cooking at any other power level other than HI (10), Power Level
button will be needed. See “Setting Power Level”.
CONTROL PANEL ON POWER HEAD - “0” should appear in window when
program is clear.
SETTING COOK TIME:
Press the COOK TIME button. The MIN indicator will flash in the lower right
corner of the display panel. Enter the required time in hours and minutes by
pressing the corresponding numerals. For example, 1 hour and 30 minutes
would be entered by pressing 130. The display panel will show 1:30. If required
time is in minutes, you only need to enter 1 or 2 numbers. For example, 5
minutes, just push 5; 46 minutes, push 46. If the number needs to be corrected,
clear the entry by pressing pause/clear button twice. Then re-enter the correct
numbers.
START COOKING:
Press START to begin cooking. The remaining cooking time will appear in the
display panel and the colon between the hours and minutes will blink ON and
OFF. The oven will automatically stop cooking when the time has expired and
will beep to alert you that it has stopped.
PAUSE/CLEAR COOKING:
To PAUSE the cooking time, press the PAUSE / CLEAR button one time. The
remaining cooking time will stay in the display panel but the colon will not be
blinking.
During the cooking, to CLEAR the cooking time, press the PAUSE / CLEAR
button twice. The remaining cook time will be fully cleared and a “0” will appear.
Display
Panel
Cook Time
Start
Pause / Clear
Power Level
Reheat
 Loading...