CHANGING THE LENSES
Change your look or adapt to new light conditions in seconds. Sold separately, our accessory lenses feature the unbeat-
able performance and protection of High Definition Optics
®
(HDO
®
). Their durable Plutonite
®
lens material filters out 100%
of all UV, not just UVA and UVB. Visit www.oakley.com to order accessory lenses for THUMP Pro.
THUMP PRO USER GUIDE 14
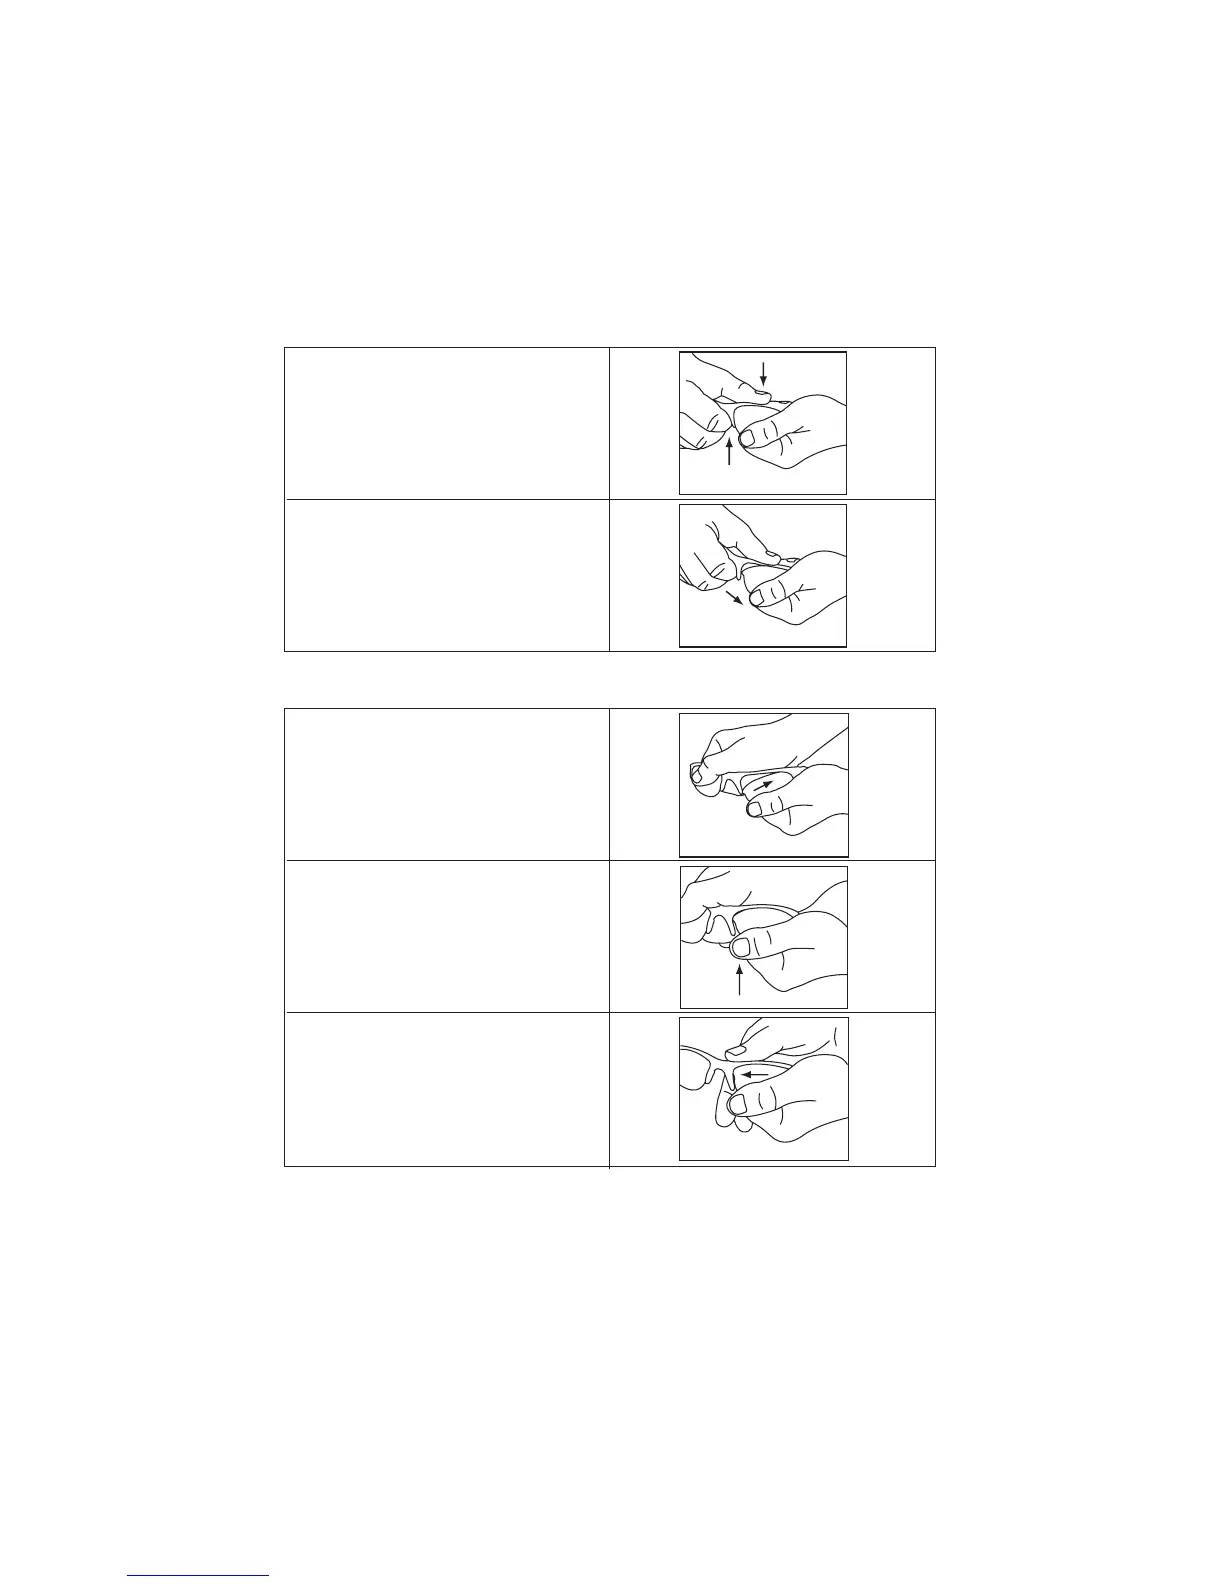
STEP 1: Grip the frame with one hand and
the lens with the other, as shown. Gently
push downward with your thumb while
pulling the nose bridge upward and open.
STEP 2: Pull the lens tab out of the frame.
Remove the lens.
LENS REMOVAL
LENS INSTALLATION
STEP 1: Grip the frame and lens as shown.
Fit the outer lens tab into the frame temple.
STEP 2: Align the inner lens tab with the
groove in the nose bridge.
STEP 3: Holding the lens firmly, slide your
thumb across the top of the frame until the
inner lens tab snaps into the groove in the
nose bridge.