This document is a user manual for the Oasser CW8 Pressure Washer, a household cleaning appliance designed for various tasks.
Function Description
The Oasser CW8 Pressure Washer is primarily used for household cleaning tasks. Its applications include:
- Cleaning cars, motorcycles, minivans, and bicycles.
- Washing patios, fences, paths, driveways, and house facades, particularly effective for blocked driveways.
- Removing algae and moss from roofs and brick buildings.
- Cleaning garden tools, furniture, and barbecue utensils.
- Cleaning the surroundings around farm animals.
The device operates by generating high-pressure water, which can be directed through various spray nozzles to tackle different cleaning challenges. It also features a detergent tank for applying cleaning solutions.
Important Technical Specifications
- Model: CW8
- Voltage (American Standard): AC 100~120V
- Power: 1800W
- Working Pressure: 1828psi
- Max. Pressure: 3046psi
- Working Temperature: 5-50°C
- Water Temperature: 0 ~ 40°C
- Max. Flow Rate: 1.85GPM (420L/h)
- Max. Water Inlet Pressure: 0.4Mpa
- Extension Cord Requirements:
- 1-10 m (3.3ft-33ft): 1.5 m²
- 10-30 m (33ft-98ft): 2.5 m²
- Water Inlet Hose: G3/4 thread of British standard (not included).
- Self-priming Water Inlet Hose Length: Not exceeding 2M (6.5ft).
Usage Features
Safety Precautions:
- Users are advised to wear protective equipment, including clothing and safety goggles, to prevent water and dirt from sputtering.
- The appliance should be placed on a flat ground to ensure stability and prevent accidents.
- It should not be used in areas with potential explosion risks or against hazardous substances/flammable liquids.
- A leakage protector (Max.30mAh) is recommended for safety during operation.
- Fixtures and couplings should be manufacturer-recommended for safety.
- When cleaning vehicle tires, maintain a distance of at least 30cm (1ft) to avoid damage or explosion.
- Operators must use the appliance correctly, being mindful of surroundings, especially children. Children should be supervised to prevent them from playing with the appliance.
- Do not spray directly at people.
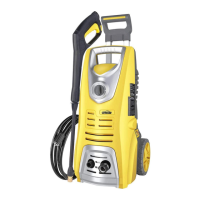
Product Parts (Front):
- Power cord
- ON/OFF switch
- Garden hose adapter
- Water inlet
- Water outlet
- High pressure hose
- High pressure hose lock
- Trigger gun
- Trigger lock
- Spray wand
- Spray nozzles
Product Parts (Back):
- Telescopic handle
- Trigger gun holder
- Spray wand holder
- Detergent suction tube
- Filter
- Detergent tank
- Wheels
Installation Steps:
- Water Inlet Connection: Connect the provided adapter to the water inlet and then attach a garden hose (G3/4 thread). Ensure the rubber seal and filter are in place and all connections are screwed tightly to prevent leaks.
- Water Sucking Methods:
- Water Tap: Connect directly to a water tap using a garden hose.
- Self-priming: The water inlet hose can be placed into a large container of water for automatic suction (hose length not exceeding 2M/6.5ft).
- High Pressure Hose Connection: Install one end of the high-pressure hose to the water outlet on the appliance and the other end to the spray gun, then lock the hose.
- Spray Wand Installation: Insert the spray wand into the spray gun and fasten by rotating it 90 degrees.
- Spray Nozzle Installation: The device comes with 5 different spray nozzles:
- Red (0 degrees): For high and hard-to-reach areas, cleaning crevices in sidewalks or driveways.
- Yellow (15 degrees): For concrete, brick, and other hard surfaces with stubborn stains.
- Green (25 degrees): For painted surfaces, wood siding, fences, and lawn mowers.
- White (40 degrees): For windows and screens.
- Black (Soap): Low-pressure foam nozzle for spraying detergent.
- Caution: Be careful with the red (0°) nozzle to avoid injury. Only the black nozzle generates foam; others are high-pressure nozzles.
- Detergent Tank: Pull out the tank, remove the cap, fill with liquid detergent (avoid solid cleaners to prevent filter blockage), cover, and reinsert. For car cleaning, car wash soap is recommended. When filling detergent, remove the spray nozzle to keep the appliance at low pressure.
Operation Cautions:
- Before Use: When using for the first time, or after storage, air may be present in the spray gun and hose. Long-press the spray gun trigger for 15-30 seconds after starting the machine until water comes out, then install the spray wand. This purges air and protects the pump. Dry running for more than 2 minutes can damage the high-pressure pump. If pressure doesn't build within 2 minutes, switch off and troubleshoot.
- After Use: Release pressure inside the machine after each use by shutting off the water tap, disconnecting the inlet hose, unlocking the spray gun trigger, and pressing it to drain residual air and water. This prevents freezing in winter and makes disassembly easier. Turn off the power switch and unplug the mains plug before storing.
Maintenance Features
- Pre-Maintenance: Ensure the device is off and unplugged before performing any maintenance.
- Filter Cleaning: Remove the water inlet adapter, pull out the filter, and rinse with water. For long-term storage, clean the filter before and after. Use a needle to clean residue if necessary.
- Disassembly: Disassemble the high-pressure hose, spray gun, and spray wand.
- Storage: Store the power cord, high-pressure hose, spray wand with gun, and other accessories properly. Do not store the pressure washer outdoors during winter if residual moisture water has not been drained out.
Troubleshooting
The manual provides a troubleshooting guide for common issues:
- Appliance fails to start up: Check plug contact, socket, extension cord, voltage, power switch, and fuse.
- Pump stops working: Check water inflow (ensure at least 10 liters per minute).
- Fluctuating pressure: Clean spray head, check high-pressure tube connection, or consult after-sales service if impurities are inside the pump.
- Appliance does not reach operating pressure: Clean or replace spray wand, check inlet water flow-rate, straighten kinked hose, clean filter, or check hose for leaks/blockages.
- Trigger gun is unusable: Unlock the gun.
- Appliance often starts or stops by itself (Stop at low pressure): Indicates a worn decompression valve spring or water leakage in the pump, high-pressure hose, or gun. Contact customer service.
After Sales Services
- Warranty: Two-year warranty period.
- Support: For questions or issues, contact customer service via email:
- US: support-us@oasser.net
- CA: support-ca@oasser.net