a. Set current input to 20 mA.
b. Click on 20 mA (2300 as default)
c. Change the value
d. The value of current at the bottom of the screen will change.
e. Change the value close to 4 mA to reach the value at the bottom of the screen.
8) Click on the down arrow to memorize the calibrated value. (do not push the left arrow
otherwise you have to calibrate 4 mA and 20 mA newly).
9) Confirm the selection and go back to the previous menu.
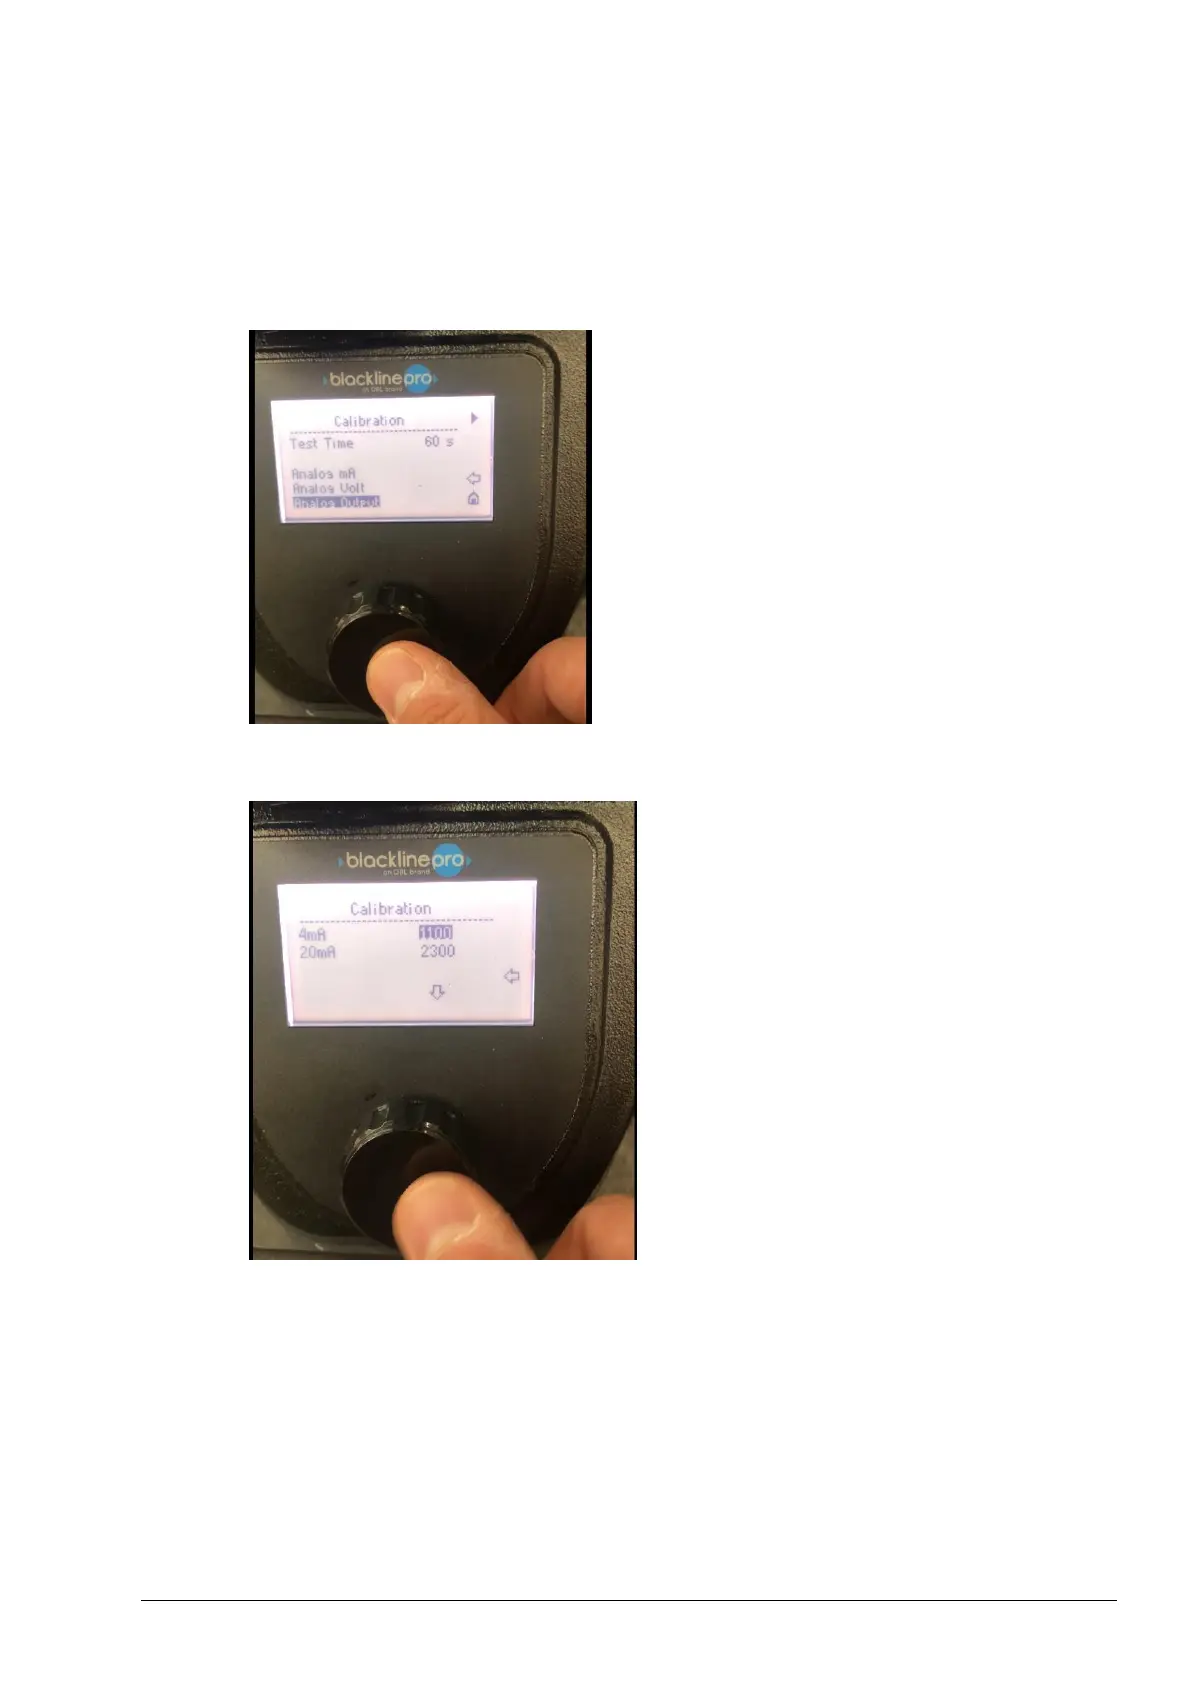
10) Click on analog output (if needed)
Figure 14
11) A window with 2 values “4 mA” and “20 mA” will appear.
Figure 15
12) To calibrate 4 mA signal:
a. click on 4 mA (1100 in the picture above)
b. change the value
c. the value of current measured by the multimeter shall change
d. Change the value until the multimeter will measure the desired 4 mA
13) To calibrate 20 mA signal:
a. click on 20 mA (2300 in the picture above)
b. change the value
c. the value of current measured by the multimeter shall change
d. Change the value until the multimeter will measure the desired 20 mA