SAFETY:
1. Turn off all switches and unplug all power
cords from outlet or power source before
performing maintenance.
Refugium Setup With Refugium
Light (not included)
1. Remove left and right ltration covers.
2. Remove overow tray and lter cartrige
from center lter chamber.
3. Once the BioCube aquarium is fully set
up and ready to support livestock, add
substrate and macroalgae to the refugium
chamber. Replace overow tray, lter
cartridge and left and right ltration covers.
Refugium Light Installation
(Figure C7)
1.
Locate window on the back of the BioCube HQI.
2. Clean area around the illumination window
with a dry cloth to remove any dust,
salt or water.
3. Follow instructions included with the
refugium light to mount to BioCube HQI.
REFUGIUM SETUP AND REFUGIUM
LIGHT INSTALLATION
FIGURE C7
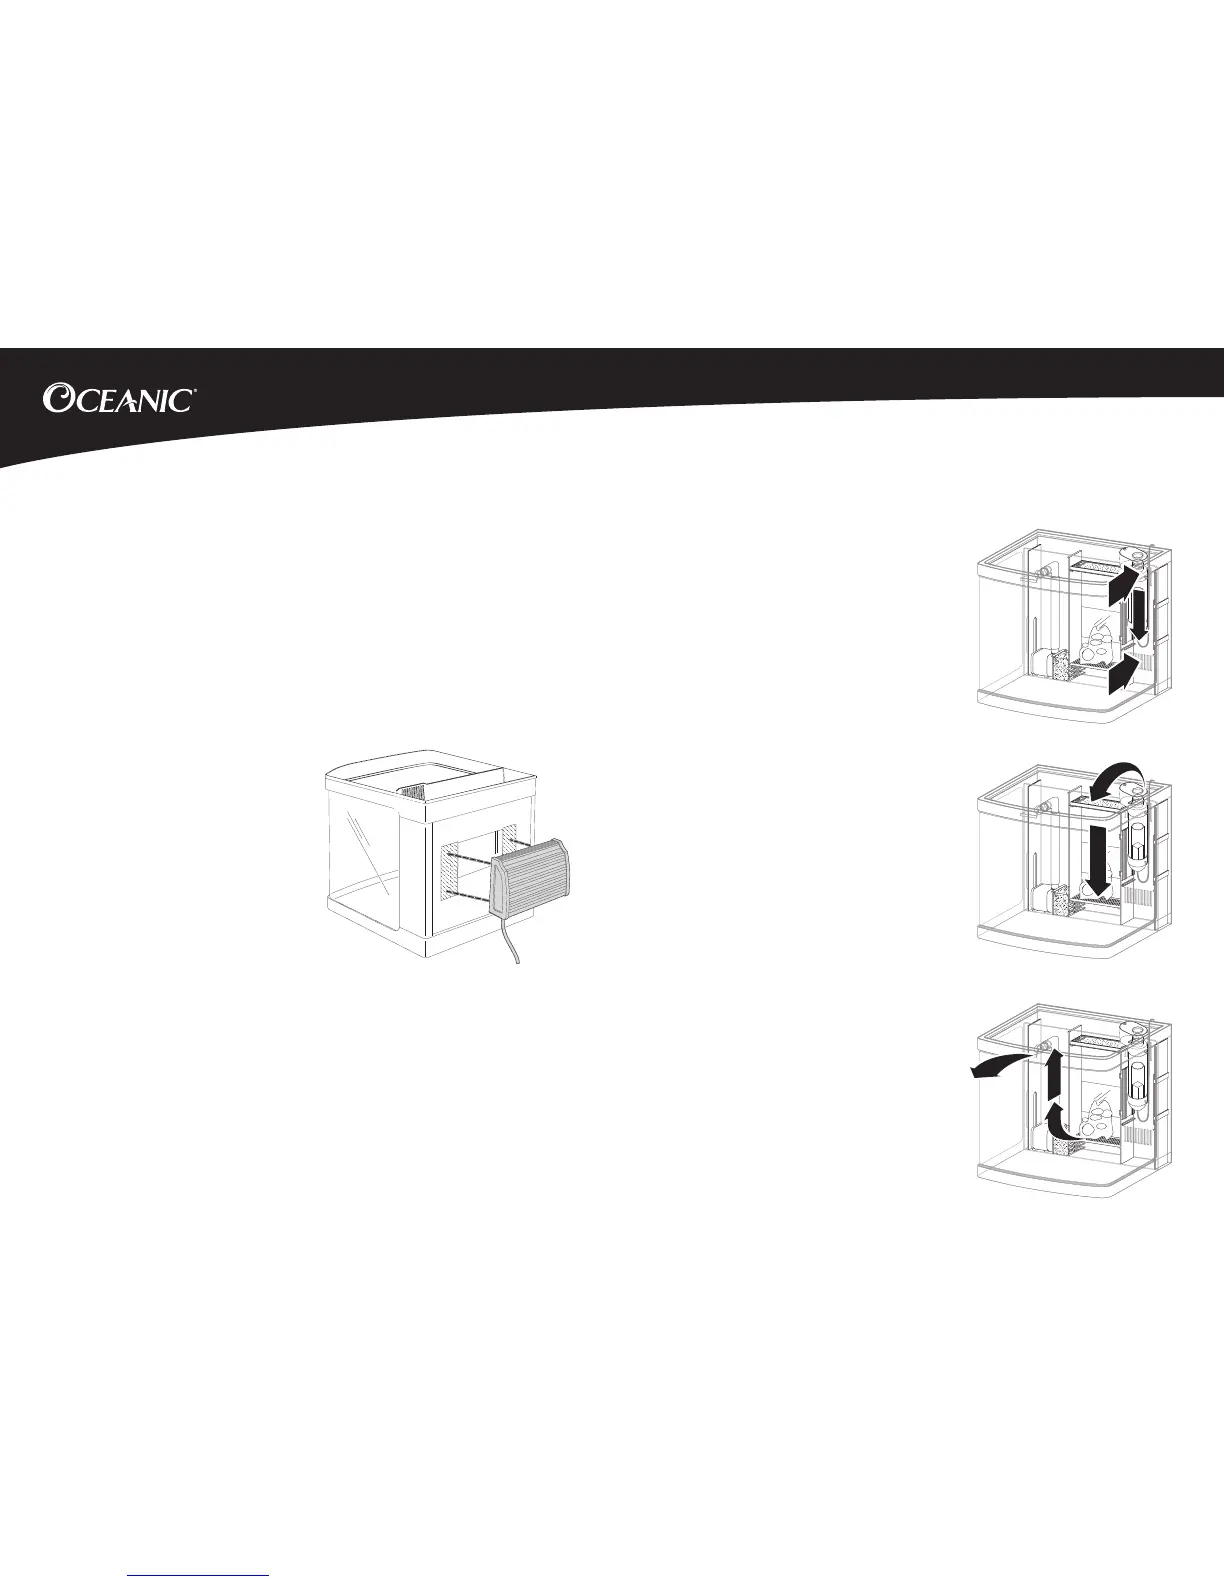
BioCube Filtration Stages
(Figures C8–C10)
1. Water ows from aquarium into the surface
and bottom intakes into chamber 1 where
some enters the protein skimmer
(Figure C8). The protein skimmer removes
many harmful organic materials from
the water.
2. From chamber 1, water ows over the top
of and through the lter cartridge into
the refugium in chamber 2 (Figure C9).
Live macroalgae and live rock in the
refugium remove excess nutrients and add
oxygen to the water while helping stabilize
the pH level.
3. From the refugium, water ows into
chamber 3 through the sponge lter
and into the water pump (Figure C10).
The water pump then forces the water
through the exible tubing and back into
the aquarium through the discharge nozzle.
BIOCUBE FILTER OPERATION
FIGURE C8
FIGURE C9
FIGURE C10
 Loading...