REGULATORS
DXI INTEGRATED FIRST STAGE
© 2002 Design 2000
OCEANICOCEANIC
OCEANICOCEANIC
OCEANIC®
Product Service Guide Product Service Guide
Product Service Guide Product Service Guide
Product Service Guide
Doc. 12-2205-r01 (01/00)
PG-2
Fig. 2
DISASSEMBLY PROCEDURE
NOTE: Be sure to check and record the intermediate pressure
and perform the Leak Detection Test outlined in the Initial
Inspection Procedures prior to disassembling the regulator.
Review the troubleshooting section to gain a better idea of
which internal parts may be worn, and to better advise your
customer of the service that is needed.
1. Before disassembling the first stage, remove the low pressure
second stage hoses with a 9/16" open end wrench, the high
pressure hose(s) with a 5/8" open end wrench, and the low
pressure inflator hose with either a 9/16" or 1/2" open end wrench.
2. Remove and inspect the o-rings now visible on all these items for
any signs of decay. Discard if found.
NOTE: It is important to remove the transmitter(22) end
components first to avoid damage of the HP seat cone located
inside the main body.
3. Secure the first stage in a soft-jawed or well padded vise and apply
a 3/8" socket drive wrench with a DX Spanner(40.6536) to the
Transmitter assembly(22). Turn the Transmitter assembly in a
counter clockwise direction to remove it from the body (28).
(Fig. 1)
CAUTION: Tighten the vise only as needed to hold the first
stage secure, and DO NOT overtighten. Doing so will result in
permanent damage, rendering it inoperable.
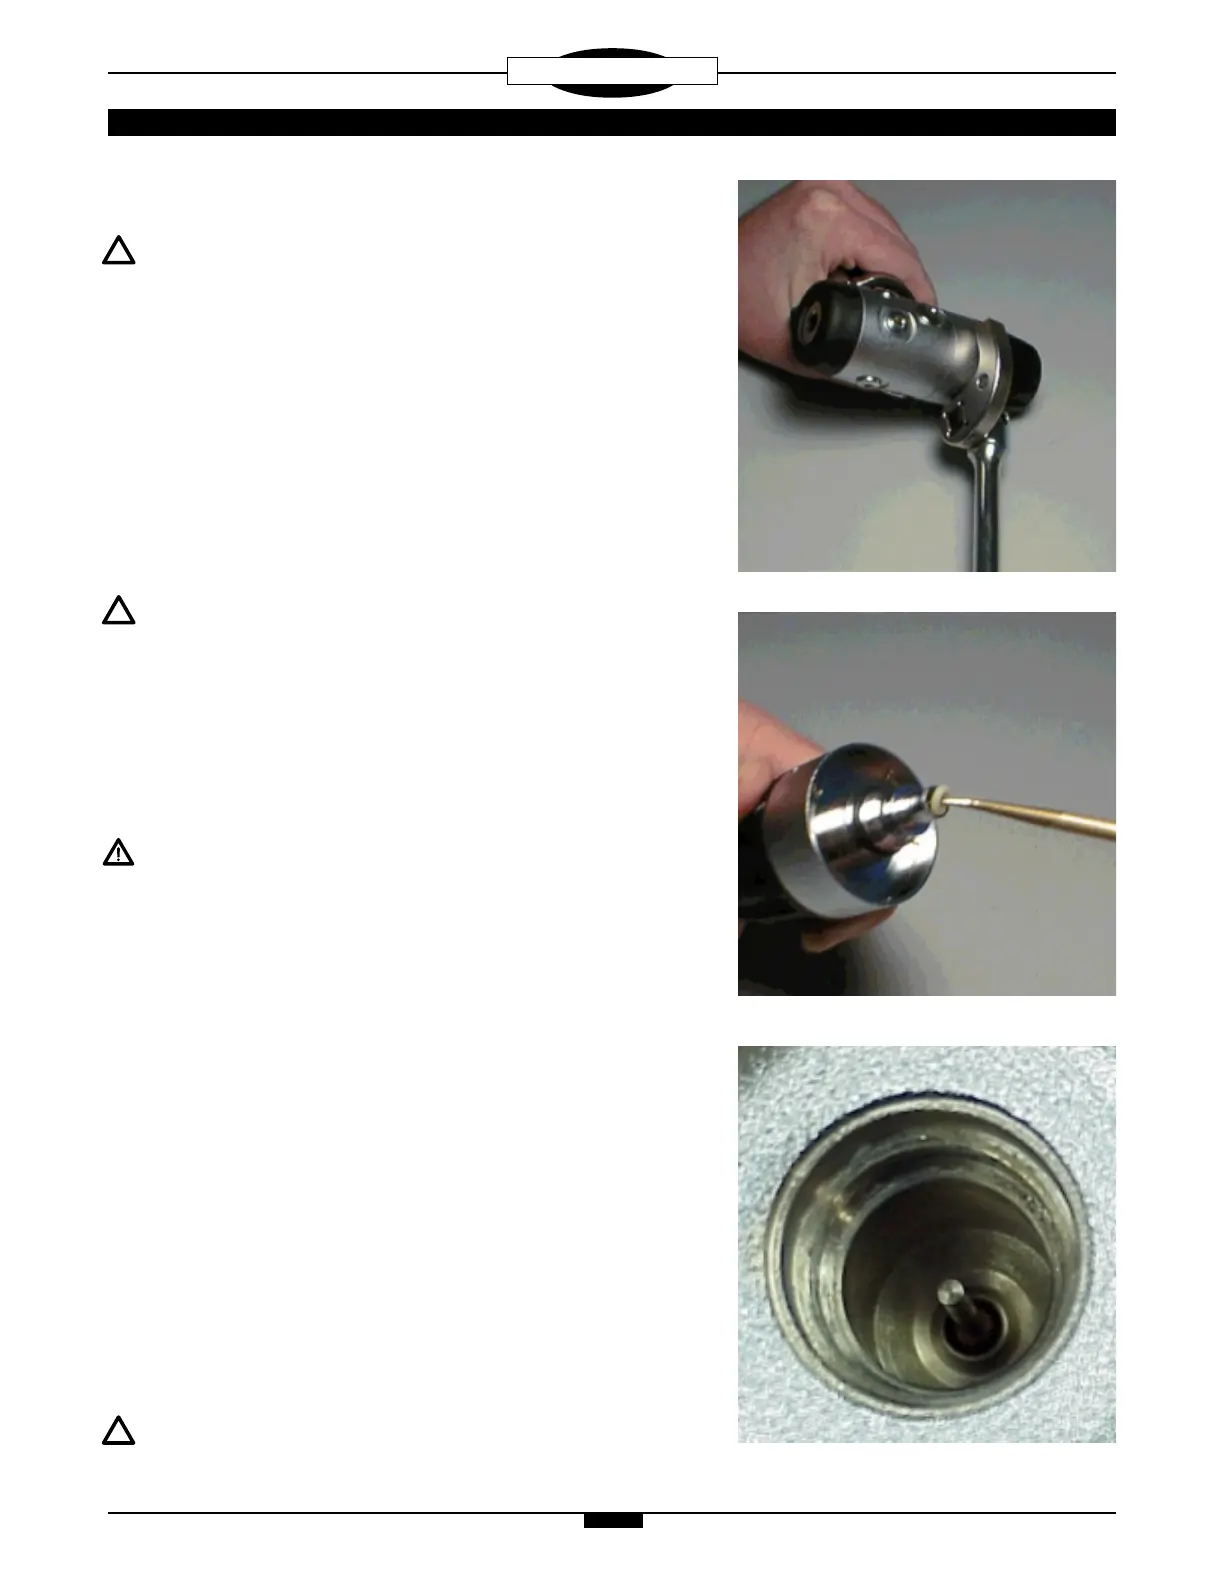
4. Remove the HP seat(27) from the transmitter(22). Discard the HP
seat, regardless of condition, and DO NOT attempt to reuse.
5. Remove the HP seat spring(26). Using a magnifier, closely
examine the spring(26) for any signs of corrosion, cracks, or other
damage. Discard if found and DO NOT attempt to reuse.
6. Using care not to scratch or damage the transmitter assembly,
remove the HP seat o-ring(25) from inside the transmitter assem-
bly(22). Discard, regardless of condition, and DO NOT attempt to
reuse. (Fig. 2)
7. Remove and inspect the transmitter o-rings(23, 24) for any signs
of decay. Discard if found.
8. With the use of a penlight and a magnifier, closely examine the
seating surface of the orifice cone inside the main body for any
signs of damage. If found, discard the main body and DO NOT
attempt to repair or reuse. (Fig. 3)
NOTE: Perform step 9 only if an Environmental Protection Kit
has been installed.
Fig. 1
Fig. 3
 Loading...